![[The AI Show Episode 142]: ChatGPT’s New Image Generator, Studio Ghibli Craze and Backlash, Gemini 2.5, OpenAI Academy, 4o Updates, Vibe Marketing & xAI Acquires X](https://www.marketingaiinstitute.com/hubfs/ep%20142%20cover.png)


![From drop-out to software architect with Jason Lengstorf [Podcast #167]](https://cdn.hashnode.com/res/hashnode/image/upload/v1743796461357/f3d19cd7-e6f5-4d7c-8bfc-eb974bc8da68.png?#)


.png?#)


_Christophe_Coat_Alamy.jpg?#)


.webp?#)


![Apple Considers Delaying Smart Home Hub Until 2026 [Gurman]](https://www.iclarified.com/images/news/96946/96946/96946-640.jpg)
![iPhone 17 Pro Won't Feature Two-Toned Back [Gurman]](https://www.iclarified.com/images/news/96944/96944/96944-640.jpg)
![Tariffs Threaten Apple's $999 iPhone Price Point in the U.S. [Gurman]](https://www.iclarified.com/images/news/96943/96943/96943-640.jpg)


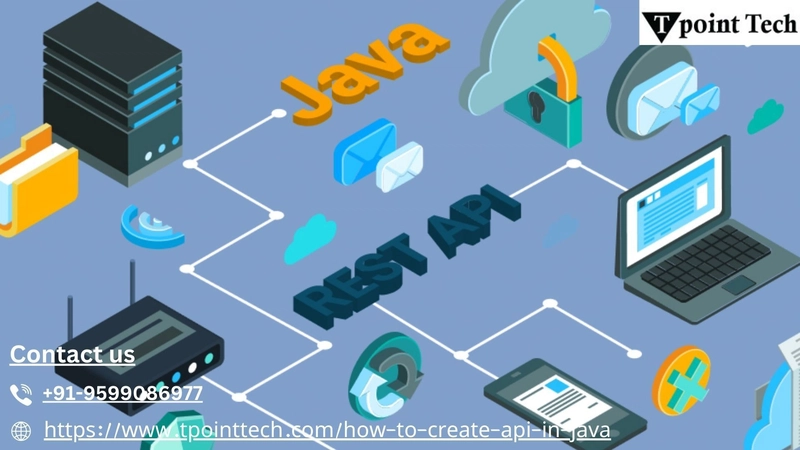
Java API Development: How to Build and Deploy Your First API
APIs (Application Programming Interfaces) have become the backbone of modern software development, enabling applications to communicate and share data efficiently. If you are new to Java and want to develop your first API, this guide will walk you through the fundamental steps, from understanding APIs to deploying them successfully. Understanding APIs and Their Importance APIs act as intermediaries that allow different software systems to interact. They define rules for communication, ensuring that applications can request and exchange data without compatibility issues. In Java, APIs are commonly used to build web services that serve data to clients like mobile apps, websites, or other software systems. By mastering API development, you open doors to creating scalable applications, microservices, and integrations between different platforms. Learning how to create an API in Java is a valuable skill that enables you to develop flexible and robust solutions. Steps to Build Your First API in Java 1. Choose the Right Framework Java provides multiple frameworks to help with API development. The most popular options include: Spring Boot – A widely used framework that simplifies API development with built-in support for RESTful services. Jakarta EE (formerly Java EE) – A powerful enterprise framework that includes Java API for RESTful Web Services (JAX-RS). Micronaut – A lightweight framework designed for microservices and cloud-based applications. For beginners, Spring Boot is highly recommended due to its ease of use and extensive community support. 2. Set Up Your Development Environment Before you start coding, ensure you have the necessary tools installed: Java Development Kit (JDK) – Preferably the latest version. Integrated Development Environment (IDE) – Eclipse, IntelliJ IDEA, or Visual Studio Code. Build Tool – Maven or Gradle to manage dependencies. Postman or cURL – For testing your API endpoints. 3. Define API Requirements Before you start writing code, clearly define the purpose of your API. Ask yourself: What data will the API provide or process? What endpoints (URLs) will it expose? What HTTP methods (GET, POST, PUT, DELETE) will be used? Will the API require authentication? For example, a simple Java tutorial API might provide information about Java programming, including tutorials, code examples, and best practices. 4. Implement API Endpoints API endpoints are the access points through which clients interact with your API. The key components include: Controller Layer – Handles incoming requests and responses. Service Layer – Contains business logic. Repository Layer – Interacts with the database (if required). Using frameworks like Spring Boot, you can define RESTful endpoints with annotations to handle HTTP requests efficiently. 5. Test Your API After implementing the API, it is essential to test it thoroughly to ensure it works as expected. Use tools like: Postman – A user-friendly interface to send requests and inspect responses. JUnit & Mockito – For writing automated unit tests. Swagger/OpenAPI – For API documentation and interactive testing. Testing helps identify potential issues early and ensures the API performs correctly under different scenarios. Deploying Your Java API Once your API is tested and ready, the next step is deployment. Here’s how you can deploy your API successfully: 1. Choose a Deployment Platform There are several options for hosting your API: Cloud Platforms – AWS, Google Cloud, or Microsoft Azure provide robust hosting solutions. Platform-as-a-Service (PaaS) – Services like Heroku or Render offer easy deployment options. On-Premise Servers – If you prefer hosting your API on a private server. 2. Package Your Application Most Java applications are packaged as JAR or WAR files: JAR (Java Archive) – Suitable for standalone applications. WAR (Web Application Archive) – Used in Java EE environments. 3. Deploy Using Docker (Optional) Using Docker can simplify deployment by packaging your application along with its dependencies. Docker containers ensure consistency across different environments, making deployment more reliable. 4. Configure a Web Server or API Gateway For better performance and security, use a web server like Apache Tomcat or an API gateway such as NGINX or Kong to manage traffic and security settings. 5. Monitor and Maintain the API After deployment, continuous monitoring ensures your API remains functional and responsive. Use monitoring tools like: Prometheus & Grafana – For performance tracking. ELK Stack (Elasticsearch, Logstash, Kibana) – For logging and analytics. New Relic or Datadog – For comprehensive monitoring and alerts. Final Thoughts Building and deploying your first API in Java may seem challenging at first, but by following a structured approach, yo
APIs (Application Programming Interfaces) have become the backbone of modern software development, enabling applications to communicate and share data efficiently. If you are new to Java and want to develop your first API, this guide will walk you through the fundamental steps, from understanding APIs to deploying them successfully.
Understanding APIs and Their Importance
APIs act as intermediaries that allow different software systems to interact. They define rules for communication, ensuring that applications can request and exchange data without compatibility issues. In Java, APIs are commonly used to build web services that serve data to clients like mobile apps, websites, or other software systems.
By mastering API development, you open doors to creating scalable applications, microservices, and integrations between different platforms. Learning how to create an API in Java is a valuable skill that enables you to develop flexible and robust solutions.
Steps to Build Your First API in Java
1. Choose the Right Framework
Java provides multiple frameworks to help with API development. The most popular options include:
- Spring Boot – A widely used framework that simplifies API development with built-in support for RESTful services.
- Jakarta EE (formerly Java EE) – A powerful enterprise framework that includes Java API for RESTful Web Services (JAX-RS).
- Micronaut – A lightweight framework designed for microservices and cloud-based applications.
For beginners, Spring Boot is highly recommended due to its ease of use and extensive community support.
2. Set Up Your Development Environment
Before you start coding, ensure you have the necessary tools installed:
Java Development Kit (JDK) – Preferably the latest version.
Integrated Development Environment (IDE) – Eclipse, IntelliJ IDEA, or Visual Studio Code.
Build Tool – Maven or Gradle to manage dependencies.
Postman or cURL – For testing your API endpoints.
3. Define API Requirements
Before you start writing code, clearly define the purpose of your API. Ask yourself:
- What data will the API provide or process?
- What endpoints (URLs) will it expose?
- What HTTP methods (GET, POST, PUT, DELETE) will be used?
- Will the API require authentication?
For example, a simple Java tutorial API might provide information about Java programming, including tutorials, code examples, and best practices.
4. Implement API Endpoints
API endpoints are the access points through which clients interact with your API. The key components include:
- Controller Layer – Handles incoming requests and responses.
- Service Layer – Contains business logic.
- Repository Layer – Interacts with the database (if required).
Using frameworks like Spring Boot, you can define RESTful endpoints with annotations to handle HTTP requests efficiently.
5. Test Your API
After implementing the API, it is essential to test it thoroughly to ensure it works as expected. Use tools like:
- Postman – A user-friendly interface to send requests and inspect responses.
- JUnit & Mockito – For writing automated unit tests.
- Swagger/OpenAPI – For API documentation and interactive testing.
Testing helps identify potential issues early and ensures the API performs correctly under different scenarios.
Deploying Your Java API
Once your API is tested and ready, the next step is deployment. Here’s how you can deploy your API successfully:
1. Choose a Deployment Platform
There are several options for hosting your API:
- Cloud Platforms – AWS, Google Cloud, or Microsoft Azure provide robust hosting solutions.
- Platform-as-a-Service (PaaS) – Services like Heroku or Render offer easy deployment options.
- On-Premise Servers – If you prefer hosting your API on a private server.
2. Package Your Application
Most Java applications are packaged as JAR or WAR files:
- JAR (Java Archive) – Suitable for standalone applications.
- WAR (Web Application Archive) – Used in Java EE environments.
3. Deploy Using Docker (Optional)
Using Docker can simplify deployment by packaging your application along with its dependencies. Docker containers ensure consistency across different environments, making deployment more reliable.
4. Configure a Web Server or API Gateway
For better performance and security, use a web server like Apache Tomcat or an API gateway such as NGINX or Kong to manage traffic and security settings.
5. Monitor and Maintain the API
After deployment, continuous monitoring ensures your API remains functional and responsive. Use monitoring tools like:
- Prometheus & Grafana – For performance tracking.
- ELK Stack (Elasticsearch, Logstash, Kibana) – For logging and analytics.
- New Relic or Datadog – For comprehensive monitoring and alerts.
Final Thoughts
Building and deploying your first API in Java may seem challenging at first, but by following a structured approach, you can create a powerful and efficient service. From selecting the right framework to defining API endpoints and deploying it on a server, every step plays a crucial role in developing a robust API.
With practice, you’ll gain confidence in Java API development and be able to create more advanced applications. Whether you’re building APIs for personal projects or enterprise solutions, mastering this skill will be a valuable asset in your software development journey.
If you're looking for more insights, consider following a comprehensive Java tutorial to deepen your understanding of API development and best practices.