


![[The AI Show Episode 142]: ChatGPT’s New Image Generator, Studio Ghibli Craze and Backlash, Gemini 2.5, OpenAI Academy, 4o Updates, Vibe Marketing & xAI Acquires X](https://www.marketingaiinstitute.com/hubfs/ep%20142%20cover.png)


![From drop-out to software architect with Jason Lengstorf [Podcast #167]](https://cdn.hashnode.com/res/hashnode/image/upload/v1743796461357/f3d19cd7-e6f5-4d7c-8bfc-eb974bc8da68.png?#)


-Mario-Kart-World-Hands-On-Preview-Is-It-Good-00-08-36.jpg?width=1920&height=1920&fit=bounds&quality=80&format=jpg&auto=webp#)


.png?#)


(1).jpg?width=1920&height=1920&fit=bounds&quality=80&format=jpg&auto=webp#)


_Igor_Mojzes_Alamy.jpg?#)


.webp?#)
.webp?#)


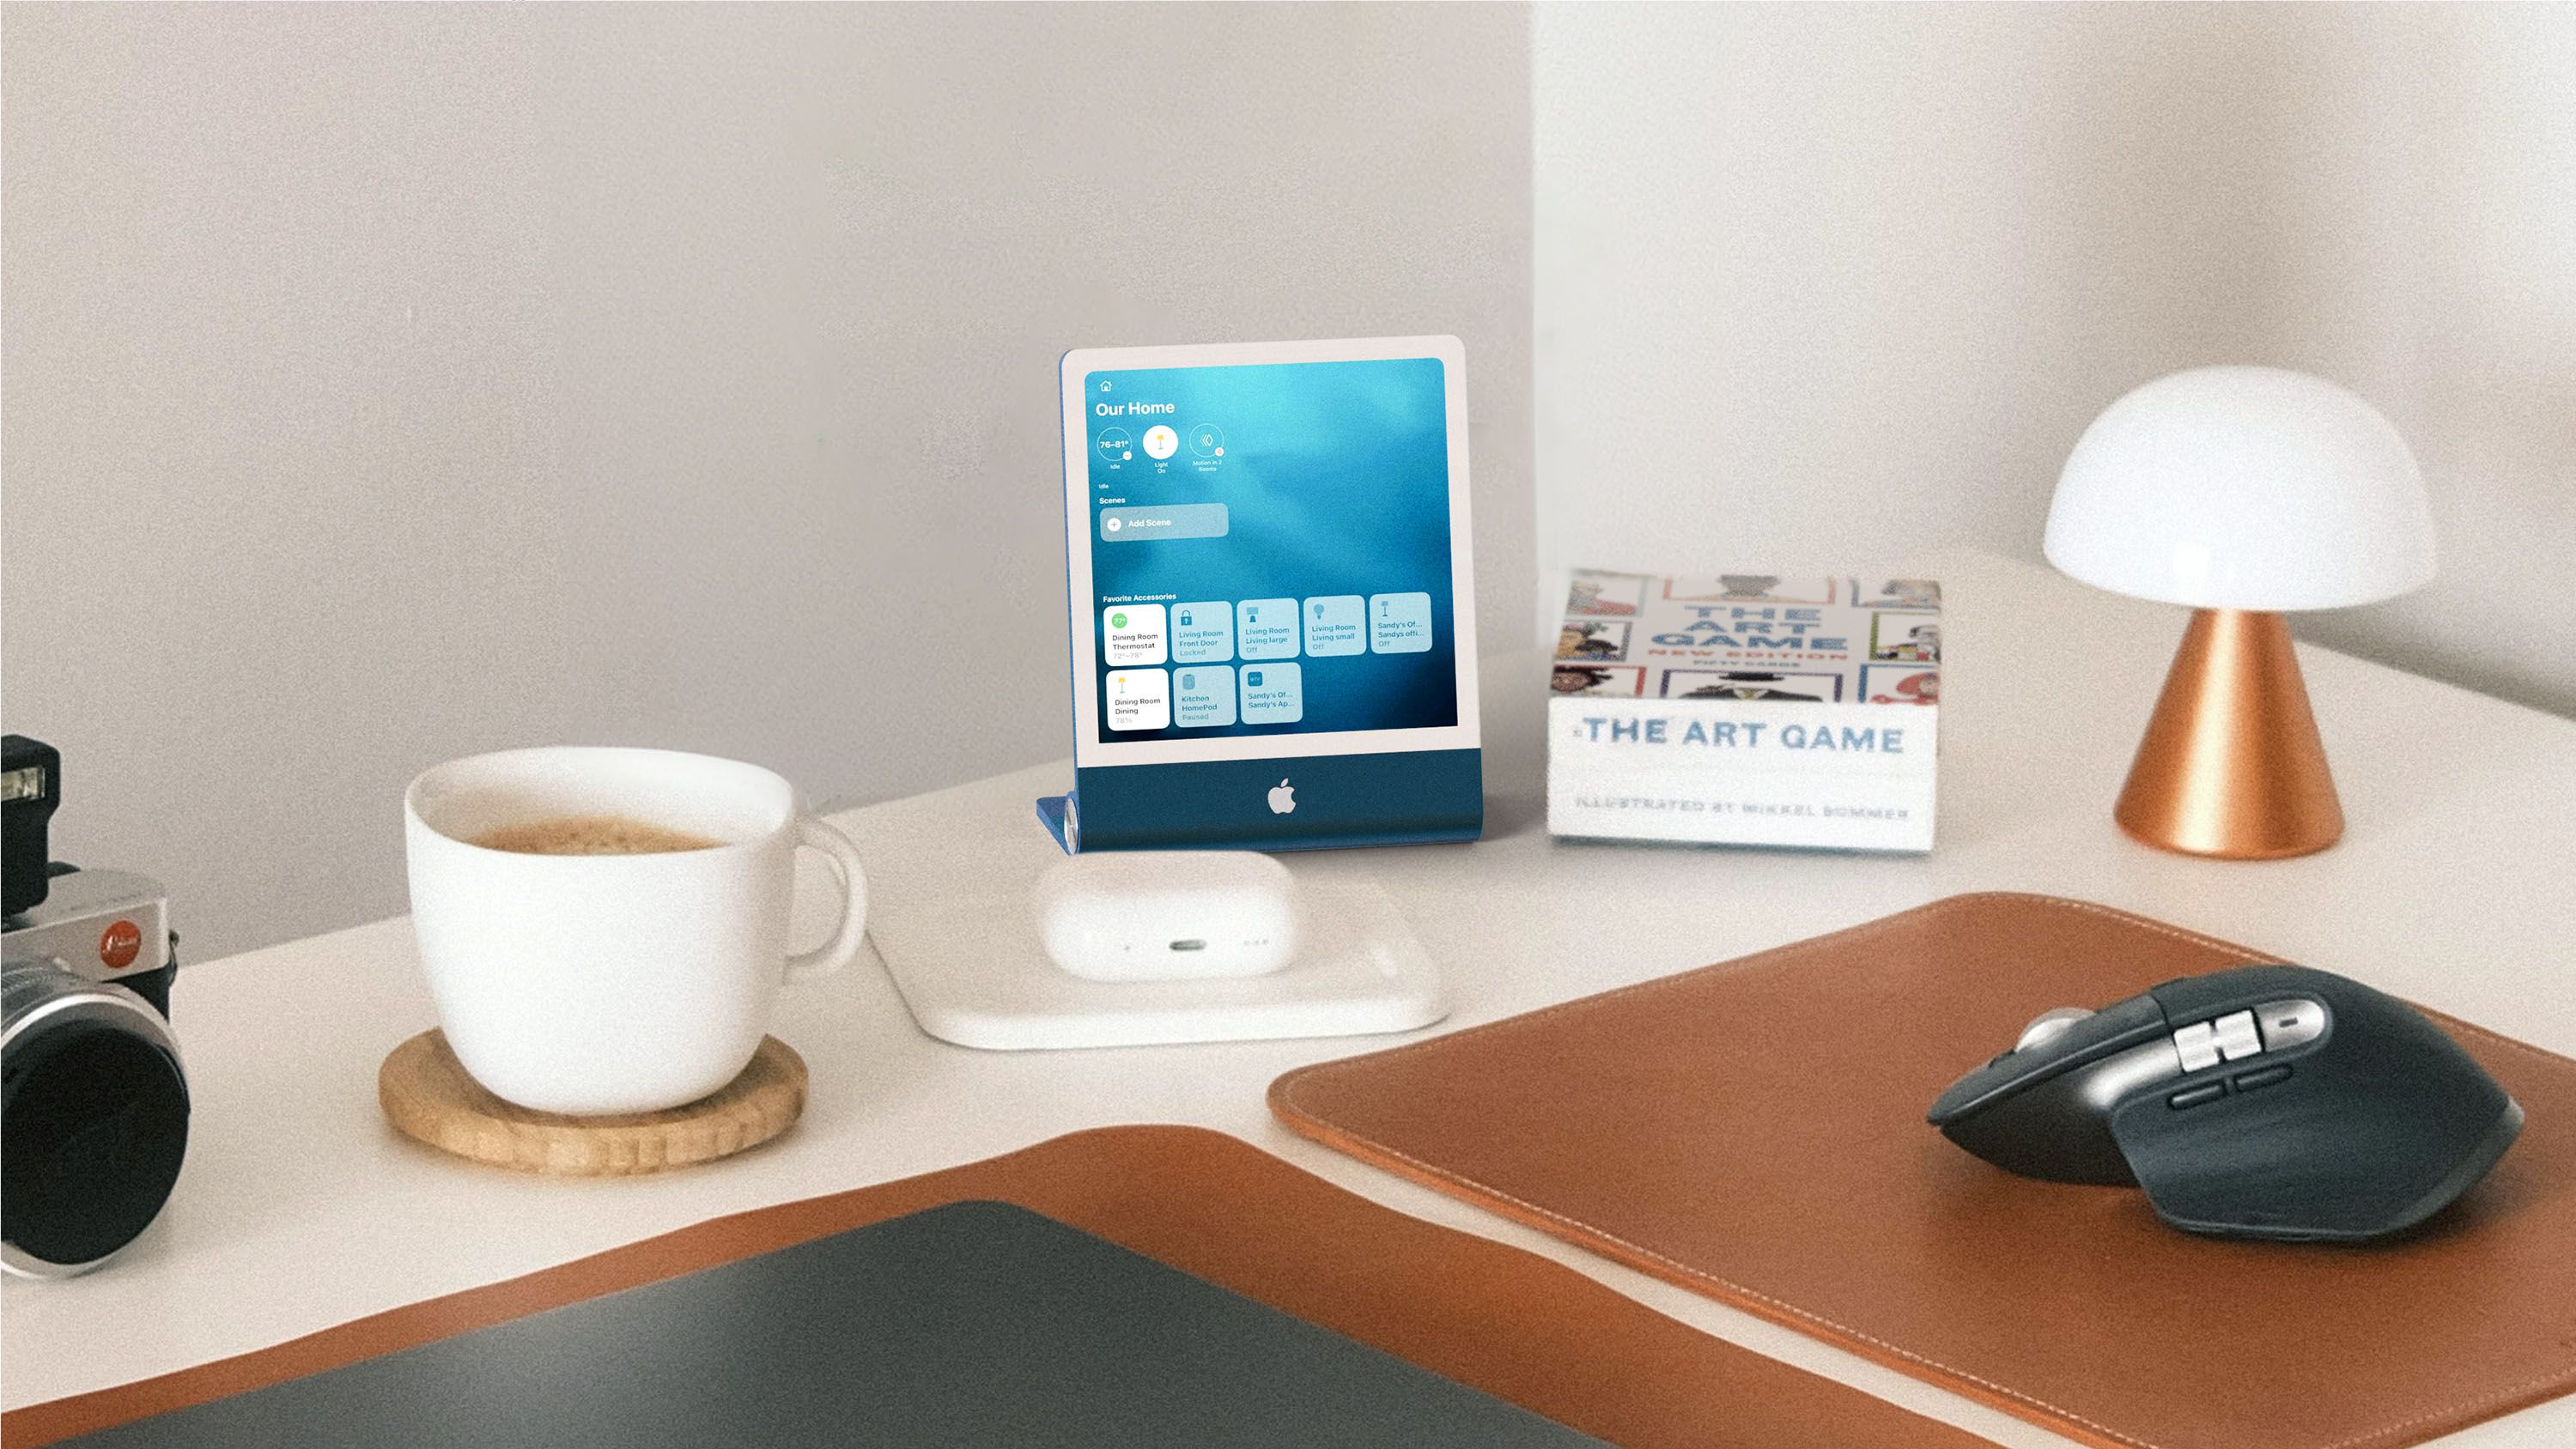
![Apple Considers Delaying Smart Home Hub Until 2026 [Gurman]](https://www.iclarified.com/images/news/96946/96946/96946-640.jpg)
![iPhone 17 Pro Won't Feature Two-Toned Back [Gurman]](https://www.iclarified.com/images/news/96944/96944/96944-640.jpg)
![Tariffs Threaten Apple's $999 iPhone Price Point in the U.S. [Gurman]](https://www.iclarified.com/images/news/96943/96943/96943-640.jpg)


Implementation of a notification system using AWS - SNS and SQS setup
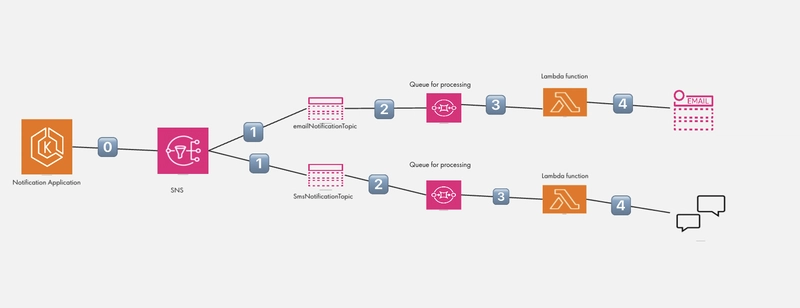
INTRODUCTION In this post, we'll walk through the steps to set up Amazon SNS and SQS to handle email notifications. This setup will allow you to send messages to an SQS queue via SNS, which can then be processed by a Lambda function. Resources to be created SNS (Simple Notification System) SQS (Simple Queue Service) Step 1 From the AWS console, navigate to the SNS dashboard and create a topic called emailNotificationTopic. Choose sns-type standard Enter the sns topic name emailNotificationTopic and display name (optional). Then click on create topic. On the emailNotificationTopic page, scroll down a bit and locate the access policy tab. Edit the access policy by adding the policy below { "Version": "2008-10-17", "Id": "__default_policy_ID", "Statement": [ { "Sid": "__default_statement_ID", "Effect": "Allow", "Principal": { "AWS": "*" }, "Action": [ "SNS:Publish", "SNS:RemovePermission", "SNS:SetTopicAttributes", "SNS:DeleteTopic", "SNS:ListSubscriptionsByTopic", "SNS:GetTopicAttributes", "SNS:AddPermission", "SNS:Subscribe" ], "Resource": "arn:aws:sns:REGION:ACCOUNT_ID:TOPIC_NAME", "Condition": { "StringEquals": { "AWS:SourceOwner": "ACCOUNT_ID" } } } ] } Check the images below for pictorial reference Step 2 Create an SQS queue that receives and stores the messages sent from the SNS topic until it is consumed. Choose queue-type standard Enter the sqs name emailNotificationQueue. Then click on create queue. On the emailNotificationQueue page, scroll down a bit and locate the access policy tab. Edit the access policy by adding the policy below { "Version": "2008-10-17", "Statement": [ { "Effect": "Allow", "Principal": { "Service": "sns.amazonaws.com" }, "Action": "sqs:SendMessage", "Resource": "arn:aws:sqs:REGION:ACCOUNT_ID:QUEUE_NAME", "Condition": { "ArnEquals": { "aws:SourceArn": "arn:aws:sns:REGION:ACCOUNT_ID:TOPIC_NAME" } } } ] } Leave everything else as it is. We will update it later. Check the images below for pictorial reference SUBSCRIPTION In this section, we will subscribe the sqs queue to the sns topic so that the queue can consume any message from the topic. Subscribe queue to SNS Click on the sns topic you created, scroll down a bit and click on the subscription tab. Click on create subscription, fill in the details and click on create. See images below for reference CONCLUSION By following these steps, you've successfully set up an SNS topic and an SQS queue, and subscribed the queue to the topic. In the next post, we'll cover how to create a Lambda function to process these messages and send emails using Amazon SES.
INTRODUCTION
In this post, we'll walk through the steps to set up Amazon SNS and SQS to handle email notifications. This setup will allow you to send messages to an SQS queue via SNS, which can then be processed by a Lambda function.
Resources to be created
SNS (Simple Notification System)
SQS (Simple Queue Service)
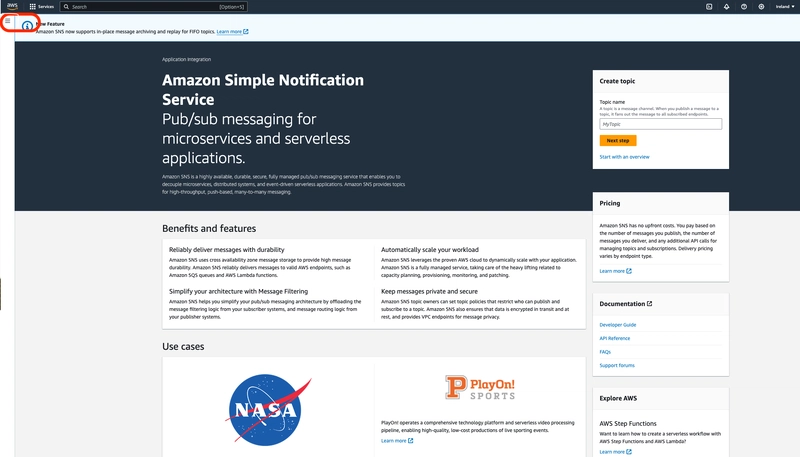
Step 1
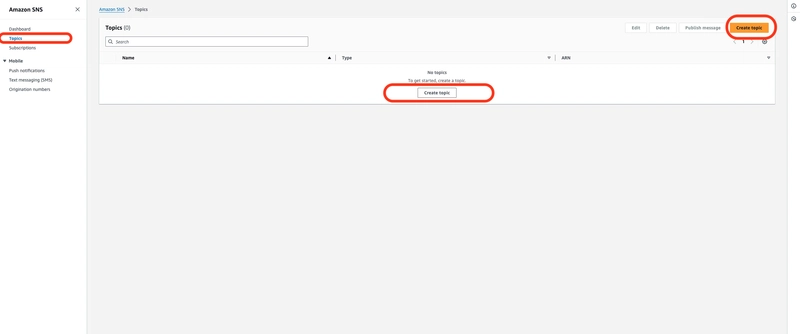
From the AWS console, navigate to the SNS dashboard and create a topic called emailNotificationTopic.
- Choose sns-type
standard - Enter the sns topic name
emailNotificationTopicand display name (optional). - Then click on create topic.
- On the
emailNotificationTopicpage, scroll down a bit and locate the access policy tab. Edit the access policy by adding the policy below
{
  "Version": "2008-10-17",
  "Id": "__default_policy_ID",
  "Statement": [
    {
      "Sid": "__default_statement_ID",
      "Effect": "Allow",
      "Principal": {
        "AWS": "*"
      },
      "Action": [
        "SNS:Publish",
        "SNS:RemovePermission",
        "SNS:SetTopicAttributes",
        "SNS:DeleteTopic",
        "SNS:ListSubscriptionsByTopic",
        "SNS:GetTopicAttributes",
        "SNS:AddPermission",
        "SNS:Subscribe"
      ],
      "Resource": "arn:aws:sns:REGION:ACCOUNT_ID:TOPIC_NAME",
      "Condition": {
        "StringEquals": {
          "AWS:SourceOwner": "ACCOUNT_ID"
        }
      }
    }
  ]
}
Check the images below for pictorial reference


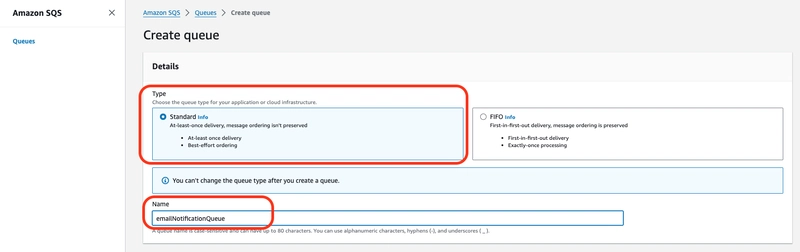
Step 2
Create an SQS queue that receives and stores the messages sent from the SNS topic until it is consumed.
- Choose queue-type
standard - Enter the sqs name
emailNotificationQueue. - Then click on create queue.
- On the
emailNotificationQueuepage, scroll down a bit and locate the access policy tab. Edit the access policy by adding the policy below
{
  "Version": "2008-10-17",
  "Statement": [
    {
      "Effect": "Allow",
      "Principal": {
        "Service": "sns.amazonaws.com"
      },
      "Action": "sqs:SendMessage",
      "Resource": "arn:aws:sqs:REGION:ACCOUNT_ID:QUEUE_NAME",
      "Condition": {
        "ArnEquals": {
          "aws:SourceArn": "arn:aws:sns:REGION:ACCOUNT_ID:TOPIC_NAME"
        }
      }
    }
  ]
}
Leave everything else as it is. We will update it later.
Check the images below for pictorial reference


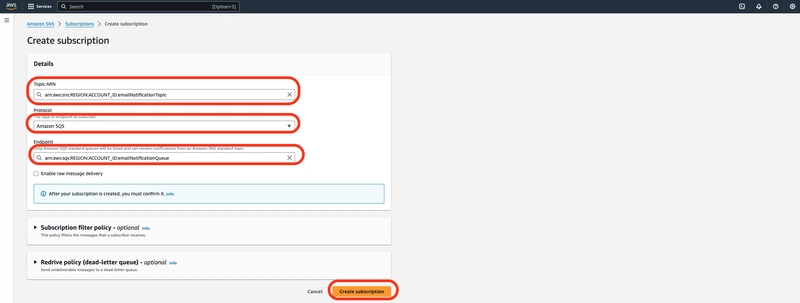
SUBSCRIPTION
In this section, we will subscribe the sqs queue to the sns topic so that the queue can consume any message from the topic.
Subscribe queue to SNS
- Click on the sns topic you created, scroll down a bit and click on the subscription tab.
- Click on create subscription, fill in the details and click on create. See images below for reference

CONCLUSION
By following these steps, you've successfully set up an SNS topic and an SQS queue, and subscribed the queue to the topic. In the next post, we'll cover how to create a Lambda function to process these messages and send emails using Amazon SES.