Hey Devs! I Found a Killer Guide to Launch an MCP Server on Phala Cloud
Hey dev.to devs! I recently had the chance to deploy a Jupyter Notebook MCP (Model Context Protocol) server integrated with the Qwen LLM model on Phala Cloud, using Docker Compose for the deployment. I also verified the attestation to confirm that the MCP server was running in a secure Trusted Execution Environment (TEE). I wanted to share my experience because I found the process surprisingly straightforward, and I think it could be helpful for others looking to explore secure AI deployments. I started by following a guide I found on the Phala Cloud blog, which outlined deploying applications on their platform using Docker Compose. The guide gives a setep-by-step breakdown of deploying MCP server with a Jupyter Notebook frontend to interact with the Qwen LLM model. The Qwen model, developed by Alibaba, is a powerful open-source LLM that I’ve been experimenting with for natural language tasks, and MCP makes it easy to connect the model to external data sources securely. The first step was setting up the Phala Cloud CLI. I installed it on my local machine with a simple command I found in the guide: bash curl -s https://raw.githubusercontent.com/Phala-Network/phala-cloud-cli/master/install.sh | bash After that, I logged in using phala-cloud login, which prompted me to authenticate via the Phala Cloud dashboard. The process was seamless—I just followed the browser prompts, and I was ready to go in a couple of minutes. Next, I needed to set up my MCP server with Jupyter Notebook and the Qwen LLM model. I created a basic Python script to serve as the MCP server, using Flask to handle requests, similar to what I’d seen in other tutorials. Here’s a simplified version of what I used: from flask import Flask, request, jsonify from transformers import AutoModelForCausalLM, AutoTokenizer app = Flask(__name__) # Load the Qwen model and tokenizer model_name = "Qwen/Qwen-7B" tokenizer = AutoTokenizer.from_pretrained(model_name) model = AutoModelForCausalLM.from_pretrained(model_name) @app.route('/mcp', methods=['POST']) def handle_mcp_request(): data = request.json input_text = data.get('text', '') inputs = tokenizer(input_text, return_tensors="pt") outputs = model.generate(**inputs) response = tokenizer.decode(outputs[0], skip_special_tokens=True) return jsonify({"status": "success", "response": response}) if __name__ == "__main__": app.run(host='0.0.0.0', port=8080) I saved this as server.py and created a requirements.txt file with the necessary dependencies: flask==2.0.1 transformers==4.31.0 torch==2.0.1 The Qwen model is quite large, so I made sure my machine had enough memory to load it during testing. Once I confirmed it worked locally, I containerized the app using Docker. I created a Dockerfile: FROM python:3.9 WORKDIR /app COPY requirements.txt . RUN pip install -r requirements.txt COPY . . EXPOSE 8080 CMD ["python", "server.py"] I built the image with: docker build -t qwen-mcp-server . Then, I set up a docker-compose.yml file to define the service, following the structure suggested in the Phala Cloud guide: version: '3' services: mcp-server: image: qwen-mcp-server ports: - "8080:8080" restart: always To add the Jupyter Notebook component, I modified the docker-compose.yml to include a Jupyter service alongside the MCP server: version: '3' services: mcp-server: image: qwen-mcp-server ports: - "8080:8080" restart: always jupyter: image: quay.io/jupyter/base-notebook:2025-03-14 ports: - "8888:8888" volumes: - ./notebooks:/home/jovyan/work command: start-notebook.py --NotebookApp.token='my-token' restart: always I created a notebooks directory locally to store my Jupyter notebooks, which would be mounted into the container. Inside a notebook, I wrote a simple script to interact with the MCP server: import requests response = requests.post("http://mcp-server:8080/mcp", json={"text": "Hello, Qwen!"}) print(response.json()) With everything set up, I deployed the app to Phala Cloud using the CLI: bash phala-cloud deploy qwen-mcp-server --name qwen-mcp-server --ports 8080,8888 The deployment took a few minutes as Phala Cloud pulled the images and set up the environment. Once it was done, I got two endpoint URLs: one for the MCP server (https://-8080.dstack-prod5.phala.network) and one for the Jupyter Notebook (https://-8888.dstack-prod5.phala.network). I accessed the Jupyter Notebook in my browser, entered the token my-token, and ran my script—it worked perfectly, returning a response from the Qwen model via the MCP server! The final step was verifying the attestation to confirm the MCP server was running in a secure TEE. The Phala Cloud has a built in attestation verifier that I used to get a detailed report showing the TEE’s integrity, including cryptographic proof that my app was running in a secure environment. I was impressed b
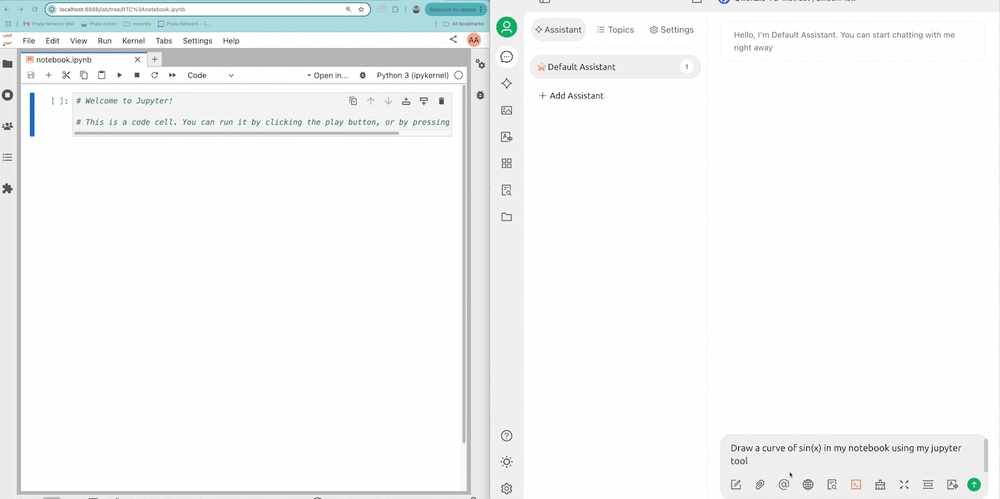
Hey dev.to devs! I recently had the chance to deploy a Jupyter Notebook MCP (Model Context Protocol) server integrated with the Qwen LLM model on Phala Cloud, using Docker Compose for the deployment. I also verified the attestation to confirm that the MCP server was running in a secure Trusted Execution Environment (TEE).
I wanted to share my experience because I found the process surprisingly straightforward, and I think it could be helpful for others looking to explore secure AI deployments.
I started by following a guide I found on the Phala Cloud blog, which outlined deploying applications on their platform using Docker Compose.
The guide gives a setep-by-step breakdown of deploying MCP server with a Jupyter Notebook frontend to interact with the Qwen LLM model. The Qwen model, developed by Alibaba, is a powerful open-source LLM that I’ve been experimenting with for natural language tasks, and MCP makes it easy to connect the model to external data sources securely.
The first step was setting up the Phala Cloud CLI. I installed it on my local machine with a simple command I found in the guide:
bash
curl -s https://raw.githubusercontent.com/Phala-Network/phala-cloud-cli/master/install.sh | bash
After that, I logged in using phala-cloud login, which prompted me to authenticate via the Phala Cloud dashboard. The process was seamless—I just followed the browser prompts, and I was ready to go in a couple of minutes.
Next, I needed to set up my MCP server with Jupyter Notebook and the Qwen LLM model. I created a basic Python script to serve as the MCP server, using Flask to handle requests, similar to what I’d seen in other tutorials. Here’s a simplified version of what I used:
from flask import Flask, request, jsonify
from transformers import AutoModelForCausalLM, AutoTokenizer

app = Flask(__name__)

# Load the Qwen model and tokenizer
model_name = "Qwen/Qwen-7B"
tokenizer = AutoTokenizer.from_pretrained(model_name)
model = AutoModelForCausalLM.from_pretrained(model_name)

@app.route('/mcp', methods=['POST'])
def handle_mcp_request():
    data = request.json
    input_text = data.get('text', '')
    inputs = tokenizer(input_text, return_tensors="pt")
    outputs = model.generate(**inputs)
    response = tokenizer.decode(outputs[0], skip_special_tokens=True)
    return jsonify({"status": "success", "response": response})

if __name__ == "__main__":
    app.run(host='0.0.0.0', port=8080)
I saved this as server.py and created a requirements.txt file with the necessary dependencies:
flask==2.0.1
transformers==4.31.0
torch==2.0.1
The Qwen model is quite large, so I made sure my machine had enough memory to load it during testing. Once I confirmed it worked locally, I containerized the app using Docker. I created a Dockerfile:
FROM python:3.9
WORKDIR /app
COPY requirements.txt .
RUN pip install -r requirements.txt
COPY . .
EXPOSE 8080
CMD ["python", "server.py"]
I built the image with:
docker build -t qwen-mcp-server .
Then, I set up a docker-compose.yml file to define the service, following the structure suggested in the Phala Cloud guide:
version: '3'
services:
  mcp-server:
    image: qwen-mcp-server
    ports:
      - "8080:8080"
    restart: always
To add the Jupyter Notebook component, I modified the docker-compose.yml to include a Jupyter service alongside the MCP server:
version: '3'
services:
  mcp-server:
    image: qwen-mcp-server
    ports:
      - "8080:8080"
    restart: always
  jupyter:
    image: quay.io/jupyter/base-notebook:2025-03-14
    ports:
      - "8888:8888"
    volumes:
      - ./notebooks:/home/jovyan/work
    command: start-notebook.py --NotebookApp.token='my-token'
    restart: always
I created a notebooks directory locally to store my Jupyter notebooks, which would be mounted into the container. Inside a notebook, I wrote a simple script to interact with the MCP server:
import requests

response = requests.post("http://mcp-server:8080/mcp", json={"text": "Hello, Qwen!"})
print(response.json())

With everything set up, I deployed the app to Phala Cloud using the CLI:
bash

phala-cloud deploy qwen-mcp-server --name qwen-mcp-server --ports 8080,8888
The deployment took a few minutes as Phala Cloud pulled the images and set up the environment. Once it was done, I got two endpoint URLs: one for the MCP server (https://) and one for the Jupyter Notebook (https://). I accessed the Jupyter Notebook in my browser, entered the token my-token, and ran my script—it worked perfectly, returning a response from the Qwen model via the MCP server!
The final step was verifying the attestation to confirm the MCP server was running in a secure TEE. The Phala Cloud has a built in attestation verifier that I used to get a detailed report showing the TEE’s integrity, including cryptographic proof that my app was running in a secure environment.
I was impressed by how transparent the process was—it gave me confidence that my data and computations were protected, which is crucial since I’m working with sensitive inputs for my AI project.
Overall, the instructions in the Phala Cloud guide were clear and easy to follow. I appreciated how they broke down each step, from CLI setup to deployment and attestation. The only hiccup I had was ensuring my Docker image had enough memory allocated for the Qwen model, but once I sorted that out, everything ran smoothly. I’m now using this setup to experiment with real-time data queries for my AI assistant, and the security guarantees of Phala Cloud’s TEEs make me feel much more comfortable handling sensitive data.
If you’re curious about secure AI deployments, I’d definitely recommend giving this a try. The guide on the Phala Cloud blog is a great starting point: How to Deploy a dApp on Phala Cloud: A Step-by-Step Guide.
Have any of you worked on deploying MCP before? I’d love to hear about your experiences in the comments!




![[The AI Show Episode 142]: ChatGPT’s New Image Generator, Studio Ghibli Craze and Backlash, Gemini 2.5, OpenAI Academy, 4o Updates, Vibe Marketing & xAI Acquires X](https://www.marketingaiinstitute.com/hubfs/ep%20142%20cover.png)




![[FREE EBOOKS] The Kubernetes Bible, The Ultimate Linux Shell Scripting Guide & Four More Best Selling Titles](https://www.javacodegeeks.com/wp-content/uploads/2012/12/jcg-logo.jpg)


![From drop-out to software architect with Jason Lengstorf [Podcast #167]](https://cdn.hashnode.com/res/hashnode/image/upload/v1743796461357/f3d19cd7-e6f5-4d7c-8bfc-eb974bc8da68.png?#)


.png?#)


.jpg?#)




_Christophe_Coat_Alamy.jpg?#)




![Rapidus in Talks With Apple as It Accelerates Toward 2nm Chip Production [Report]](https://www.iclarified.com/images/news/96937/96937/96937-640.jpg)


