


![[The AI Show Episode 142]: ChatGPT’s New Image Generator, Studio Ghibli Craze and Backlash, Gemini 2.5, OpenAI Academy, 4o Updates, Vibe Marketing & xAI Acquires X](https://www.marketingaiinstitute.com/hubfs/ep%20142%20cover.png)


![From drop-out to software architect with Jason Lengstorf [Podcast #167]](https://cdn.hashnode.com/res/hashnode/image/upload/v1743796461357/f3d19cd7-e6f5-4d7c-8bfc-eb974bc8da68.png?#)


![When is multiple validation layers of protection necessary? [duplicate]](https://cdn.sstatic.net/Sites/softwareengineering/Img/apple-touch-icon@2.png?v=1ef7363febba)


.png?#)


.jpg?#)


_Christophe_Coat_Alamy.jpg?#)


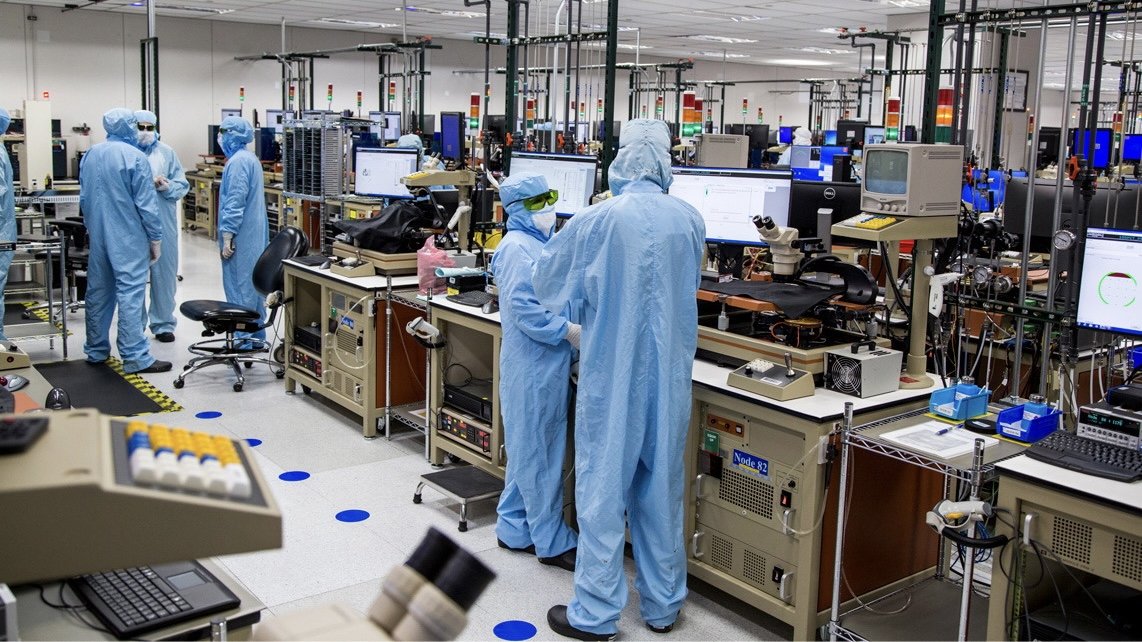
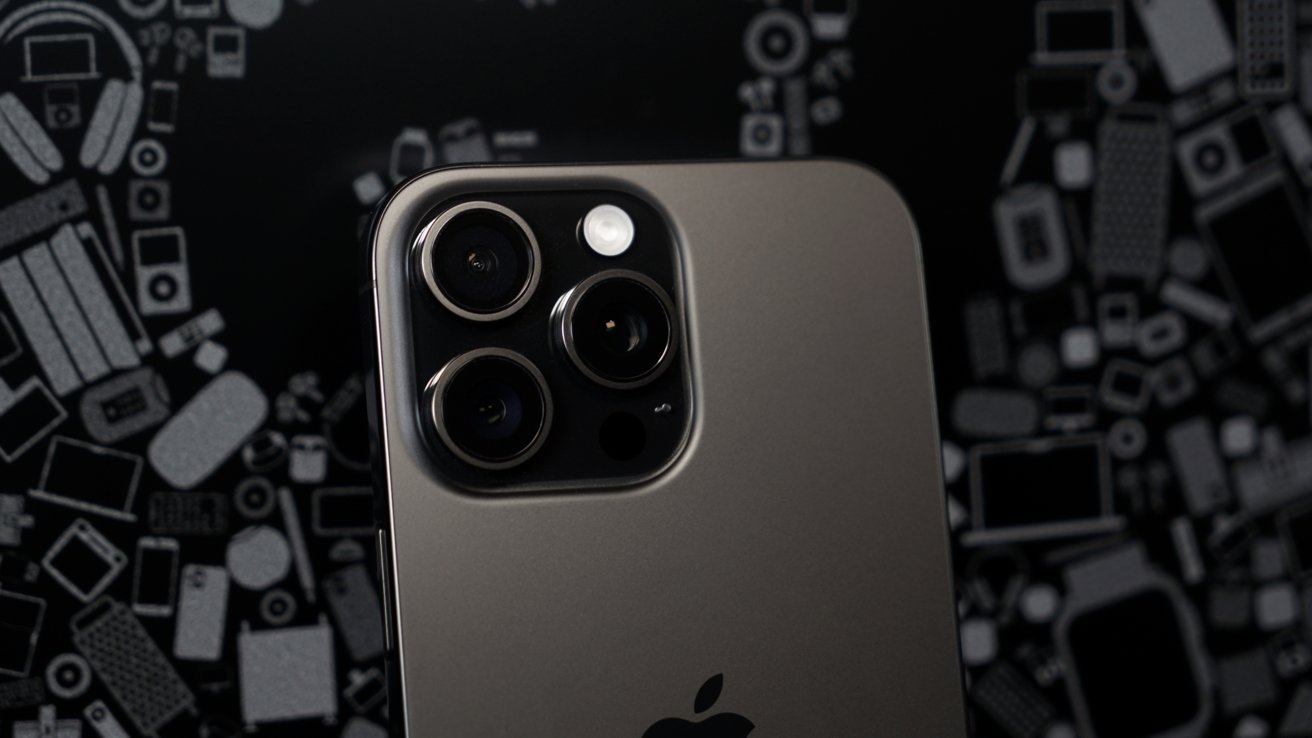


![Rapidus in Talks With Apple as It Accelerates Toward 2nm Chip Production [Report]](https://www.iclarified.com/images/news/96937/96937/96937-640.jpg)


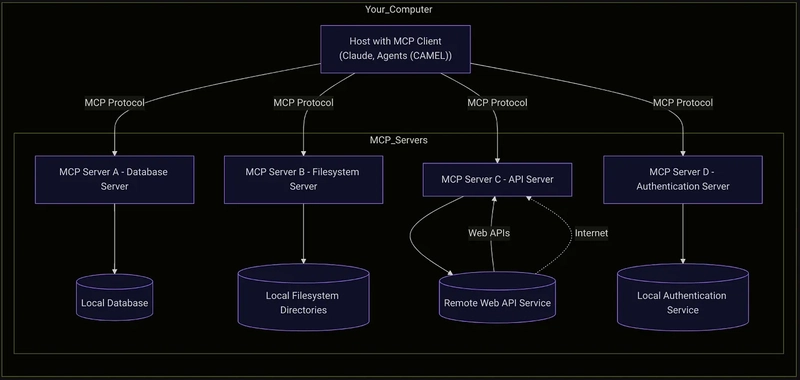
Frontend MCP Tool Development Tutorial
MCP (Model Context Protocol) Tool Development Tutorial Table of Contents Introduction Core Concepts Usage Examples Best Practices Introduction MCP (Model Context Protocol) is a protocol for building interactions between AI models and external tools. It allows us to create custom tools and resources that enable AI models to perform specific tasks. MCP tool development uses the modelcontextprotocol SDK, GitHub repository: https://github.com/modelcontextprotocol Core Concepts 1. StdioServerTransport StdioServerTransport is the transport layer of MCP, which implements communication between server and client through standard input/output (stdin/stdout). import { StdioServerTransport } from "@modelcontextprotocol/sdk/server/stdio"; const transport = new StdioServerTransport(); 2. McpServer McpServer is the core server class of MCP, used to create and manage tools and resources. import { McpServer } from "@modelcontextprotocol/sdk/server/mcp"; const server = new McpServer({ name: "your-server-name", description: "Server description", version: "1.0.0" }); 3. Tool Tool is a function in MCP used to execute specific tasks. Each tool requires: Name Parameter schema (using Zod for validation) Execution function import { z } from "zod"; server.tool( "tool-name", { param1: z.string(), param2: z.number().optional() }, async (params) => { // Tool implementation return { content: [{ type: "text", text: "Execution result" }] }; } ); 4. Resource Resource is used to manage accessible data or state. Each resource requires: Name URI template Function to get content import { ResourceTemplate } from "@modelcontextprotocol/sdk/server/mcp"; server.resource( "resource-name", new ResourceTemplate("resource://{id}", { list: undefined }), async (uri, { id }) => ({ contents: [{ uri: uri.href, text: `Resource content: ${id}` }] }) ); Usage Examples Here we use the modelcontextprotocol typescript-sdk for development Install Dependencies First, install the necessary npm packages: npm install @modelcontextprotocol/sdk @playwright/test pngjs pixelmatch zod Let me demonstrate these concepts working together through a practical Playwright UI testing tool. This example will show how to create a complete visual testing tool. 1. Type Definitions First, we need to define the types for test configuration and results: // types.ts export interface VisualTestConfig { url: string; selector?: string; waitForSelector?: string; waitForTimeout?: number; threshold?: number; ignoreSelectors?: string[]; viewport?: { width: number; height: number; }; baselineImagePath?: string; baselineImage?: string | Buffer; login?: { url: string; usernameSelector: string; passwordSelector: string; submitSelector: string; username: string; password: string; successSelector?: string; }; autoLogin?: { username: string; password: string; usernameSelector: string; passwordSelector: string; submitSelector: string; successSelector?: string; loginUrlPattern?: string; }; } export interface VisualTestResult { success: boolean; message?: string; error?: string; diffPixels?: number; threshold?: number; passed?: boolean; baselineCreated?: boolean; baselineUpdated?: boolean; screenshots?: { current?: string; diff?: string; }; } 2. Create Server import { McpServer } from "@modelcontextprotocol/sdk/server/mcp"; const server = new McpServer({ name: "visual-test", description: "UI visual comparison test tool", version: "1.0.0" }); 3. Implement Core Functions 3.1 Login Function async function login(page: any, loginConfig: VisualTestConfig["login"]) { if (!loginConfig) return; await page.goto(loginConfig.url); await page.waitForSelector(loginConfig.usernameSelector); await page.waitForSelector(loginConfig.passwordSelector); await page.waitForSelector(loginConfig.submitSelector); await page.fill(loginConfig.usernameSelector, loginConfig.username); await page.fill(loginConfig.passwordSelector, loginConfig.password); await page.click(loginConfig.submitSelector); if (loginConfig.successSelector) { await page.waitForSelector(loginConfig.successSelector); } else { await page.waitForNavigation(); } } 3.2 Auto Login Function async function autoLogin(page: any, config: VisualTestConfig["autoLogin"]) { if (!config) return false; try { await page.waitForSelector(config.usernameSelector); await page.waitForSelector(config.passwordSelector); await page.waitForSelector(config.submitSelector); await page.fill(config.usernameSelector, config.username); await page.fill(config.passwordSele
MCP (Model Context Protocol) Tool Development Tutorial
Table of Contents
- Introduction
- Core Concepts
- Usage Examples
- Best Practices
Introduction
MCP (Model Context Protocol) is a protocol for building interactions between AI models and external tools. It allows us to create custom tools and resources that enable AI models to perform specific tasks.
MCP tool development uses the modelcontextprotocol SDK, GitHub repository:
https://github.com/modelcontextprotocol
Core Concepts
1. StdioServerTransport
StdioServerTransport is the transport layer of MCP, which implements communication between server and client through standard input/output (stdin/stdout).
import { StdioServerTransport } from "@modelcontextprotocol/sdk/server/stdio";

const transport = new StdioServerTransport();
2. McpServer
McpServer is the core server class of MCP, used to create and manage tools and resources.
import { McpServer } from "@modelcontextprotocol/sdk/server/mcp";

const server = new McpServer({
  name: "your-server-name",
  description: "Server description",
  version: "1.0.0"
});
3. Tool
Tool is a function in MCP used to execute specific tasks. Each tool requires:
- Name
- Parameter schema (using Zod for validation)
- Execution function
import { z } from "zod";

server.tool(
  "tool-name",
  {
    param1: z.string(),
    param2: z.number().optional()
  },
  async (params) => {
    // Tool implementation
    return {
      content: [{
        type: "text",
        text: "Execution result"
      }]
    };
  }
);
4. Resource
Resource is used to manage accessible data or state. Each resource requires:
- Name
- URI template
- Function to get content
import { ResourceTemplate } from "@modelcontextprotocol/sdk/server/mcp";

server.resource(
  "resource-name",
  new ResourceTemplate("resource://{id}", { list: undefined }),
  async (uri, { id }) => ({
    contents: [{
      uri: uri.href,
      text: `Resource content: ${id}`
    }]
  })
);
Usage Examples
Here we use the modelcontextprotocol typescript-sdk for development
Install Dependencies
First, install the necessary npm packages:
npm install @modelcontextprotocol/sdk @playwright/test pngjs pixelmatch zod
Let me demonstrate these concepts working together through a practical Playwright UI testing tool. This example will show how to create a complete visual testing tool.
1. Type Definitions
First, we need to define the types for test configuration and results:
// types.ts
export interface VisualTestConfig {
  url: string;
  selector?: string;
  waitForSelector?: string;
  waitForTimeout?: number;
  threshold?: number;
  ignoreSelectors?: string[];
  viewport?: {
    width: number;
    height: number;
  };
  baselineImagePath?: string;
  baselineImage?: string | Buffer;
  login?: {
    url: string;
    usernameSelector: string;
    passwordSelector: string;
    submitSelector: string;
    username: string;
    password: string;
    successSelector?: string;
  };
  autoLogin?: {
    username: string;
    password: string;
    usernameSelector: string;
    passwordSelector: string;
    submitSelector: string;
    successSelector?: string;
    loginUrlPattern?: string;
  };
}

export interface VisualTestResult {
  success: boolean;
  message?: string;
  error?: string;
  diffPixels?: number;
  threshold?: number;
  passed?: boolean;
  baselineCreated?: boolean;
  baselineUpdated?: boolean;
  screenshots?: {
    current?: string;
    diff?: string;
  };
}
2. Create Server
import { McpServer } from "@modelcontextprotocol/sdk/server/mcp";

const server = new McpServer({
  name: "visual-test",
  description: "UI visual comparison test tool",
  version: "1.0.0"
});
3. Implement Core Functions
3.1 Login Function
async function login(page: any, loginConfig: VisualTestConfig["login"]) {
  if (!loginConfig) return;

  await page.goto(loginConfig.url);
  await page.waitForSelector(loginConfig.usernameSelector);
  await page.waitForSelector(loginConfig.passwordSelector);
  await page.waitForSelector(loginConfig.submitSelector);

  await page.fill(loginConfig.usernameSelector, loginConfig.username);
  await page.fill(loginConfig.passwordSelector, loginConfig.password);
  await page.click(loginConfig.submitSelector);

  if (loginConfig.successSelector) {
    await page.waitForSelector(loginConfig.successSelector);
  } else {
    await page.waitForNavigation();
  }
}
3.2 Auto Login Function
async function autoLogin(page: any, config: VisualTestConfig["autoLogin"]) {
  if (!config) return false;

  try {
    await page.waitForSelector(config.usernameSelector);
    await page.waitForSelector(config.passwordSelector);
    await page.waitForSelector(config.submitSelector);

    await page.fill(config.usernameSelector, config.username);
    await page.fill(config.passwordSelector, config.password);
    await page.click(config.submitSelector);

    if (config.successSelector) {
      await page.waitForSelector(config.successSelector);
    } else {
      await page.waitForNavigation();
    }

    return true;
  } catch (error) {
    console.error("Auto login failed:", error);
    return false;
  }
}
3.3 Visual Test Core Function
async function runVisualTest(config: VisualTestConfig): Promise {
  const browser = await chromium.launch();
  const page = await browser.newPage();

  try {
    // Set viewport size
    const defaultViewport = { width: 1280, height: 720 };
    await page.setViewportSize({
      width: config.viewport?.width ?? defaultViewport.width,
      height: config.viewport?.height ?? defaultViewport.height
    });

    // Handle login
    if (config.login) {
      await login(page, config.login);
    }

    // Visit target page
    await page.goto(config.url);
    await page.waitForLoadState("networkidle");

    // Check if auto login is needed
    await checkLoginRedirect(page, config);

    // Wait for specified element
    if (config.waitForSelector) {
      await page.waitForSelector(config.waitForSelector);
    }

    // Wait for specified time
    if (config.waitForTimeout) {
      await page.waitForTimeout(config.waitForTimeout);
    }

    // Hide elements to ignore
    if (config.ignoreSelectors?.length) {
      await page.evaluate((selectors) => {
        selectors.forEach((selector) => {
          const elements = document.querySelectorAll(selector);
          elements.forEach((el) => {
            (el as HTMLElement).style.visibility = "hidden";
          });
        });
      }, config.ignoreSelectors);
    }

    // Get page screenshot
    const screenshot = await page.screenshot({
      fullPage: !config.selector,
      type: "png",
      ...(config.selector ? { selector: config.selector } : {}),
    });

    // Save current screenshot
    const currentScreenshotPath = path.join(screenshotsDir, "current.png");
    fs.writeFileSync(currentScreenshotPath, screenshot);

    // Handle baseline image
    const baselineScreenshotPath = path.join(screenshotsDir, "baseline.png");
    if (fs.existsSync(baselineScreenshotPath)) {
      console.log("Using existing baseline image");
    } else if (config.baselineImagePath) {
      const baselineBuffer = fs.readFileSync(config.baselineImagePath);
      fs.writeFileSync(baselineScreenshotPath, baselineBuffer);
    } else if (config.baselineImage) {
      let baselineBuffer: Buffer;
      if (Buffer.isBuffer(config.baselineImage)) {
        baselineBuffer = config.baselineImage;
      } else {
        baselineBuffer = Buffer.from(config.baselineImage, "base64");
      }
      fs.writeFileSync(baselineScreenshotPath, baselineBuffer);
    } else {
      fs.copyFileSync(currentScreenshotPath, baselineScreenshotPath);
      return {
        success: true,
        message: "Created new baseline screenshot",
        baselineCreated: true,
      };
    }

    // Image comparison
    const baseline = PNG.sync.read(fs.readFileSync(baselineScreenshotPath));
    const current = PNG.sync.read(screenshot);

    if (baseline.width !== current.width || baseline.height !== current.height) {
      fs.copyFileSync(currentScreenshotPath, baselineScreenshotPath);
      return {
        success: true,
        message: "Updated baseline screenshot",
        baselineUpdated: true,
      };
    }

    // Create diff image
    const { width, height } = baseline;
    const diff = new PNG({ width, height });
    const numDiffPixels = pixelmatch(
      baseline.data,
      current.data,
      diff.data,
      width,
      height,
      { threshold: config.threshold ? config.threshold / 100 : 0.1 }
    );

    // Save diff image
    fs.writeFileSync(
      path.join(screenshotsDir, "diff.png"),
      PNG.sync.write(diff)
    );

    return {
      success: true,
      message: "Successfully created diff image",
      diffPixels: numDiffPixels,
      threshold: config.threshold || 100,
      passed: numDiffPixels < (config.threshold || 100),
    };
  } catch (error) {
    console.error("Visual comparison test failed:", error);
    return {
      success: false,
      error: error instanceof Error ? error.message : "Unknown error",
    };
  } finally {
    await browser.close();
  }
}
4. Define MCP Tool
server.tool(
  "playwright-ui-test",
  {
    url: z.string(),
    selector: z.string().optional(),
    waitForSelector: z.string().optional(),
    waitForTimeout: z.number().optional(),
    threshold: z.number().optional(),
    ignoreSelectors: z.array(z.string()).optional(),
    viewport: z.object({
      width: z.number(),
      height: z.number()
    }).optional(),
    baselineImagePath: z.string().optional(),
    baselineImage: z.string().optional()
  },
  async (params) => {
    // Get auto login configuration
    const autoLoginConfig = {
      username: process.env.AUTO_LOGIN_USERNAME,
      password: process.env.AUTO_LOGIN_PASSWORD,
      usernameSelector: process.env.AUTO_LOGIN_USERNAME_SELECTOR || "#username",
      passwordSelector: process.env.AUTO_LOGIN_PASSWORD_SELECTOR || "#password",
      submitSelector: process.env.AUTO_LOGIN_SUBMIT_SELECTOR || 'button[type="submit"]',
      successSelector: process.env.AUTO_LOGIN_SUCCESS_SELECTOR,
      loginUrlPattern: process.env.AUTO_LOGIN_URL_PATTERN || "login|signin|auth",
    };

    // Get test configuration
    const testConfig = {
      selector: process.env.TEST_SELECTOR || params.selector,
      waitForSelector: process.env.TEST_WAIT_FOR_SELECTOR || params.waitForSelector,
      waitForTimeout: process.env.TEST_WAIT_TIMEOUT ? parseInt(process.env.TEST_WAIT_TIMEOUT) : params.waitForTimeout,
      threshold: process.env.TEST_THRESHOLD ? parseInt(process.env.TEST_THRESHOLD) : params.threshold,
      ignoreSelectors: process.env.TEST_IGNORE_SELECTORS ? process.env.TEST_IGNORE_SELECTORS.split(',') : params.ignoreSelectors,
      viewport: {
        width: process.env.TEST_VIEWPORT_WIDTH ? parseInt(process.env.TEST_VIEWPORT_WIDTH) : (params.viewport?.width || 1280),
        height: process.env.TEST_VIEWPORT_HEIGHT ? parseInt(process.env.TEST_VIEWPORT_HEIGHT) : (params.viewport?.height || 720)
      }
    };

    const result = await runVisualTest({
      url: params.url,
      ...testConfig,
      baselineImagePath: params.baselineImagePath,
      baselineImage: params.baselineImage,
      autoLogin: autoLoginConfig,
    });

    if (result.success) {
      if (result.baselineCreated || result.baselineUpdated) {
        return {
          content: [{
            type: "text",
            text: result.message || "Updated baseline image"
          }]
        };
      }

      return {
        content: [{
          type: "text",
          text: `Diff pixels: ${result.diffPixels}, Threshold: ${result.threshold}, Test ${result.passed ? 'passed' : 'failed'}`
        }, {
          type: "image",
          data: result.screenshots?.current || "",
          mimeType: "image/png"
        }, {
          type: "image",
          data: result.screenshots?.diff || "",
          mimeType: "image/png"
        }]
      };
    }

    return {
      content: [{
        type: "text",
        text: result.error || "Unknown error"
      }]
    };
  }
);
Project Repository
https://www.npmjs.com/package/@anguske/mcp-playwright-visual-test
5. Configure Cursor
To use this tool in Cursor, add the following configuration to .cursor/mcp.json:
{
  "mcpServers": {
    "@anguske/mcp-playwright-visual-test": {
      "command": "npx",
      "args": ["-y", "@anguske/mcp-playwright-visual-test"],
      "env": {
        "AUTO_LOGIN_USERNAME": "",
        "AUTO_LOGIN_PASSWORD": "",
        "AUTO_LOGIN_USERNAME_SELECTOR": "#userNameSignIn",
        "AUTO_LOGIN_PASSWORD_SELECTOR": "#passwordSignIn",
        "AUTO_LOGIN_SUBMIT_SELECTOR": "input[type=\"submit\"]",
        "AUTO_LOGIN_SUCCESS_SELECTOR": "",
        "TEST_VIEWPORT_WIDTH": 1440,
        "TEST_VIEWPORT_HEIGHT": 800,
        "TEST_THRESHOLD": 20,
        "TEST_WAIT_TIMEOUT": 10000,
        "AUTO_LOGIN_URL_PATTERN": "login|signin|auth",
        "PROJECT_ROOT": "C:/project/root"
      }
    }
  }
}
This configuration file defines the MCP server configuration information:
-
Server Configuration:
-
command: Usenpxcommand to run the tool -
args: Use-yparameter to automatically confirm installation and run the@anguske/mcp-playwright-visual-testpackage
-
-
Environment Variable Configuration:
- Auto login configuration:
-
AUTO_LOGIN_USERNAME: Login username -
AUTO_LOGIN_PASSWORD: Login password -
AUTO_LOGIN_USERNAME_SELECTOR: Username input field selector -
AUTO_LOGIN_PASSWORD_SELECTOR: Password input field selector -
AUTO_LOGIN_SUBMIT_SELECTOR: Submit button selector -
AUTO_LOGIN_SUCCESS_SELECTOR: Login success indicator selector
-
- Auto login configuration:
-
Test configuration:
-
TEST_VIEWPORT_WIDTH: Viewport width (1440px) -
TEST_VIEWPORT_HEIGHT: Viewport height (800px) -
TEST_THRESHOLD: Difference threshold (20) -
TEST_WAIT_TIMEOUT: Wait timeout (10000ms)
-
-
Other configuration:
-
AUTO_LOGIN_URL_PATTERN: Login page URL matching pattern -
PROJECT_ROOT: Project root directory path
-
When you use this tool in Cursor:
- Cursor reads this configuration file
- Starts the MCP server according to the configuration
- Runs tests using the configured environment variables
- Displays test results and screenshots
For example, when you enter in Cursor:
/test playwright-ui-test url="https://example.com"
Cursor will:
- Recognize this as a tool call
- Start the server using configured environment variables
- Call the
playwright-ui-testtool method - Display test results and screenshots
6. Add Resource
server.resource(
  "testResult",
  new ResourceTemplate("test://{id}", { list: undefined }),
  async (uri, { id }) => ({
    contents: [{
      uri: uri.href,
      text: `Test Result ID: ${id}`
    }]
  })
);
Best Practices
-
Parameter Validation
- Use Zod for strict parameter validation
- Provide default values for optional parameters
- Use environment variables for configuration
-
Error Handling
- Use try-catch to catch possible errors
- Return structured error information
- Clean up resources in finally block
-
Resource Management
- Use meaningful URI templates
- Implement appropriate resource access control
- Manage temporary files and directories
-
Tool Design
- Keep tool functionality single-purpose
- Provide clear parameter documentation
- Return structured results
- Support multiple configuration methods
-
Configuration Management
- Use environment variables for configuration
- Provide reasonable default values
- Support multiple configuration sources
Summary
MCP provides a powerful framework for building interactions between AI models and external tools. Through proper use of Tools and Resources, we can create feature-rich and maintainable AI applications. Remember to follow best practices to ensure code maintainability and extensibility. In actual development, pay attention to:
- Proper code organization
- Comprehensive error handling
- Flexible configuration options
- Code testability
- User experience and feedback