Elegant Backsplash Transitions: How to End Backsplash on an Open Wall Like a Pro
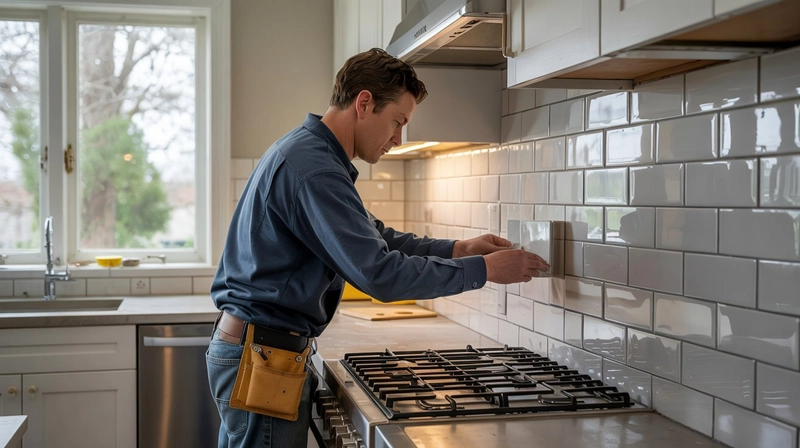
Introduction: For those who want a professional touch, understanding how to end backsplash on open wall sections is essential. This article focuses on the advanced techniques used by experts to ensure that your backsplash doesn’t just look good but feels like a part of the room's architecture. SF Marble and Granite brings years of expertise to the table, ensuring that your backsplash not only suits your design but also fits perfectly with your vision of elegance. 1. Creating Clean Lines with Mitered Edges Mitered edges are a professional choice for ending your backsplash, especially for high-end materials like granite, marble, or quartz. This method involves cutting the tiles at a 45-degree angle and fitting them together to form a smooth, angled edge. The result is a sharp, clean finish that looks sophisticated and tailored. Mitered edges are ideal for creating a seamless transition between the backsplash and the wall, blending the two elements together flawlessly. 2. Using Decorative Trims to Add a Touch of Luxury Decorative trim can be used to add an element of luxury when finishing your backsplash installation. You can choose trims made of materials such as metal, ceramic, or even natural stone. These trims not only help protect the edges of the tiles but also create a high-end look that complements your overall design. For instance, a thin metallic trim around a marble backsplash can elevate the space, giving it a refined, polished finish. 3. Combining Materials for a Multi-Layered Look For a more creative and dynamic finish, you can combine different materials along the edge of the backsplash. For example, transitioning from a stone backsplash to a painted wall can be done by using a contrasting material, such as a thin strip of wood, glass, or metal, along the edge. This technique adds depth and dimension to the space, making the transition feel intentional and layered. 4. Softening the Edge with Rounded Tiles To achieve a more relaxed and subtle transition, rounded tiles are a great choice. These tiles create a soft, fluid edge that feels less harsh than a straight line. This method works well in cozy, traditional spaces where a more inviting, soft design is preferred. Rounded edges also help reduce the risk of sharp corners or edges, making them a great option for family-friendly spaces. 5. Framing the Backsplash with Accent Tiles Framing the backsplash with accent tiles is another elegant solution for ending the installation. Using contrasting or complementary tiles along the edge can add visual interest and make the transition feel more intentional. This technique is perfect for spaces where the backsplash is the focal point, and you want to highlight its beauty with a carefully considered framing effect. Conclusion: Learning how to end backsplash on open wall is essential for achieving a professional, polished look in your kitchen or bathroom. Techniques like mitered edges, decorative trims, and material combinations can help create a seamless, elegant transition that enhances the overall design of your space. By utilizing these advanced methods, you can ensure that your backsplash installation looks intentional and cohesive, reflecting the beauty of your design vision. With SF Marble and Granite, you can rest assured that your backsplash will transition smoothly and beautifully into the rest of your room’s design

Introduction: For those who want a professional touch, understanding how to end backsplash on open wall sections is essential. This article focuses on the advanced techniques used by experts to ensure that your backsplash doesn’t just look good but feels like a part of the room's architecture. SF Marble and Granite brings years of expertise to the table, ensuring that your backsplash not only suits your design but also fits perfectly with your vision of elegance.

1. Creating Clean Lines with Mitered Edges
Mitered edges are a professional choice for ending your backsplash, especially for high-end materials like granite, marble, or quartz. This method involves cutting the tiles at a 45-degree angle and fitting them together to form a smooth, angled edge. The result is a sharp, clean finish that looks sophisticated and tailored. Mitered edges are ideal for creating a seamless transition between the backsplash and the wall, blending the two elements together flawlessly.
2. Using Decorative Trims to Add a Touch of Luxury
Decorative trim can be used to add an element of luxury when finishing your backsplash installation. You can choose trims made of materials such as metal, ceramic, or even natural stone. These trims not only help protect the edges of the tiles but also create a high-end look that complements your overall design. For instance, a thin metallic trim around a marble backsplash can elevate the space, giving it a refined, polished finish.
3. Combining Materials for a Multi-Layered Look
For a more creative and dynamic finish, you can combine different materials along the edge of the backsplash. For example, transitioning from a stone backsplash to a painted wall can be done by using a contrasting material, such as a thin strip of wood, glass, or metal, along the edge. This technique adds depth and dimension to the space, making the transition feel intentional and layered.
4. Softening the Edge with Rounded Tiles
To achieve a more relaxed and subtle transition, rounded tiles are a great choice. These tiles create a soft, fluid edge that feels less harsh than a straight line. This method works well in cozy, traditional spaces where a more inviting, soft design is preferred. Rounded edges also help reduce the risk of sharp corners or edges, making them a great option for family-friendly spaces.
5. Framing the Backsplash with Accent Tiles
Framing the backsplash with accent tiles is another elegant solution for ending the installation. Using contrasting or complementary tiles along the edge can add visual interest and make the transition feel more intentional. This technique is perfect for spaces where the backsplash is the focal point, and you want to highlight its beauty with a carefully considered framing effect.
Conclusion:
Learning how to end backsplash on open wall is essential for achieving a professional, polished look in your kitchen or bathroom. Techniques like mitered edges, decorative trims, and material combinations can help create a seamless, elegant transition that enhances the overall design of your space. By utilizing these advanced methods, you can ensure that your backsplash installation looks intentional and cohesive, reflecting the beauty of your design vision. With SF Marble and Granite, you can rest assured that your backsplash will transition smoothly and beautifully into the rest of your room’s design


![[The AI Show Episode 142]: ChatGPT’s New Image Generator, Studio Ghibli Craze and Backlash, Gemini 2.5, OpenAI Academy, 4o Updates, Vibe Marketing & xAI Acquires X](https://www.marketingaiinstitute.com/hubfs/ep%20142%20cover.png)


![[FREE EBOOKS] The Kubernetes Bible, The Ultimate Linux Shell Scripting Guide & Four More Best Selling Titles](https://www.javacodegeeks.com/wp-content/uploads/2012/12/jcg-logo.jpg)


![From drop-out to software architect with Jason Lengstorf [Podcast #167]](https://cdn.hashnode.com/res/hashnode/image/upload/v1743796461357/f3d19cd7-e6f5-4d7c-8bfc-eb974bc8da68.png?#)


.png?#)


.jpg?#)


_Christophe_Coat_Alamy.jpg?#)


![Rapidus in Talks With Apple as It Accelerates Toward 2nm Chip Production [Report]](https://www.iclarified.com/images/news/96937/96937/96937-640.jpg)


