


![[The AI Show Episode 144]: ChatGPT’s New Memory, Shopify CEO’s Leaked “AI First” Memo, Google Cloud Next Releases, o3 and o4-mini Coming Soon & Llama 4’s Rocky Launch](https://www.marketingaiinstitute.com/hubfs/ep%20144%20cover.png)


![Is this too much for a modular monolith system? [closed]](https://i.sstatic.net/pYL1nsfg.png)


_Andreas_Prott_Alamy.jpg?width=1280&auto=webp&quality=80&disable=upscale#)


![What features do you get with Gemini Advanced? [April 2025]](https://i0.wp.com/9to5google.com/wp-content/uploads/sites/4/2024/02/gemini-advanced-cover.jpg?resize=1200%2C628&quality=82&strip=all&ssl=1)


![Apple Shares Official Trailer for 'Long Way Home' Starring Ewan McGregor and Charley Boorman [Video]](https://www.iclarified.com/images/news/97069/97069/97069-640.jpg)
![Apple Watch Series 10 Back On Sale for $299! [Lowest Price Ever]](https://www.iclarified.com/images/news/96657/96657/96657-640.jpg)
![EU Postpones Apple App Store Fines Amid Tariff Negotiations [Report]](https://www.iclarified.com/images/news/97068/97068/97068-640.jpg)
![Apple Slips to Fifth in China's Smartphone Market with 9% Decline [Report]](https://www.iclarified.com/images/news/97065/97065/97065-640.jpg)


Deploying an LLM on Serverless (Ollama + GCloud) for Free(ish)
AI programs/LLMs (Large Language Models like Illama, Chatgpt, Gemini, Claude, etc.) have become useful for everyday work, especially if you use digital tools daily. In this article, we'll learn how to deploy an LLM to a Google Cloud Run endpoint and why that can be useful. Why Deploy an LLM endpoint Deploying an LLM to an endpoint you can manage is useful in the following ways: It can help in complying with various regulation by ensuring all your data never leaves the required jurisdictions It can help reduce costs as it is cheaper than subscribing to a chat service provider You can further control and limit the LLM's behaviour to comply with your policies It is cheaper to develop in-house, AI powered products and services In the context of this article, we'll learn to deploy transformer-based LLMs served on Ollama to Cloud Run, a Google serverless product powered by Kubernettes. We are using Cloud Run because serverless deployments only incur costs when a user is performing a request. This makes them very suitable for testing and deploying web-based solutions affordably. Pre-requisites I'm running this on Windows 11, so all CLI commands you see are run on Git Bash. Other requirements are: A free Google account with billing enabled on Cloud Console. You can do that on this link You'll need to install gcloud CLI and run it via Git Bash (or the appropriate shell tool in your system). Once installed, authenticate it with your account (gcloud auth login) and configure it to use your project (gcloud config set project YOUR_PROJECT_ID). Next, enable these APIs on your Google account by running the command below. APIs - Cloud Run API, Artifact Registry API, Cloud Build API, IAM API, and Compute Engine API. You can also enable them via the Cloud Console UI (under APIs & Services > Library). gcloud services enable run.googleapis.com artifactregistry.googleapis.com cloudbuild.googleapis.com iam.googleapis.com compute.googleapis.com --project=YOUR_PROJECT_ID Next, request a quota for NVIDIA L4 GPUs under the Cloud Run API in your desired region (e.g., us-central1). Check your quotas in the Google Cloud Console (IAM & Admin > Quotas & System Limits). In the table, filter by name and enter "Total Nvidia L4 GPU allocation with zonal redundancy, per project per region" or "Total Nvidia L4 GPU allocation without zonal redundancy, per project per region". Then, click the arrow beside the "Value" header to change the sorting order. If in both sorting orders, the value is still 0, it means you need to submit an increase request. The option for submitting an increase request should be on a second tab near the top. Please complete this process before continuing. This can take some time (up to 5 working days) to be approved. Finally, pick an LLM from Ollama. For this example, we are using Gemma:2b, and we have also tested Gemma3:4b. We recommend any LLM that is less than 8GB and requires no more than 16GB of memory. From my understanding, at the moment, the L4 GPUs available on Cloud Run have a limit of 16GB RAM. That's it; now, let's build and deploy! Deployment process First, run the following commands on Git Bash. These are values that we'll be reusing; hence it's better to save them for easy reference. # Replace with your actual project ID export PROJECT_ID="YOUR_PROJECT_ID" # Choose a region that supports Cloud Run GPUs (e.g., us-central1) export REGION="us-central1" # Choose a name for your Artifact Registry repository export REPO_NAME="gemma-models" # Choose a name for your Cloud Run service export SERVICE_NAME="gemma-ollama-service" # Choose the Gemma model tag from Ollama Hub (e.g., gemma:2b, gemma:7b) # Smaller models load faster and use fewer resources. export OLLAMA_MODEL="gemma:2b" # Set the gcloud project and region gcloud config set project $PROJECT_ID gcloud config set run/region $REGION gcloud config set artifacts/location $REGION Then, run this command to create an artifact registry Docker repository. This repository will store your container image. gcloud artifacts repositories create $REPO_NAME \ --repository-format=docker \ --location=$REGION \ --description="Repository for Gemma Ollama containers" Now, create a new directory for your project, navigate into it, and create a file named Dockerfile (no extension) with the following content: # Use an official Ollama image as the base FROM ollama/ollama # Set environment variables for Ollama ENV OLLAMA_HOST=0.0.0.0:8080 ENV OLLAMA_KEEP_ALIVE=-1 ENV OLLAMA_DEBUG=false # Define the model to pull (using the ARG passed during build) ARG OLLAMA_MODEL # Pre-pull the Gemma model: # 1. Start ollama serve in the background (&) # 2. Wait a few seconds for the server to start (sleep 5) # 3. Run ollama pull # 4. (Optional but good practice) Kill the background server process # We use 'ps | grep ollama | grep -v grep | awk '{print $1}' | xargs kill' to find and kill the server proc
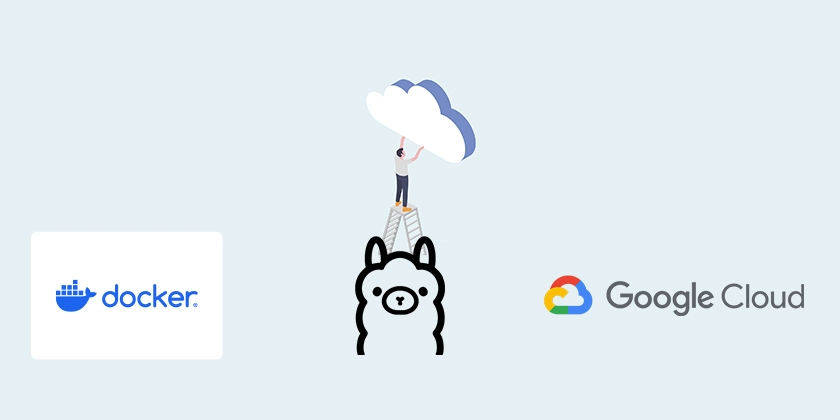
AI programs/LLMs (Large Language Models like Illama, Chatgpt, Gemini, Claude, etc.) have become useful for everyday work, especially if you use digital tools daily. In this article, we'll learn how to deploy an LLM to a Google Cloud Run endpoint and why that can be useful.
Why Deploy an LLM endpoint
Deploying an LLM to an endpoint you can manage is useful in the following ways:
It can help in complying with various regulation by ensuring all your data never leaves the required jurisdictions
It can help reduce costs as it is cheaper than subscribing to a chat service provider
You can further control and limit the LLM's behaviour to comply with your policies
It is cheaper to develop in-house, AI powered products and services
In the context of this article, we'll learn to deploy transformer-based LLMs served on Ollama to Cloud Run, a Google serverless product powered by Kubernettes. We are using Cloud Run because serverless deployments only incur costs when a user is performing a request. This makes them very suitable for testing and deploying web-based solutions affordably.
Pre-requisites
I'm running this on Windows 11, so all CLI commands you see are run on Git Bash. Other requirements are:
A free Google account with billing enabled on Cloud Console. You can do that on this link
You'll need to install gcloud CLI and run it via Git Bash (or the appropriate shell tool in your system). Once installed, authenticate it with your account (gcloud auth login) and configure it to use your project (gcloud config set project YOUR_PROJECT_ID).
Next, enable these APIs on your Google account by running the command below. APIs - Cloud Run API, Artifact Registry API, Cloud Build API, IAM API, and Compute Engine API. You can also enable them via the Cloud Console UI (under APIs & Services > Library).
gcloud services enable run.googleapis.com artifactregistry.googleapis.com cloudbuild.googleapis.com iam.googleapis.com compute.googleapis.com --project=YOUR_PROJECT_ID
Next, request a quota for NVIDIA L4 GPUs under the Cloud Run API in your desired region (e.g., us-central1). Check your quotas in the Google Cloud Console (IAM & Admin > Quotas & System Limits). In the table, filter by name and enter "Total Nvidia L4 GPU allocation with zonal redundancy, per project per region" or "Total Nvidia L4 GPU allocation without zonal redundancy, per project per region". Then, click the arrow beside the "Value" header to change the sorting order. If in both sorting orders, the value is still 0, it means you need to submit an increase request. The option for submitting an increase request should be on a second tab near the top. Please complete this process before continuing. This can take some time (up to 5 working days) to be approved.
Finally, pick an LLM from Ollama. For this example, we are using Gemma:2b, and we have also tested Gemma3:4b. We recommend any LLM that is less than 8GB and requires no more than 16GB of memory. From my understanding, at the moment, the L4 GPUs available on Cloud Run have a limit of 16GB RAM.
That's it; now, let's build and deploy!
Deployment process
First, run the following commands on Git Bash. These are values that we'll be reusing; hence it's better to save them for easy reference.
# Replace with your actual project ID
export PROJECT_ID="YOUR_PROJECT_ID"

# Choose a region that supports Cloud Run GPUs (e.g., us-central1)
export REGION="us-central1"

# Choose a name for your Artifact Registry repository
export REPO_NAME="gemma-models"

# Choose a name for your Cloud Run service
export SERVICE_NAME="gemma-ollama-service"

# Choose the Gemma model tag from Ollama Hub (e.g., gemma:2b, gemma:7b)
# Smaller models load faster and use fewer resources.
export OLLAMA_MODEL="gemma:2b"

# Set the gcloud project and region
gcloud config set project $PROJECT_ID
gcloud config set run/region $REGION
gcloud config set artifacts/location $REGION
Then, run this command to create an artifact registry Docker repository. This repository will store your container image.
gcloud artifacts repositories create $REPO_NAME \
  --repository-format=docker \
  --location=$REGION \
  --description="Repository for Gemma Ollama containers"
Now, create a new directory for your project, navigate into it, and create a file named Dockerfile (no extension) with the following content:
# Use an official Ollama image as the base
FROM ollama/ollama

# Set environment variables for Ollama
ENV OLLAMA_HOST=0.0.0.0:8080
ENV OLLAMA_KEEP_ALIVE=-1
ENV OLLAMA_DEBUG=false

# Define the model to pull (using the ARG passed during build)
ARG OLLAMA_MODEL

# Pre-pull the Gemma model:
# 1. Start ollama serve in the background (&)
# 2. Wait a few seconds for the server to start (sleep 5)
# 3. Run ollama pull
# 4. (Optional but good practice) Kill the background server process
#    We use 'ps | grep ollama | grep -v grep | awk '{print $1}' | xargs kill' to find and kill the server process
#    Note: Error during kill is ignored (|| true) in case the server exited quickly.
RUN ollama serve & \
    sleep 5 && \
    ollama pull ${OLLAMA_MODEL} && \
    (ps | grep ollama | grep -v grep | awk '{print $1}' | xargs kill || true)

# Set the entrypoint to start the Ollama server when the final container runs
ENTRYPOINT ["ollama", "serve"]
Then, in the same directory as your Dockerfile, create a file named cloudbuild.yaml with the following content:
steps:
- name: 'gcr.io/cloud-builders/docker'
  args: [
    'build',
    '--tag', '${_IMAGE_NAME}',
    '--build-arg', 'OLLAMA_MODEL=${_OLLAMA_MODEL}',
    '.'
  ]
images:
- '${_IMAGE_NAME}'
substitutions:
  _OLLAMA_MODEL: 'gemma:2b' # Default value, can be overridden
  _IMAGE_NAME: 'gcr.io/cloud-builders/docker' # Default value, MUST be overridden
Finally, you run the build command below.
gcloud builds submit . \
  --config cloudbuild.yaml \
  --substitutions=_IMAGE_NAME="$IMAGE_NAME",_OLLAMA_MODEL="$OLLAMA_MODEL"
This will build the image that will be containerised and deployed on Cloud Run. It will take some time, about 30 minutes.
Once your build process completes successfully, run the command below to deploy it. If you already had gcloud CLI installed, please update it, some of the flags used below were added as recently as early April 2025, so if you have not updated it lately, the command might fail.
Also, note what kind of L4 GPU Quota is approved for your account. If the approved quota option is the one with zonal redundancy, then remove the last flag from the command "--no-gpu-zonal-redundancy".
gcloud run deploy $SERVICE_NAME \
  --image=$IMAGE_NAME \
  --platform=managed \
  --region=$REGION \
  --execution-environment=gen2 \
  --cpu=4 \
  --memory=16Gi \
  --gpu=1 \
  --gpu-type=nvidia-l4 \
  --max-instances=3 \
  --min-instances=0 \
  --concurrency=1 \
  --timeout=600 \
  --port=8080 \
  --no-allow-unauthenticated \
  --no-gpu-zonal-redundancy
When the deployment finishes successfully, run the command below to save your service URL. This is the URL you'll serve you'll use to interact with the LLM.
export SERVICE_URL=$(gcloud run services describe $SERVICE_NAME --platform=managed --region=$REGION --format='value(status.url)')
echo "Service URL: $SERVICE_URL"
Then run this command to get your authentication token, since we deployed with "--no-allow-unauthenticated", we need to authenticate your request.
export AUTH_TOKEN=$(gcloud auth print-identity-token)
Finally, finally, finally. You can talk to your LLM by running the command below.
curl -X POST $SERVICE_URL/api/generate \
  -H "Authorization: Bearer $AUTH_TOKEN" \
  -H "Content-Type: application/json" \
  -d '{
    "model": "'"$OLLAMA_MODEL"'",
    "prompt": "Why is the sky blue?",
    "stream": false
  }'
From here, your LLM endpoint is live but only incurring cost when a user sends a prompt for generation.
I don't recommend making this endpoint publicly accessible. Instead, make another serveless instance and build a web app on it to interact with your LLM deployemnt. You can see an example of this here, although this app contains other stuff beyond this. I'm pasting an example function below.
The example below shows a function calling the LLM point while including chat history so the LLM can produce a better response to fit the chat context.
/**
* Calls the deployed Gemma/Ollama Cloud Run service's CHAT endpoint.
* @param {string} serviceUrl The base URL of the Cloud Run service.
* @param {string} bearerToken The OIDC Identity Token (without "Bearer ").
* @param {string} prompt The *current* text prompt.
* @param {string} modelName The name/tag of the Ollama model.
* @param {Array
export async function callGemmaChatService( // Renamed for clarity
serviceUrl,
bearerToken,
prompt,
modelName,
chatHistory = [], // <<< ADD chatHistory parameter
timeout = 60000
) {
if (!serviceUrl || !bearerToken || !prompt || !modelName) {
throw new Error(
'Service URL, Token, Prompt, and Model Name are required.'
);
}
const apiUrl = `${serviceUrl.replace(/\/$/, '')}/api/chat`; // <<< CHANGE Endpoint
console.log(`Calling Gemma CHAT service: ${apiUrl} with model: ${modelName}`);
// <<< TRANSFORM HISTORY and create messages payload >>>
const messages = transformHistoryToMessages(chatHistory, prompt);
const requestData = {
model: modelName,
messages: messages, // <<< Use messages array
stream: false,
};
const config = {
method: 'post', url: apiUrl,
headers: {
Authorization: `Bearer ${bearerToken}`,
'Content-Type': 'application/json',
},
data: requestData,
timeout: timeout,
};
try {
const response = await axios(config);
if (response.status >= 200 && response.status < 300) {
// console.log('Successful response from Gemma CHAT service.');
// The response structure for /api/chat (non-stream) includes the assistant's message
// e.g., { model: '...', created_at: '...', message: { role: 'assistant', content: '...' }, done: true, ...stats }
return response.data; // <<< Return the full response object
} else {
throw new Error(`Request failed with status code: ${response.status}`);
}
} catch (error) {
// Error handling remains similar
console.error('Error calling Gemma CHAT service:', error.message);
if (axios.isAxiosError(error)) {
const axiosError = error;
let detail = axiosError.message;
if (axiosError.response) {
detail = `Status ${axiosError.response.status}: ${JSON.stringify(
axiosError.response.data
)}`;
} else if (axiosError.request) {
detail = 'No response received from service.';
}
throw new Error(`Gemma CHAT service call failed: ${detail}`);
}
throw error;
}
}
You can also try this app out for yourself here. If you're feeling lucky and are in Tanzania, send us some coffee money for our good work!
Feel free to comment below if you face any issues.