![[The AI Show Episode 142]: ChatGPT’s New Image Generator, Studio Ghibli Craze and Backlash, Gemini 2.5, OpenAI Academy, 4o Updates, Vibe Marketing & xAI Acquires X](https://www.marketingaiinstitute.com/hubfs/ep%20142%20cover.png)


![From drop-out to software architect with Jason Lengstorf [Podcast #167]](https://cdn.hashnode.com/res/hashnode/image/upload/v1743796461357/f3d19cd7-e6f5-4d7c-8bfc-eb974bc8da68.png?#)


.png?#)


_Christophe_Coat_Alamy.jpg?#)
 (1).webp?#)


![Apple Considers Delaying Smart Home Hub Until 2026 [Gurman]](https://www.iclarified.com/images/news/96946/96946/96946-640.jpg)
![iPhone 17 Pro Won't Feature Two-Toned Back [Gurman]](https://www.iclarified.com/images/news/96944/96944/96944-640.jpg)
![Tariffs Threaten Apple's $999 iPhone Price Point in the U.S. [Gurman]](https://www.iclarified.com/images/news/96943/96943/96943-640.jpg)


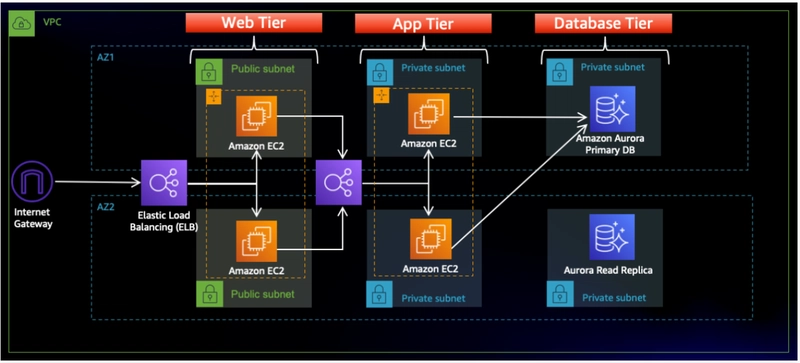
Deploying a 3-tier application
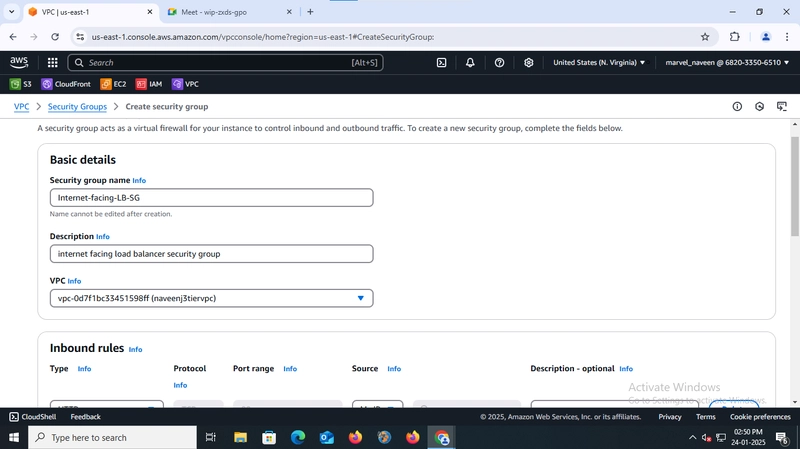
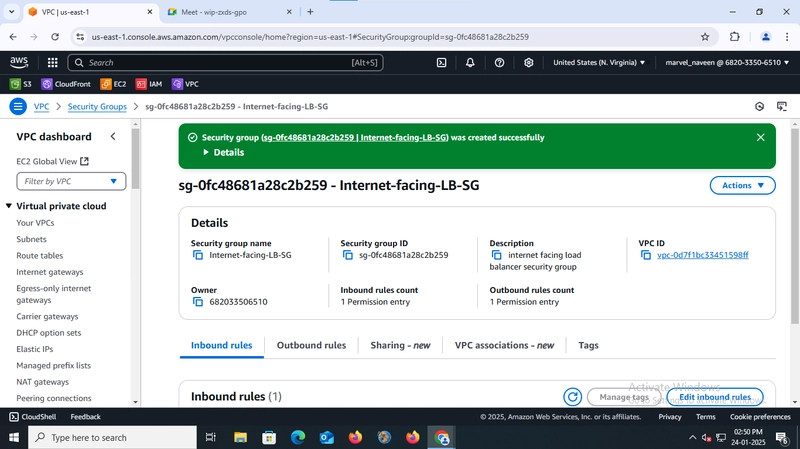
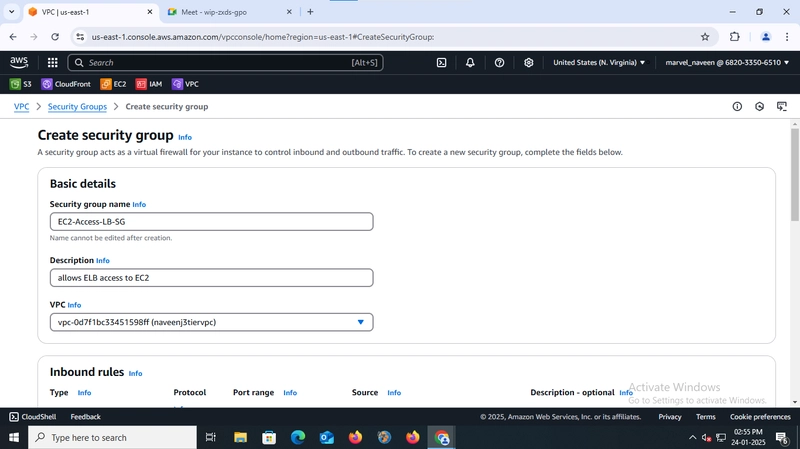
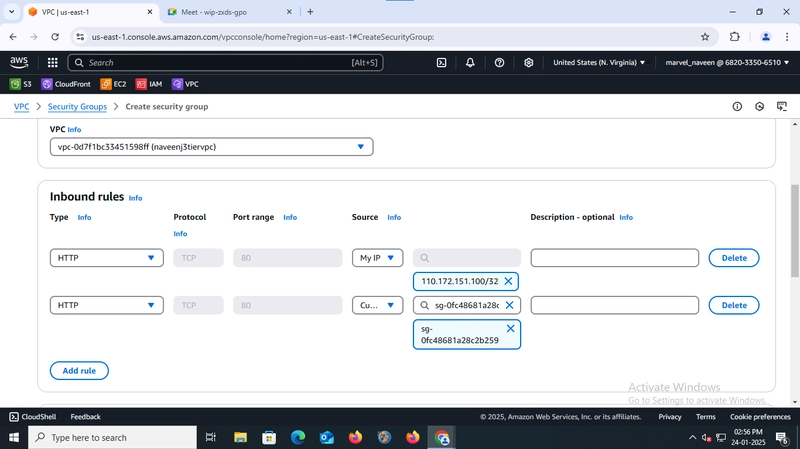
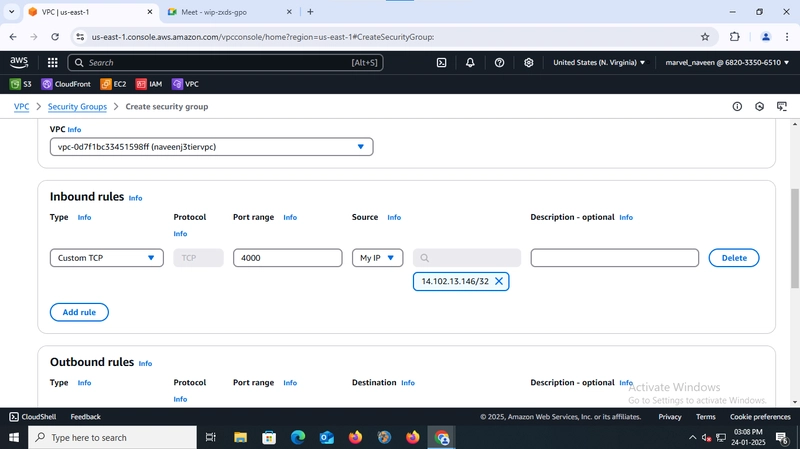
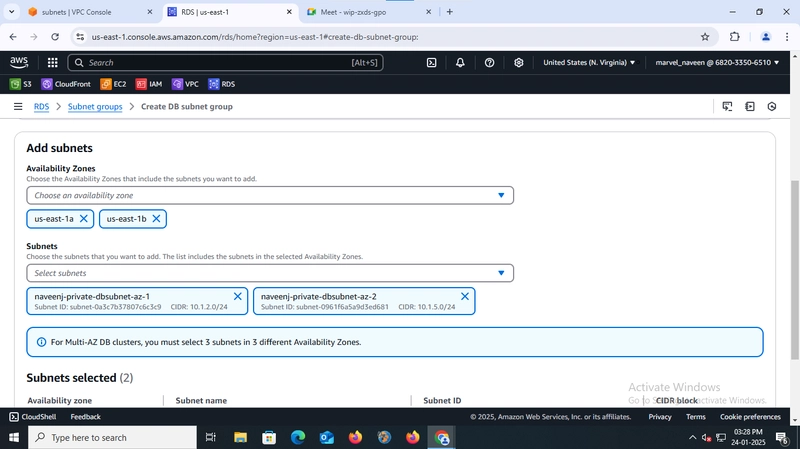
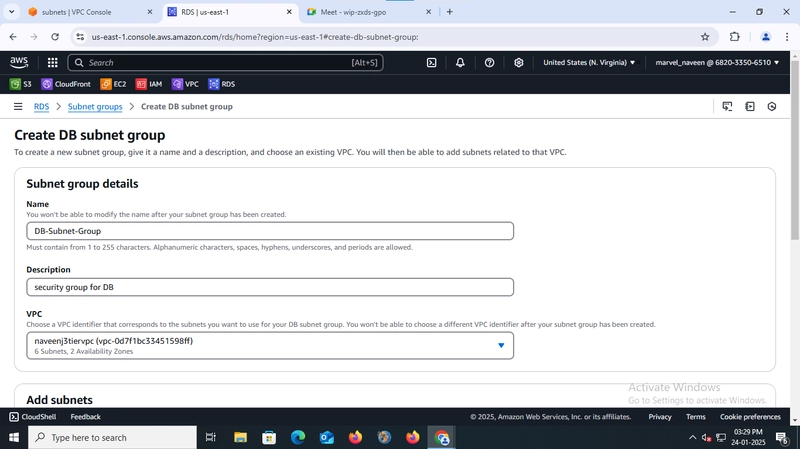
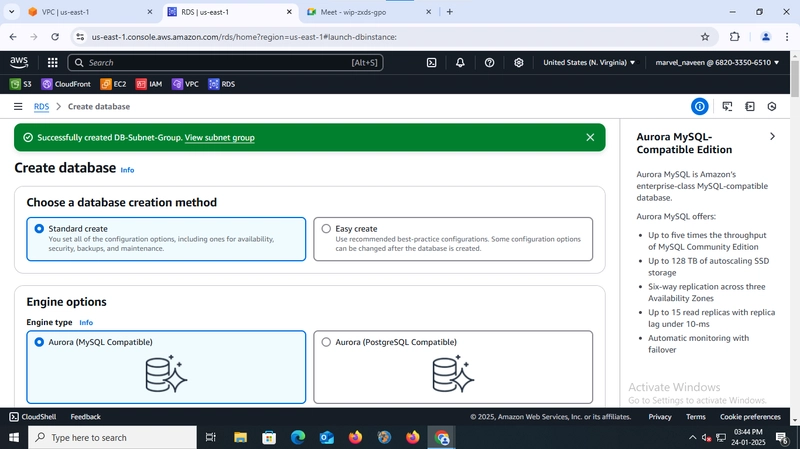
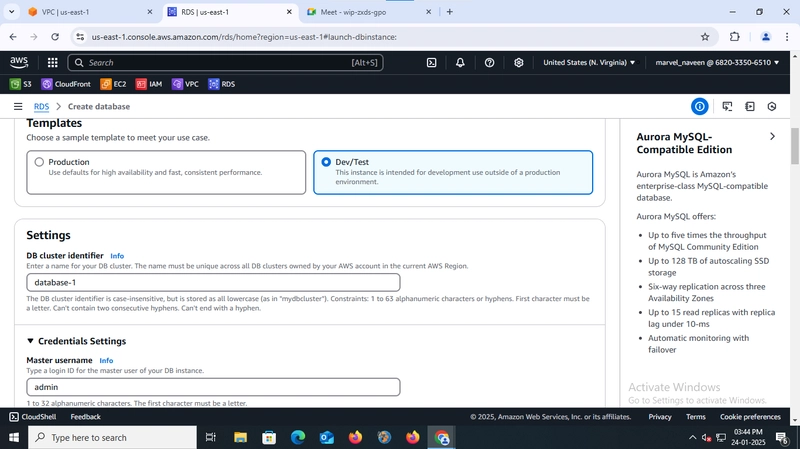
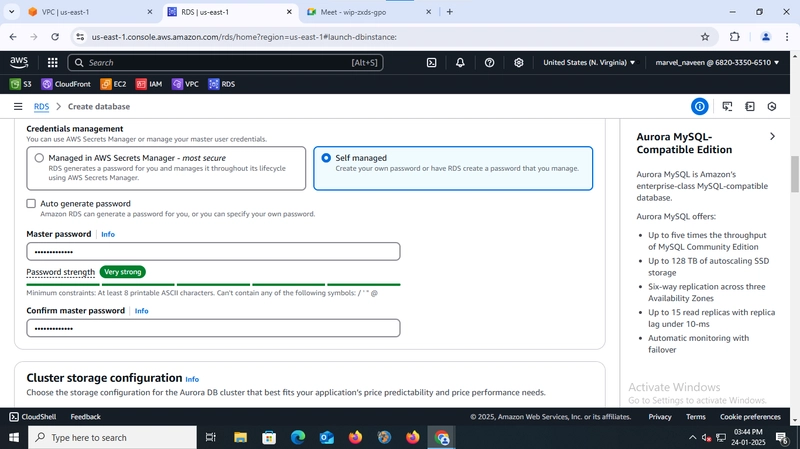
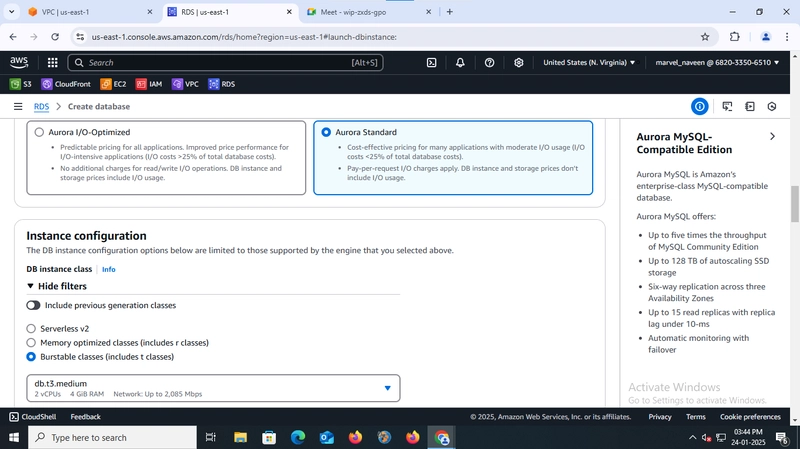
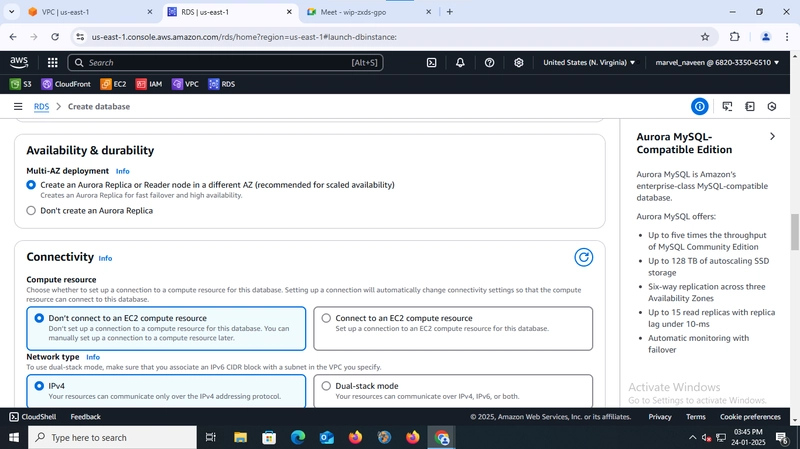
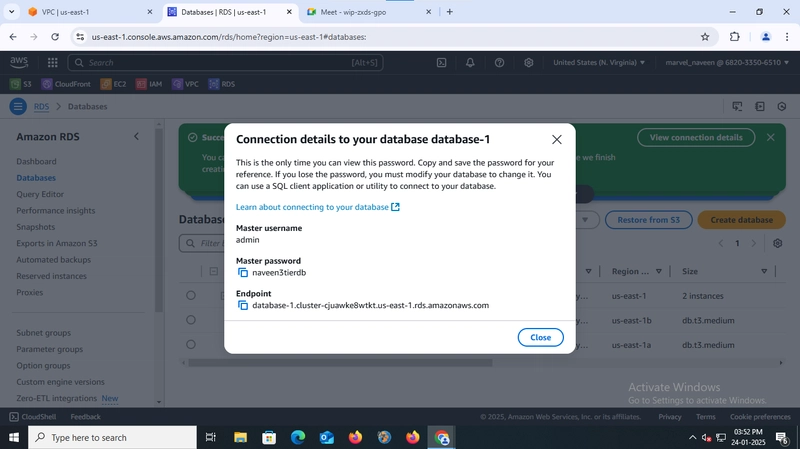
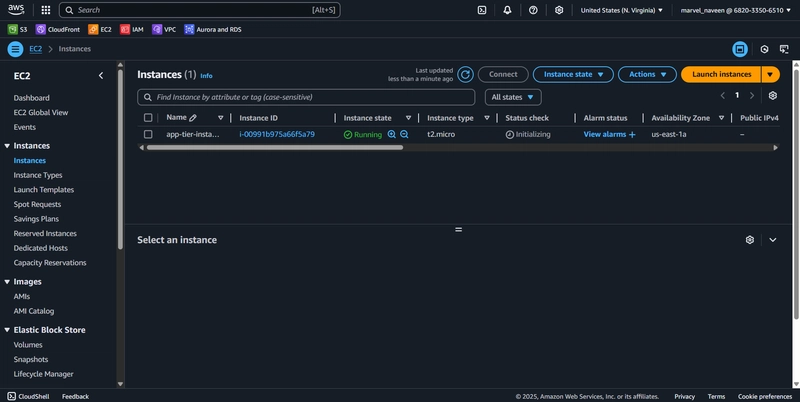
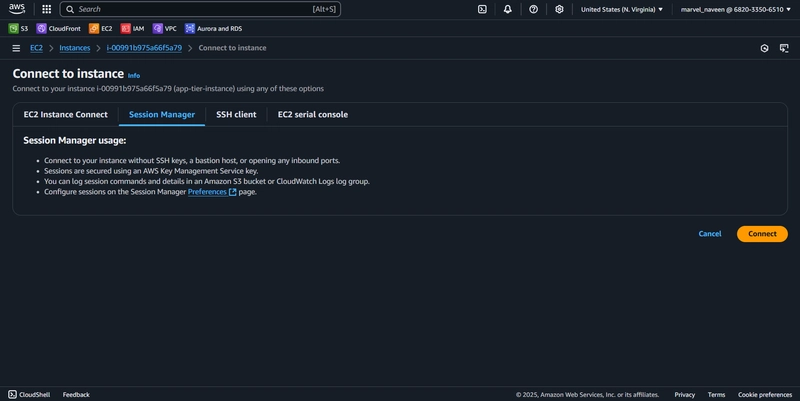
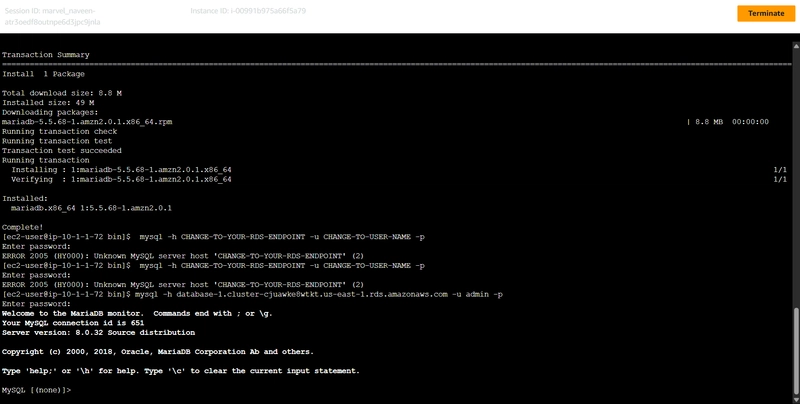
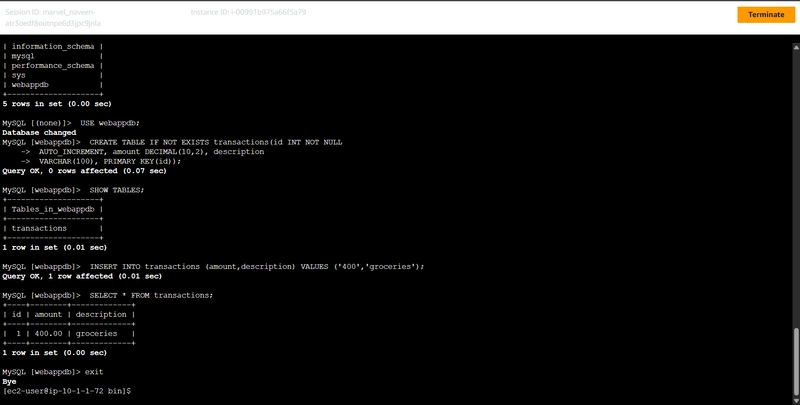
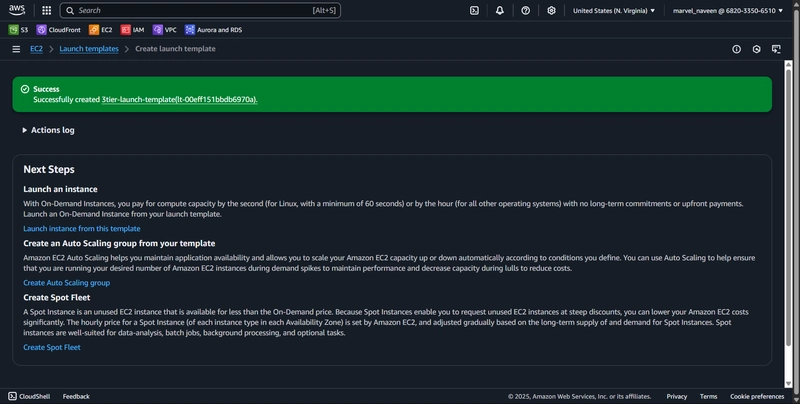
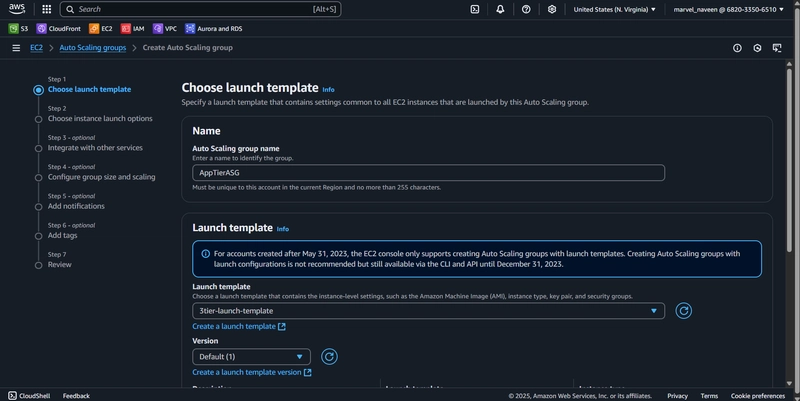
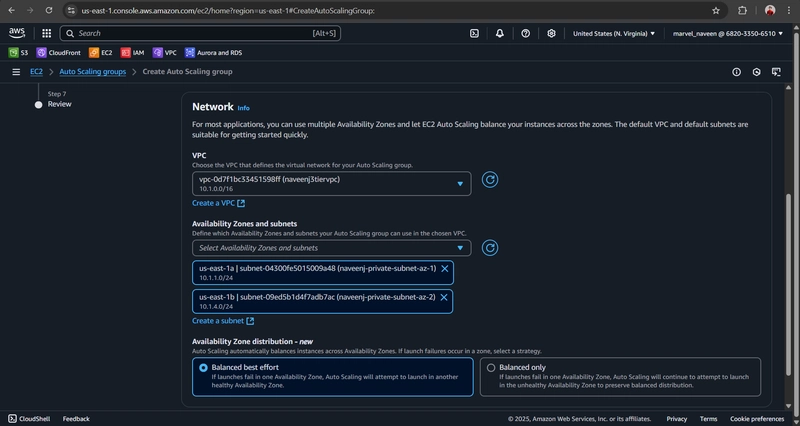
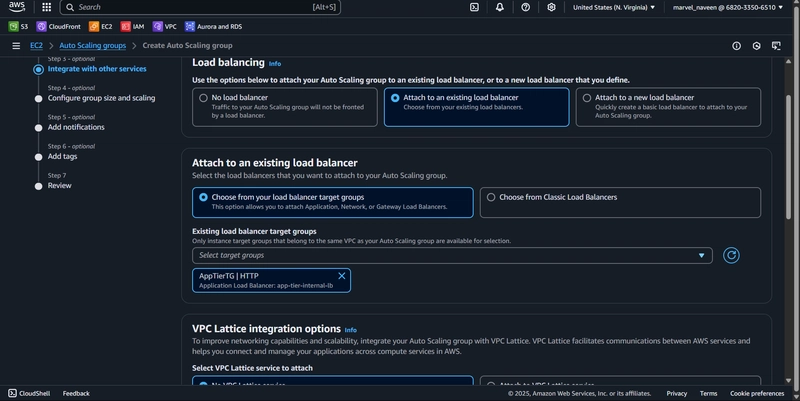
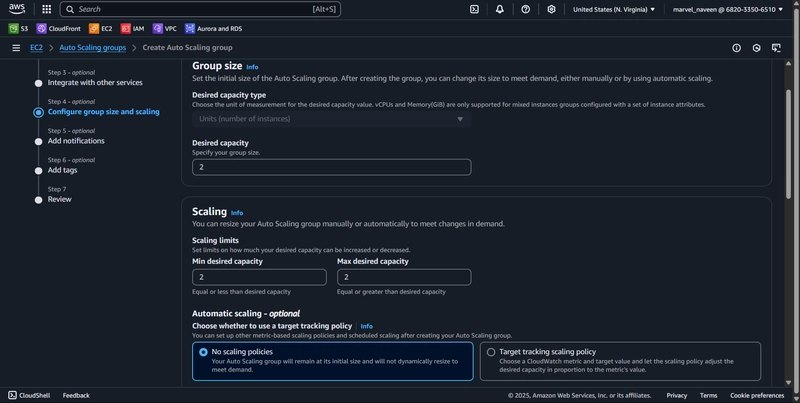
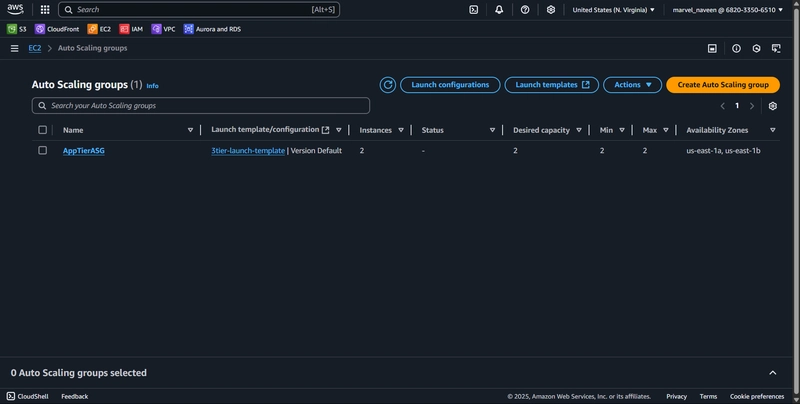
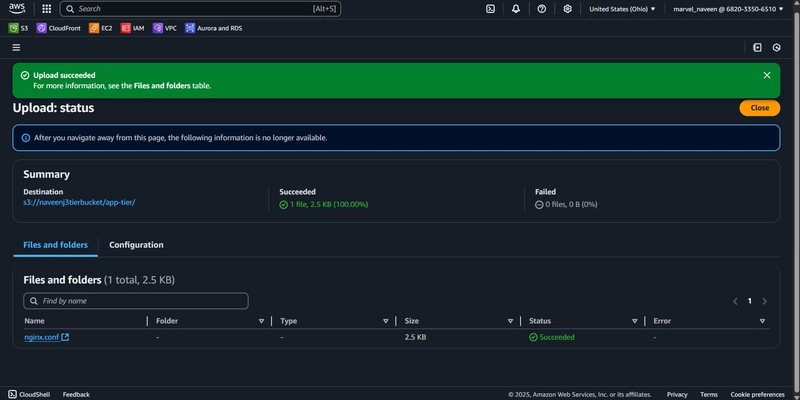
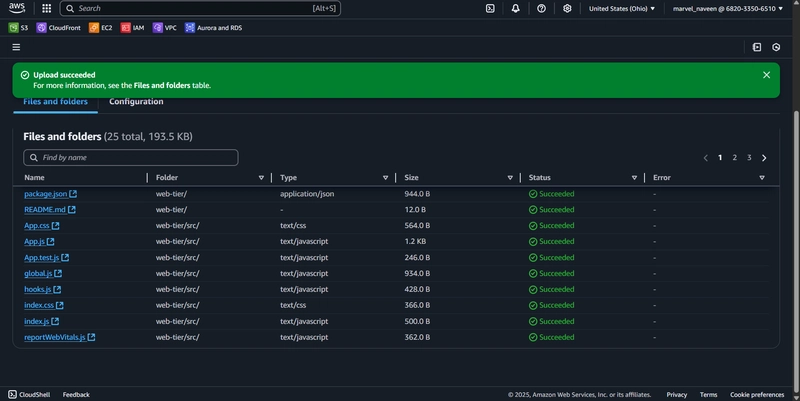
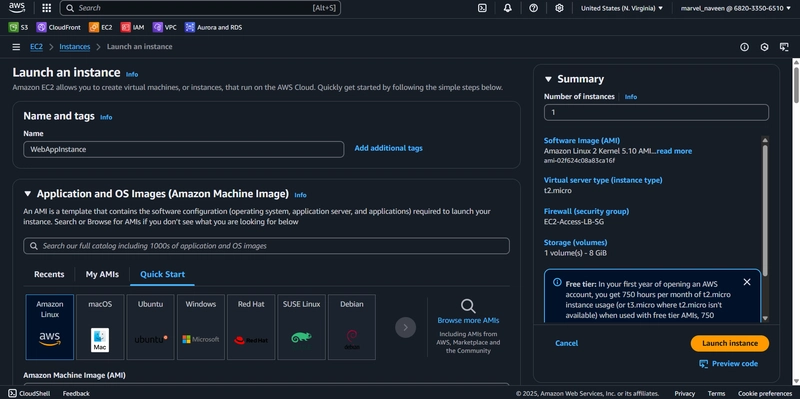
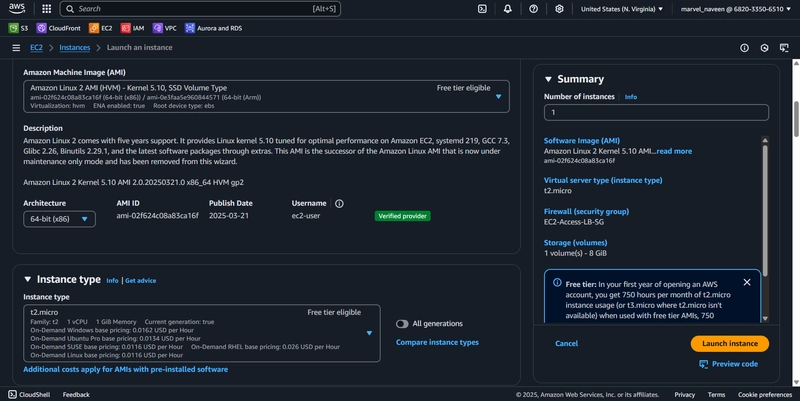
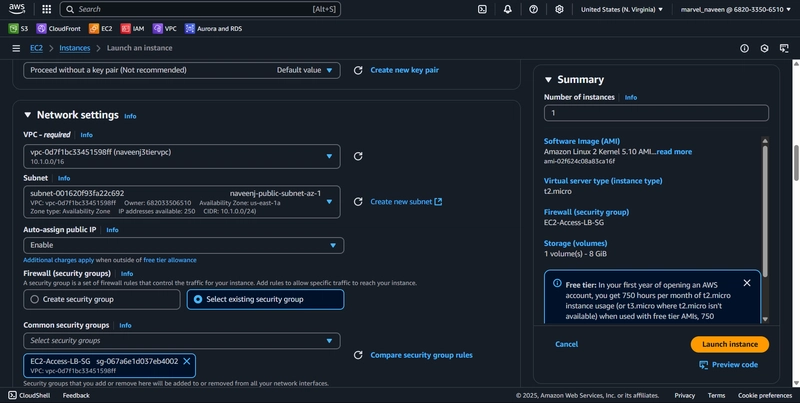
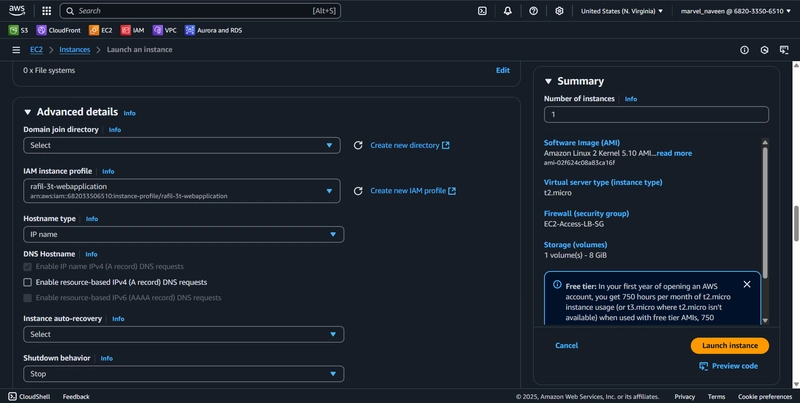
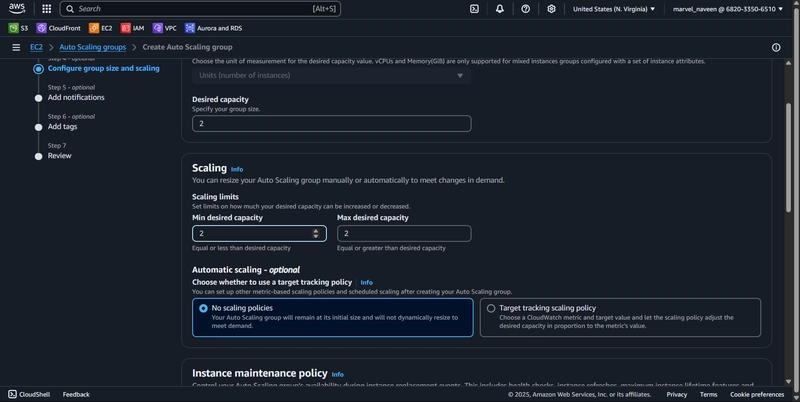
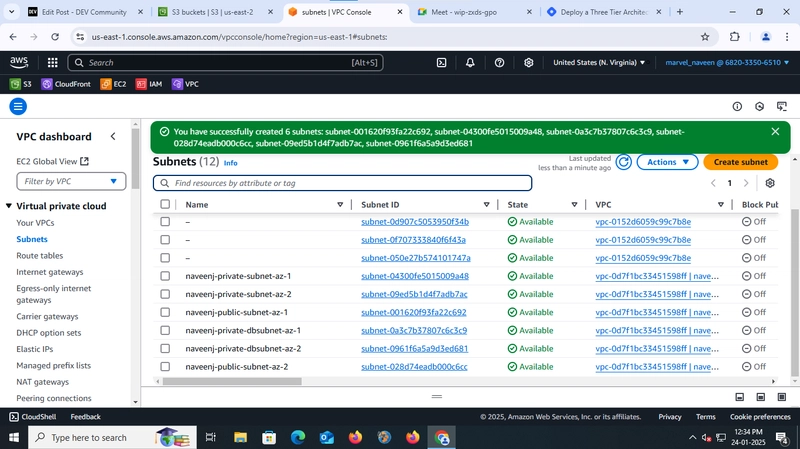
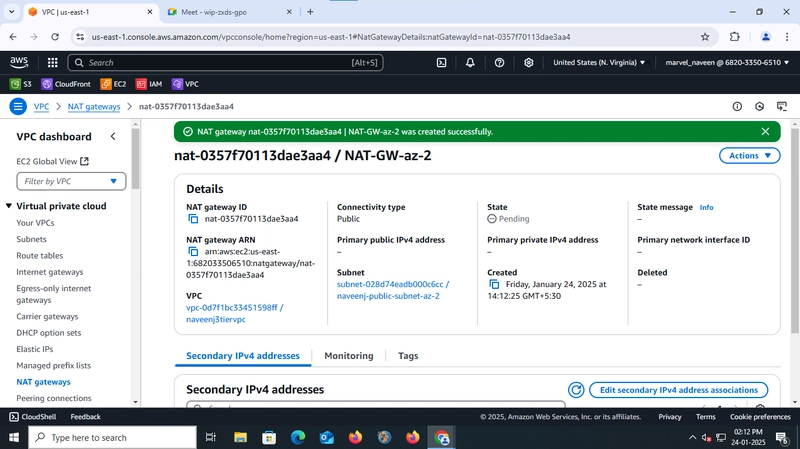
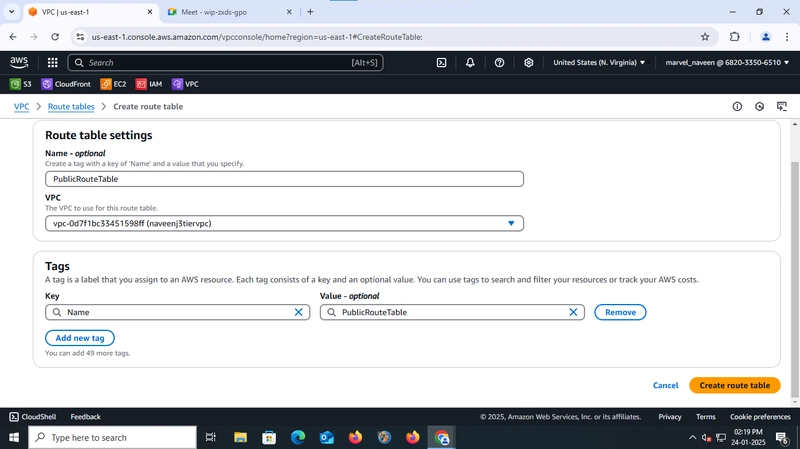
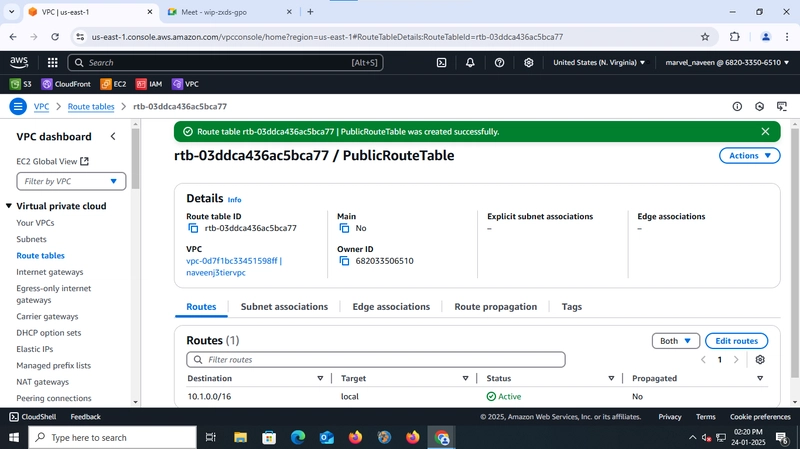
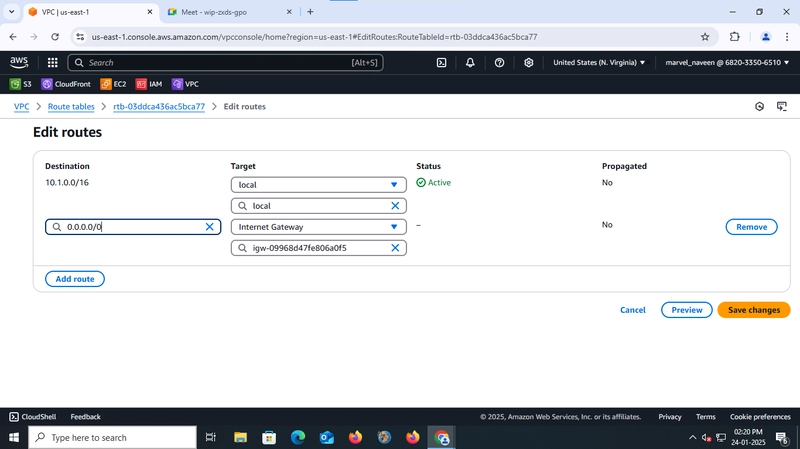
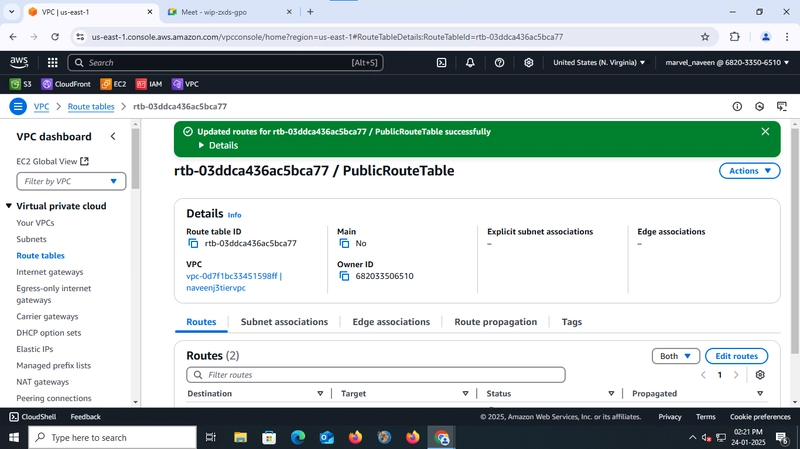
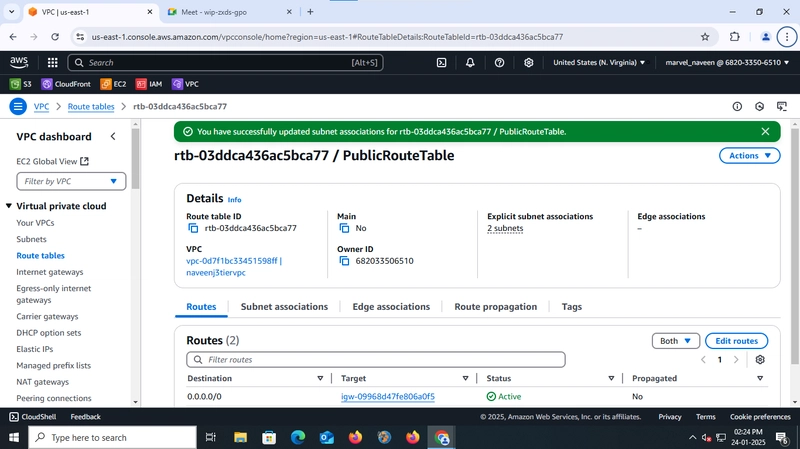
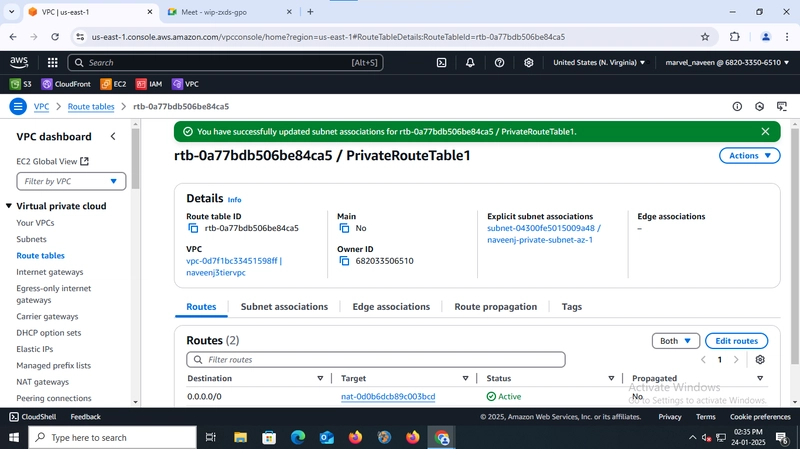
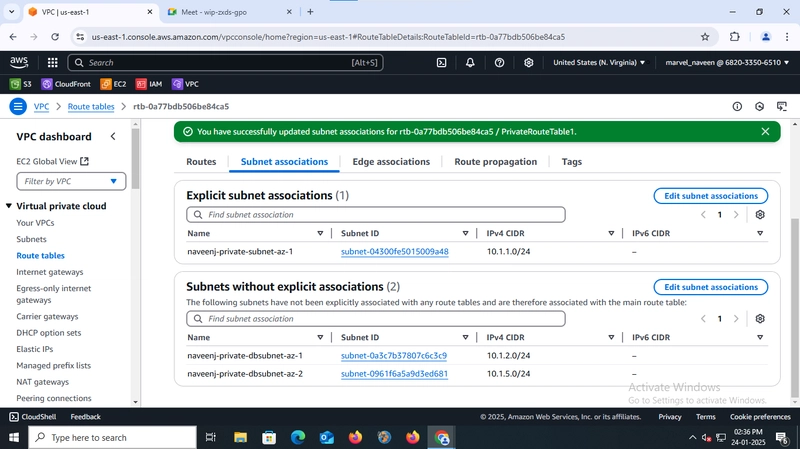
Part I: (1) Download code from github (2) Create S3 bucket (3) IAM Role creation (4) Create VPC (5) Create Subnets - 6 (6) Create IG - 1 (7) Create NAT GW - 2 (8) Create Route Tables (public sn, private sn - 2, private db - 2) (9) Create Security Groups (Internet-1, Web tier-1, Internal-1, App tier-1, DB-1) (10) Create Database (11) Create App tier (instance) I. connect app tier instance in session manager II. follow the commands: (i) sudo -su ec2-user (ii) ping 8.8.8.8 (iii) sudo yum install mysql -y (iv) mysql -h (CHANGE-TO-YOUR-RDS-ENDPOINT) -u (CHANGE-TO-USER-NAME) -p (v) (TYPE DB PASSWORD) III. type the SQL commands: (i) CREATE DATABASE webappdb; (ii) SHOW DATABASES; (iii) USE webappdb; (iv) CREATE TABLE IF NOT EXISTS transactions(id INT NOT NULL AUTO_INCREMENT, amount DECIMAL(10,2), description VARCHAR(100), PRIMARY KEY(id)); (v) SHOW TABLES; (vi) INSERT INTO transactions (amount,description) VALUES ('400','groceries'); (vii) SELECT * FROM transactions; IV. type 'exit' to exit from MySQL client (12) modify the 'DBconfig.js' file in the app tier folder and upload the app tier folder to s3 (13) Back to the SSM, follow the commands: curl -o- https://raw.githubusercontent.com/nvm-sh/nvm/v0.38.0/install.sh | bash source ~/.bashrc nvm install 16 nvm use 16 npm install -g pm2 cd ~/ aws s3 cp s3://BUCKET_NAME/app-tier/ app-tier --recursive cd ~/app-tier npm install pm2 start index.js pm2 list pm2 logs pm2 startup pm2 save curl http://localhost:4000/health curl http://localhost:4000/transaction (14) Create AMI for the App tier instance (15) Create Target Group (16) Create Load Balancer for App tier (17) Launch Templates (18) Create Auto Scaling Group (19) update the ngnix file and upload it along with the WebApp to S3 (20) create an instance for WebApp (21) connect the instance to SSM (22) Create AMI for the Web tier instance (23) Create Target Group (24) Create Load Balancer for Web tier (25) Launch Templates (26) Create Auto Scaling Group (i) Subnet Assocoations -> Edit subnet associations -> select public subnets (ii) Subnet Assocoations -> Edit subnet associations -> select private subnets (iii) Internet SG
Part I:
(1) Download code from github
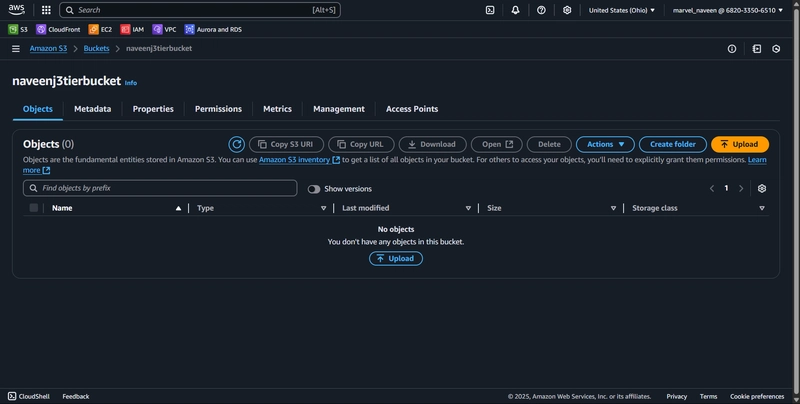
(2) Create S3 bucket
(3) IAM Role creation
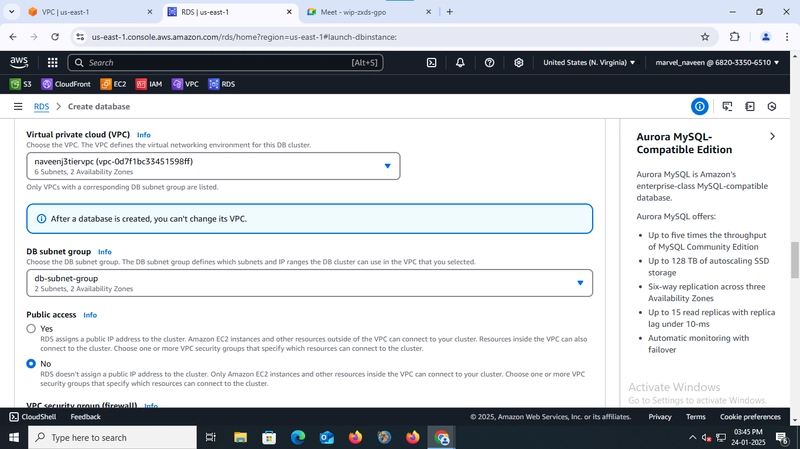
(4) Create VPC
(5) Create Subnets - 6
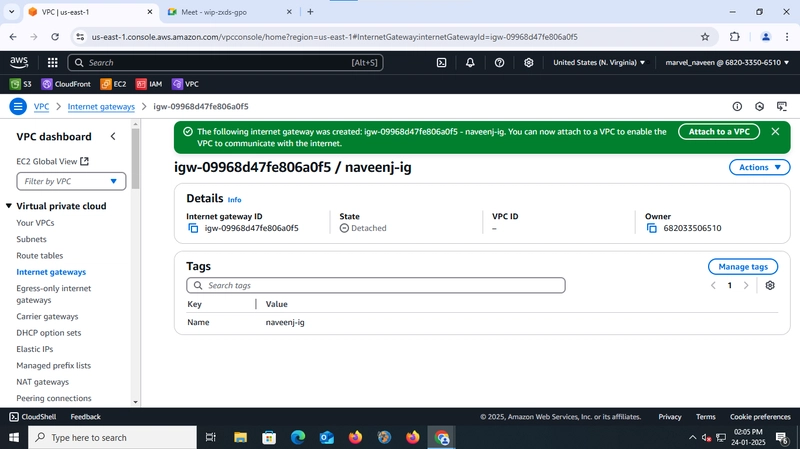
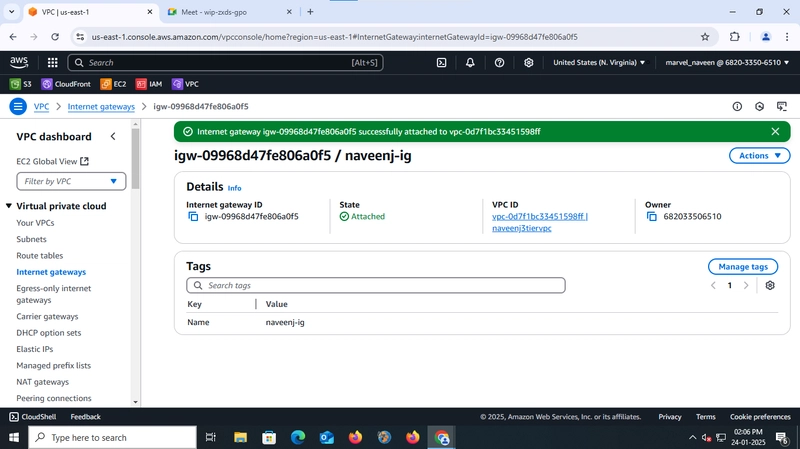
(6) Create IG - 1
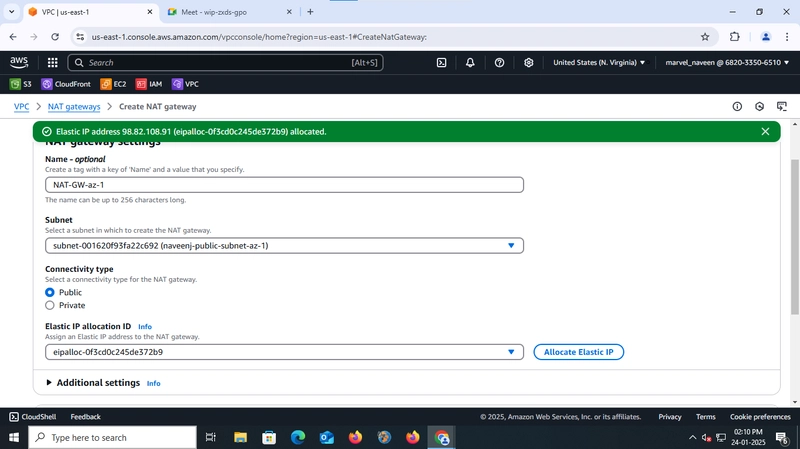
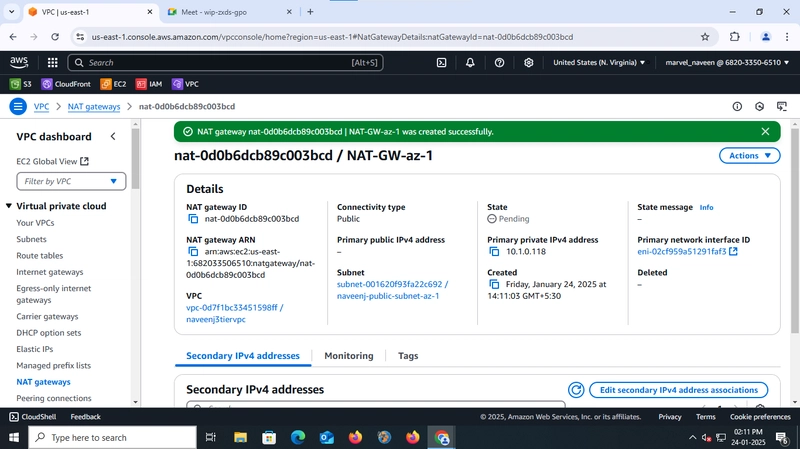
(7) Create NAT GW - 2
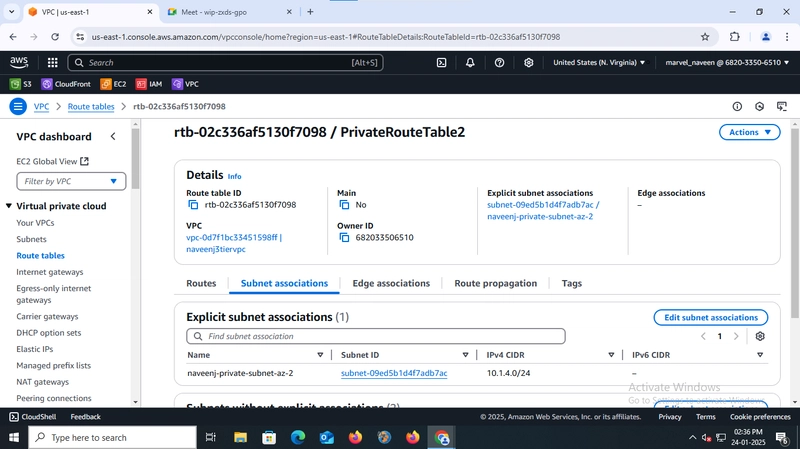
(8) Create Route Tables (public sn, private sn - 2, private db - 2)
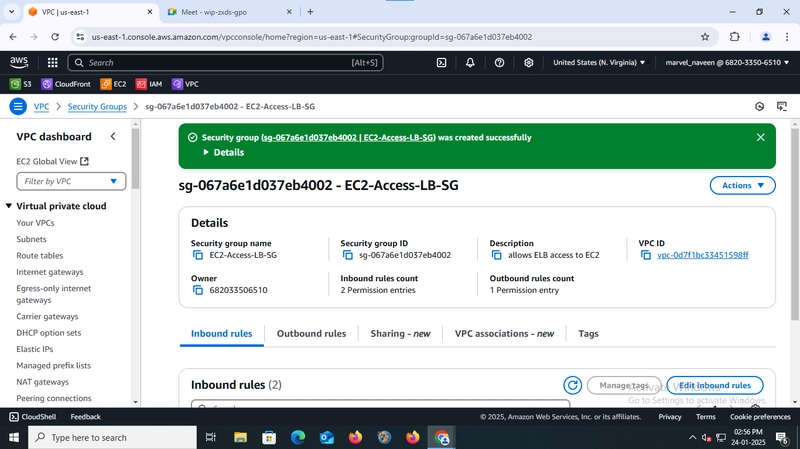
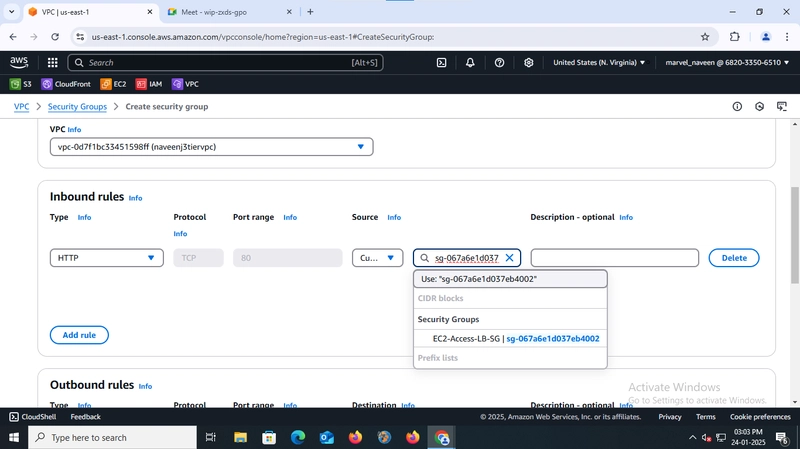
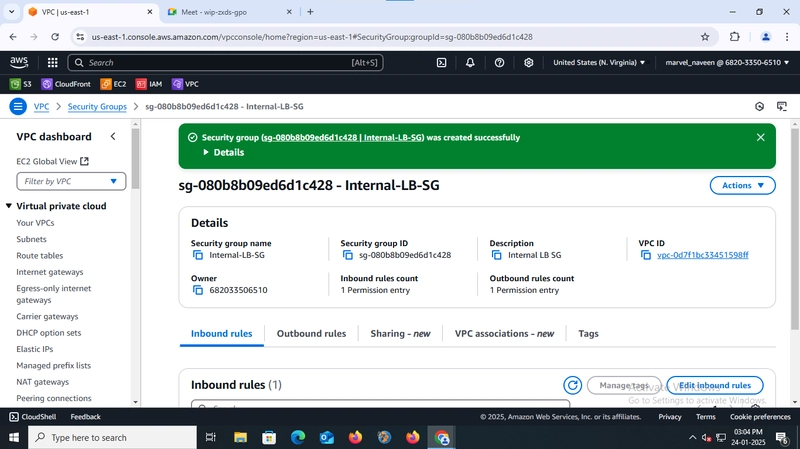
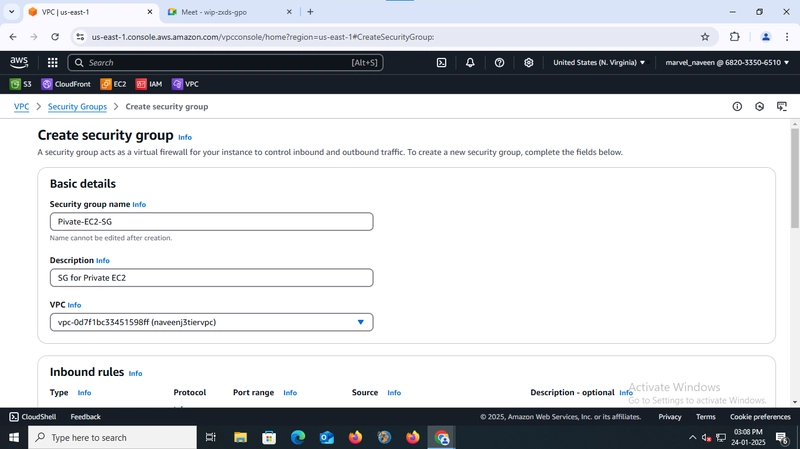
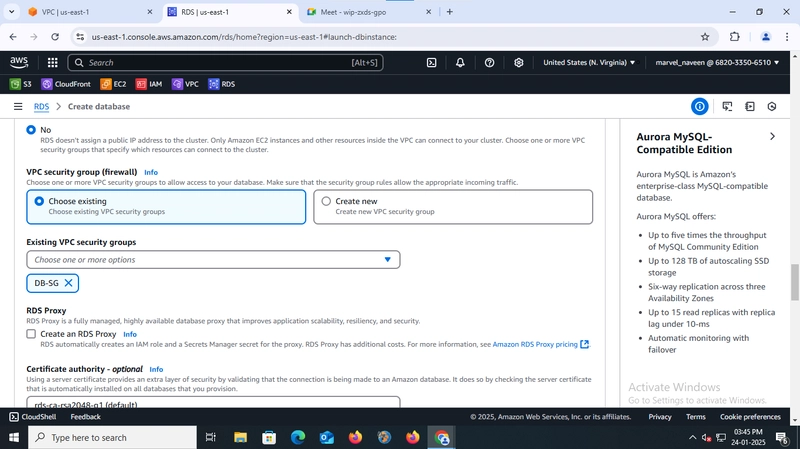
(9) Create Security Groups (Internet-1, Web tier-1, Internal-1, App tier-1, DB-1)
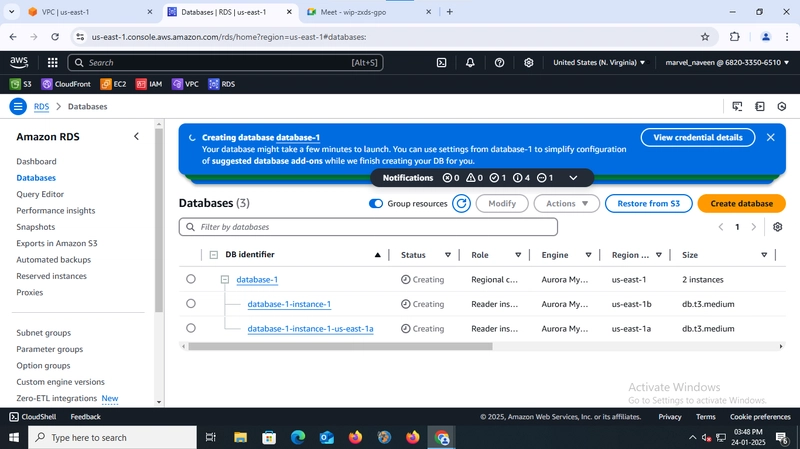
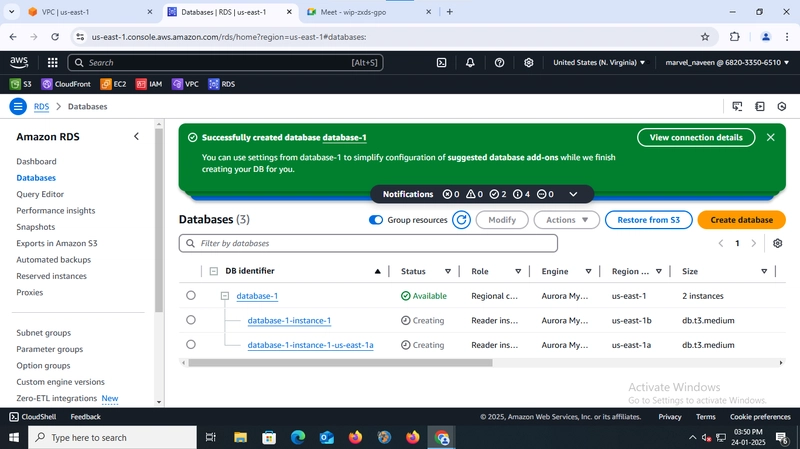
(10) Create Database
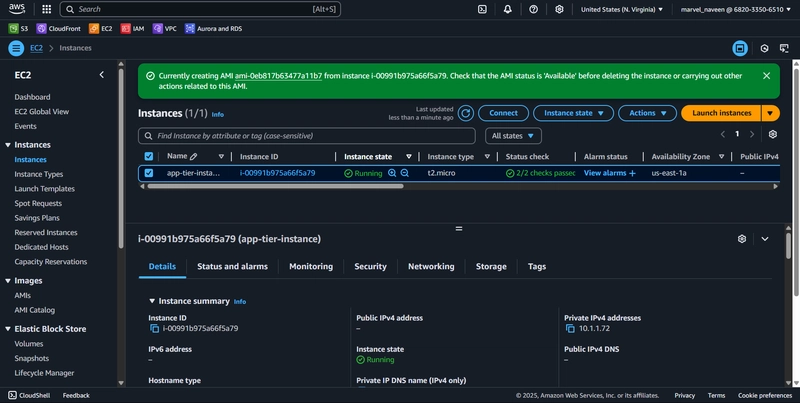
(11) Create App tier (instance)
I. connect app tier instance in session manager
II. follow the commands:
(i) sudo -su ec2-user
(ii) ping 8.8.8.8
(iii) sudo yum install mysql -y
(iv) mysql -h (CHANGE-TO-YOUR-RDS-ENDPOINT) -u (CHANGE-TO-USER-NAME) -p
(v) (TYPE DB PASSWORD)
III. type the SQL commands:
(i) CREATE DATABASE webappdb;
(ii) SHOW DATABASES;
(iii) USE webappdb;
(iv) CREATE TABLE IF NOT EXISTS transactions(id INT NOT NULL
AUTO_INCREMENT, amount DECIMAL(10,2), description
VARCHAR(100), PRIMARY KEY(id));
(v) SHOW TABLES;
(vi) INSERT INTO transactions (amount,description) VALUES
('400','groceries');
(vii) SELECT * FROM transactions;
IV. type 'exit' to exit from MySQL client
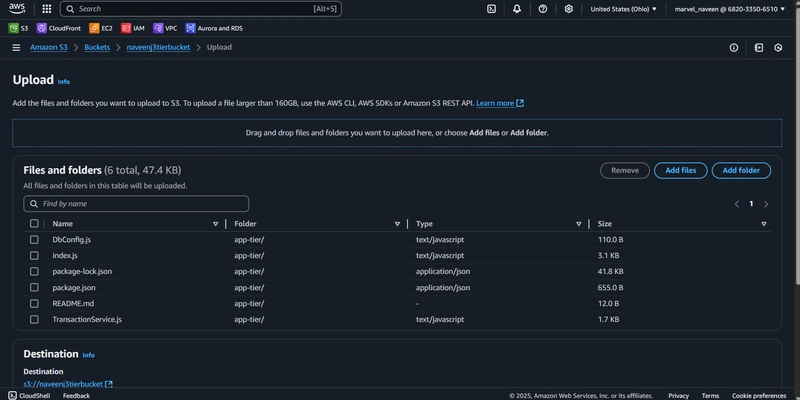
(12) modify the 'DBconfig.js' file in the app tier folder and upload the app tier folder to s3
(13) Back to the SSM, follow the commands:
curl -o- https://raw.githubusercontent.com/nvm-sh/nvm/v0.38.0/install.sh | bash
source ~/.bashrcnvm install 16
nvm use 16npm install -g pm2
cd ~/
aws s3 cp s3://BUCKET_NAME/app-tier/ app-tier --recursivecd ~/app-tier
npm install
pm2 start index.jspm2 list
pm2 logs
pm2 startup
pm2 save
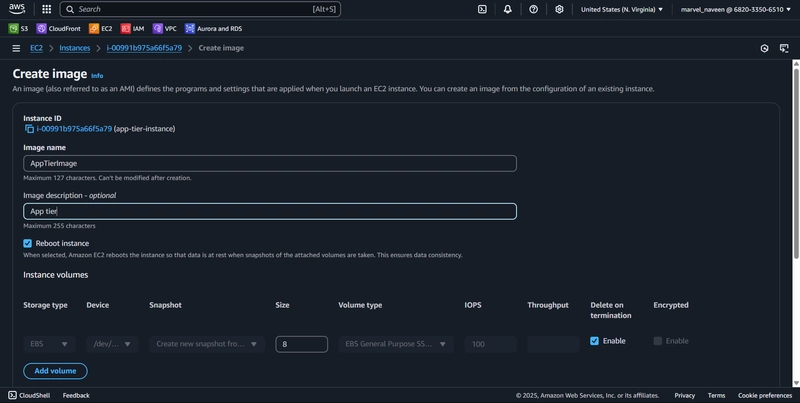
(14) Create AMI for the App tier instance
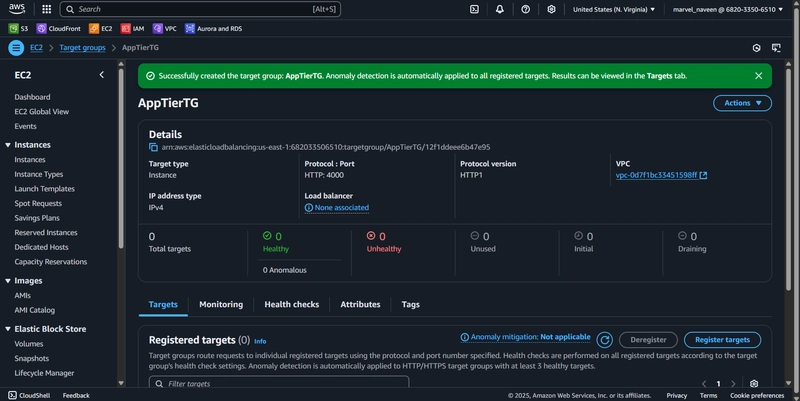
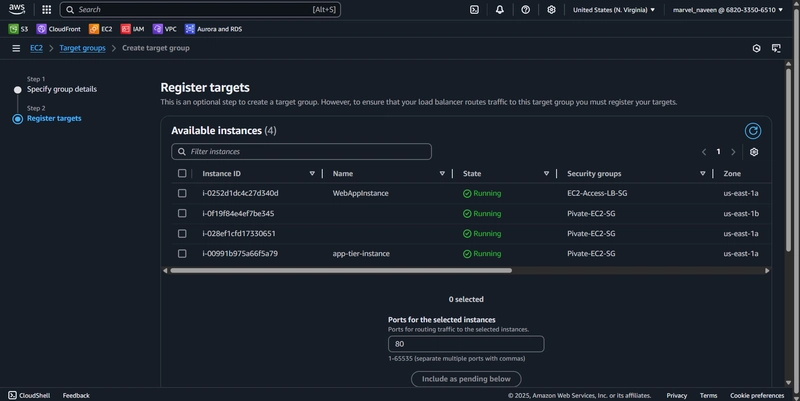
(15) Create Target Group
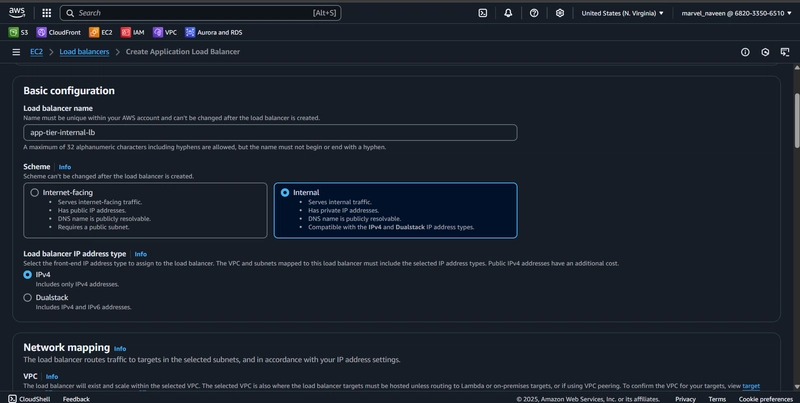
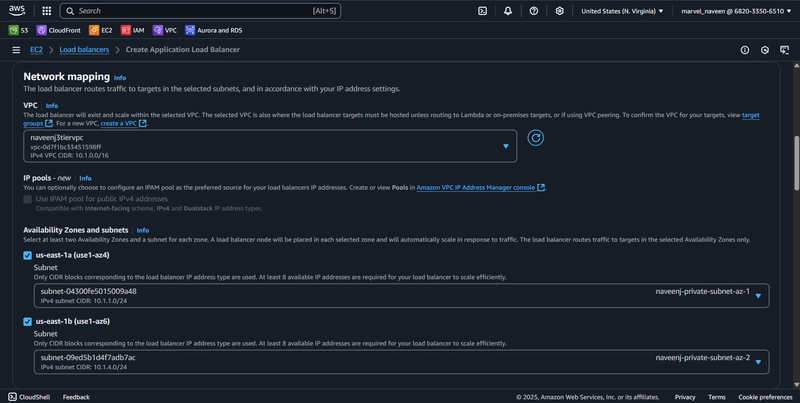
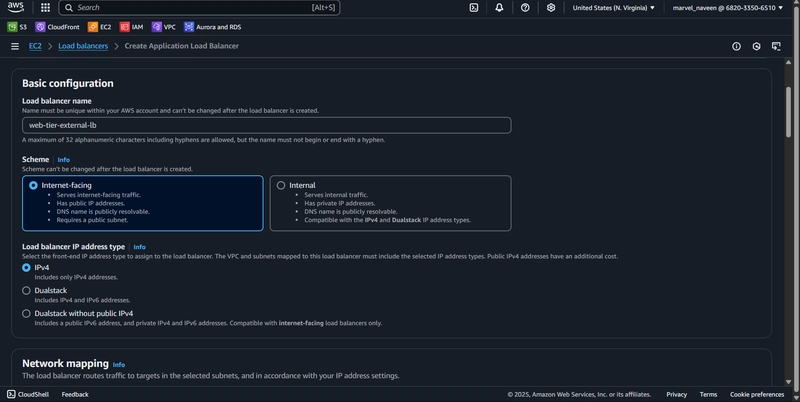
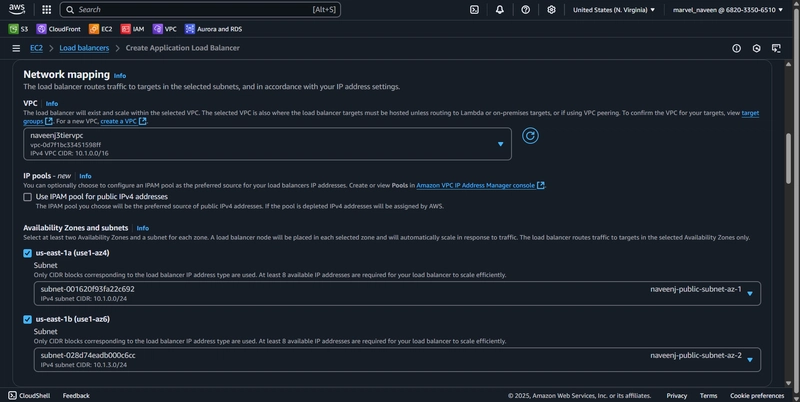
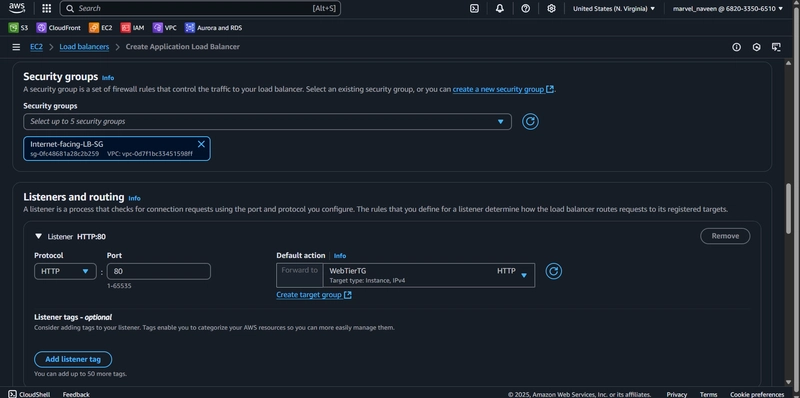
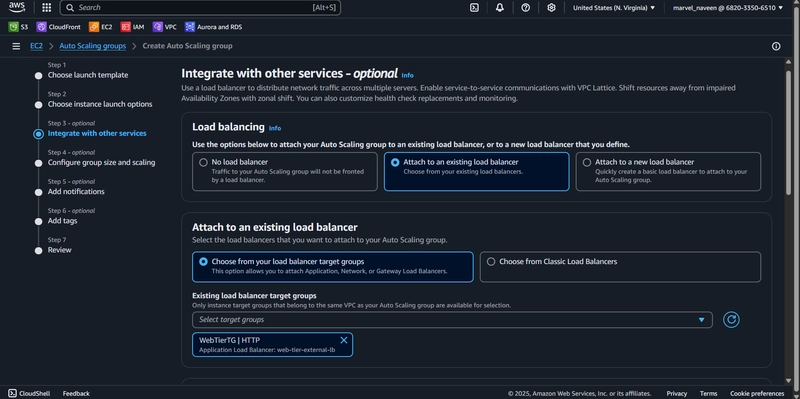
(16) Create Load Balancer for App tier
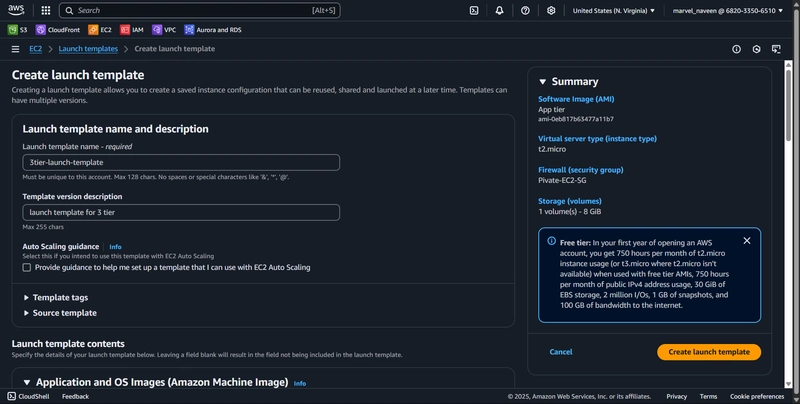
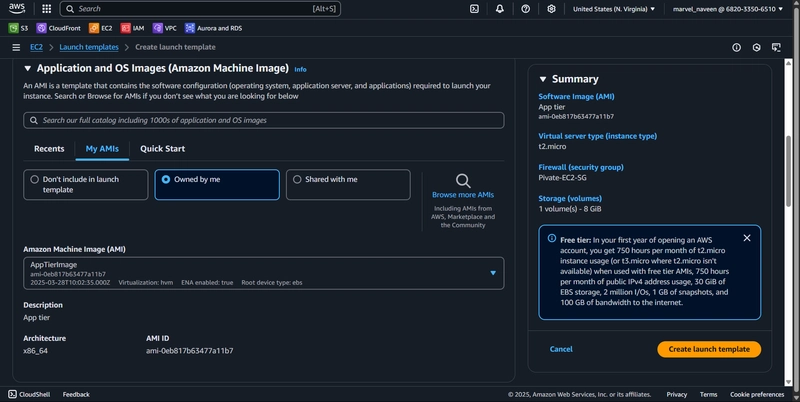
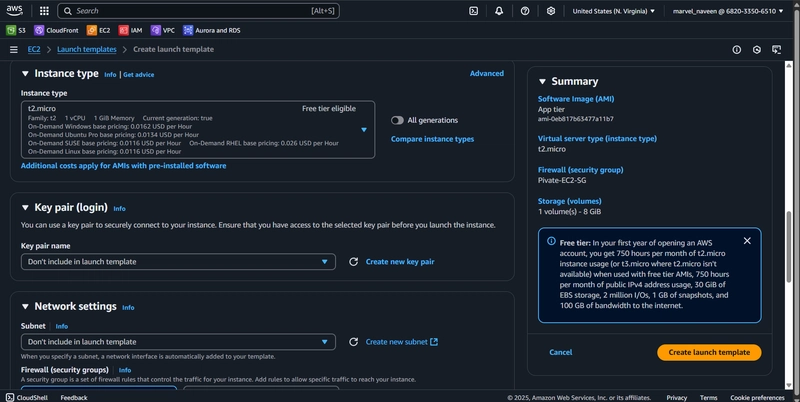
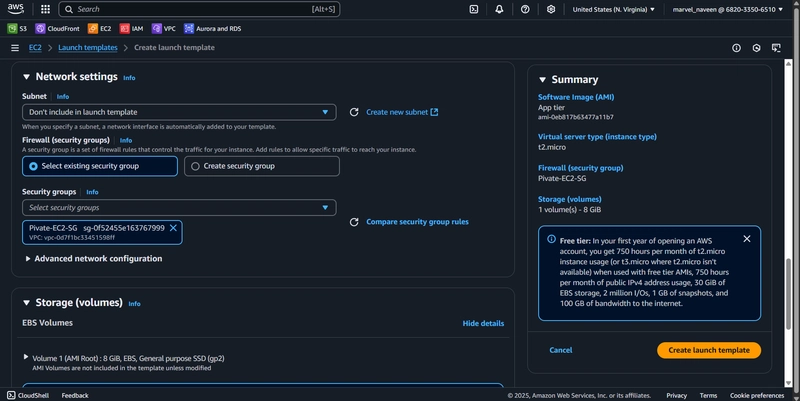
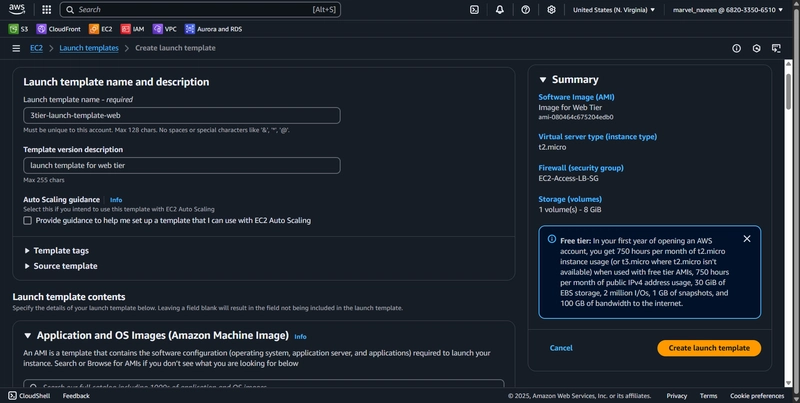
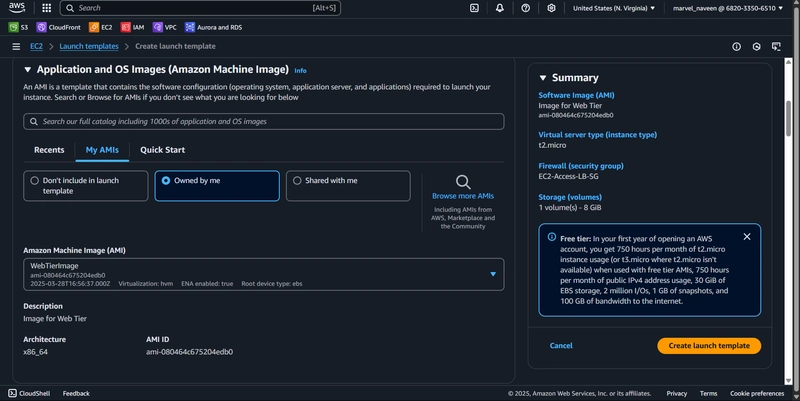
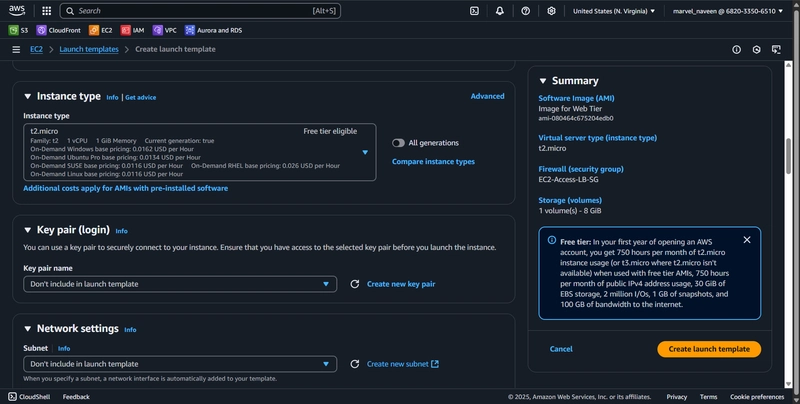
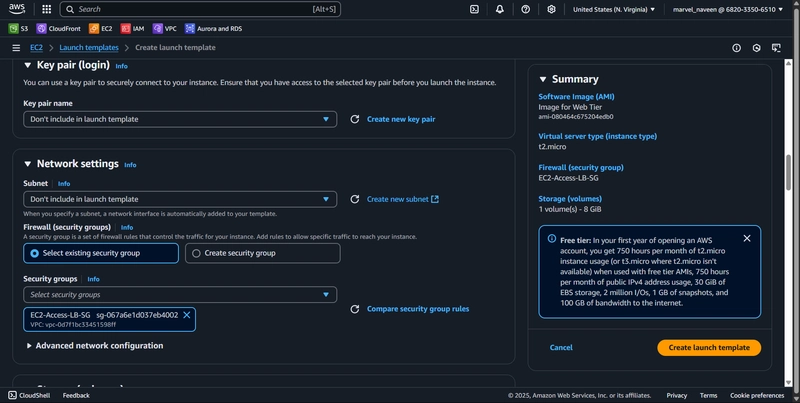
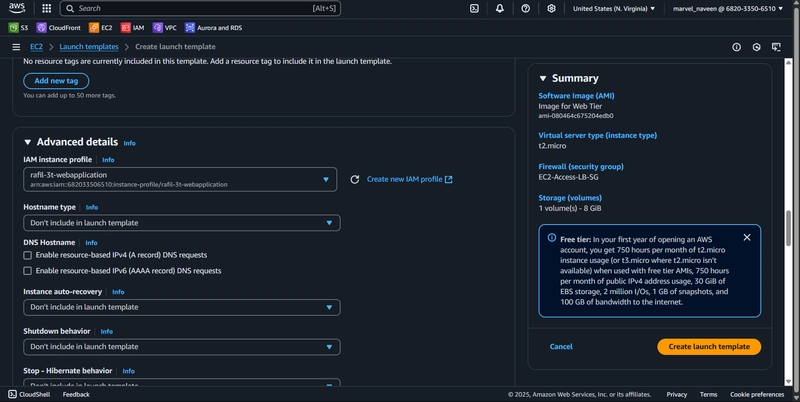
(17) Launch Templates
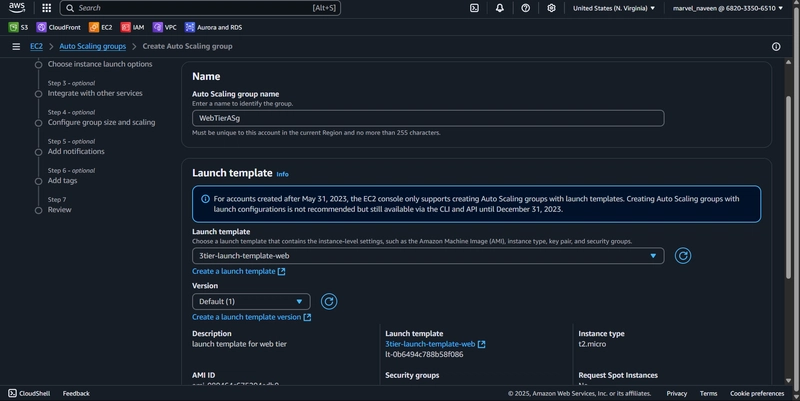
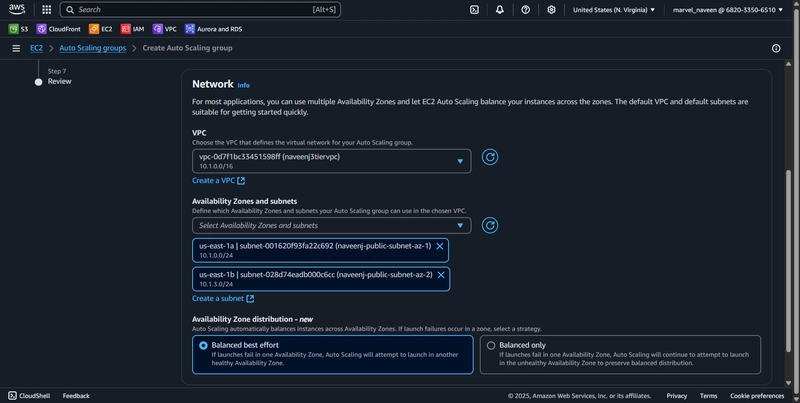
(18) Create Auto Scaling Group
(19) update the ngnix file and upload it along with the WebApp to S3
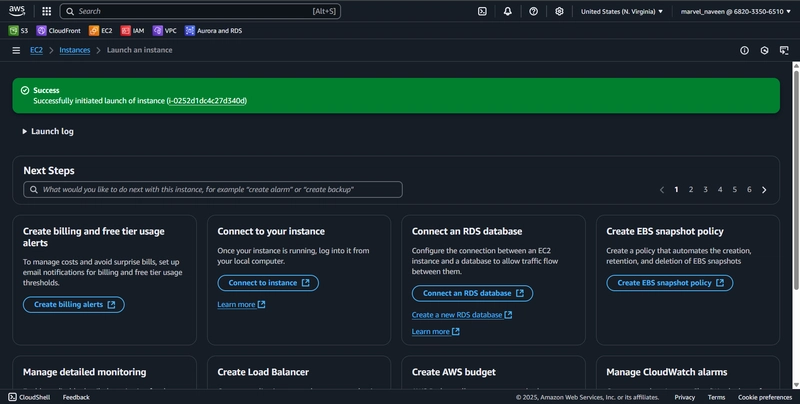
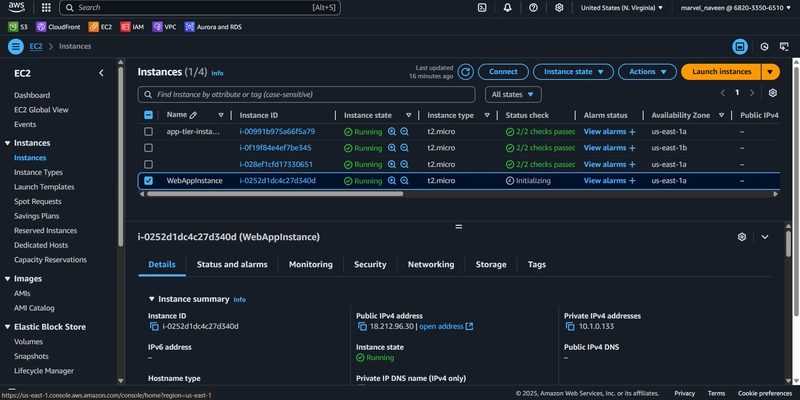
(20) create an instance for WebApp
(21) connect the instance to SSM
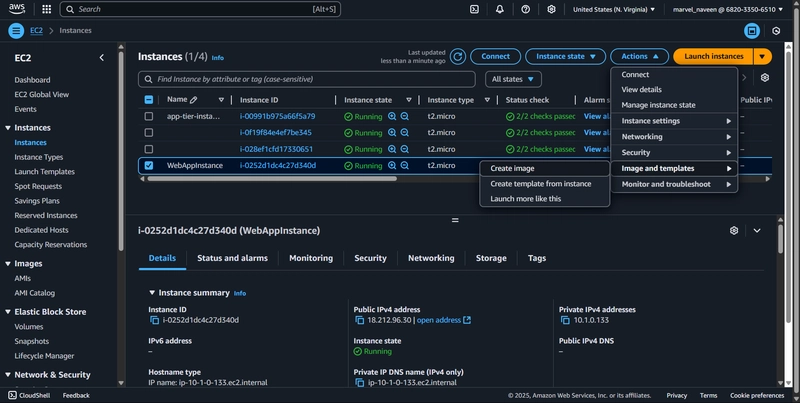
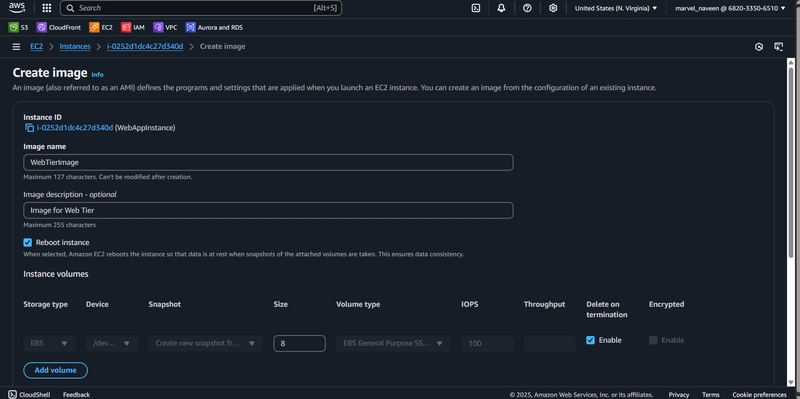
(22) Create AMI for the Web tier instance
(23) Create Target Group
(24) Create Load Balancer for Web tier
(25) Launch Templates
(26) Create Auto Scaling Group

(i) Subnet Assocoations -> Edit subnet associations -> select public subnets
(ii) Subnet Assocoations -> Edit subnet associations -> select private subnets

(iii) Internet SG