


![[The AI Show Episode 144]: ChatGPT’s New Memory, Shopify CEO’s Leaked “AI First” Memo, Google Cloud Next Releases, o3 and o4-mini Coming Soon & Llama 4’s Rocky Launch](https://www.marketingaiinstitute.com/hubfs/ep%20144%20cover.png)


![Is this too much for a modular monolith system? [closed]](https://i.sstatic.net/pYL1nsfg.png)


_Andreas_Prott_Alamy.jpg?width=1280&auto=webp&quality=80&disable=upscale#)


![What features do you get with Gemini Advanced? [April 2025]](https://i0.wp.com/9to5google.com/wp-content/uploads/sites/4/2024/02/gemini-advanced-cover.jpg?resize=1200%2C628&quality=82&strip=all&ssl=1)


![Apple Shares Official Trailer for 'Long Way Home' Starring Ewan McGregor and Charley Boorman [Video]](https://www.iclarified.com/images/news/97069/97069/97069-640.jpg)
![Apple Watch Series 10 Back On Sale for $299! [Lowest Price Ever]](https://www.iclarified.com/images/news/96657/96657/96657-640.jpg)
![EU Postpones Apple App Store Fines Amid Tariff Negotiations [Report]](https://www.iclarified.com/images/news/97068/97068/97068-640.jpg)
![Apple Slips to Fifth in China's Smartphone Market with 9% Decline [Report]](https://www.iclarified.com/images/news/97065/97065/97065-640.jpg)


Create a static website using Amazon S3
✅ Step 1: Prepare Your Website Files First, I created a simple HTML file called myself.html containing my resume and personal information. It can include HTML, CSS, and JavaScript — no backend code is needed since it’s a static website. ✅ Step 2: Create an S3 Bucket Log in to the AWS Console. Go to S3 under Services. Click Create bucket. Choose a globally unique name. Uncheck “Block all public access”. Enable ACLs and acknowledge the warning. Click Create bucket. ✅ Step 3: Upload Your HTML File Open your bucket. Click Upload → Add your index.html. Click Upload. ✅ Step 4: Set File Permissions Select the uploaded file. Click Actions > Make public. This step is important so your file is visible to the public through the website URL. ✅ Step 5: Enable Static Website Hosting Go to the Properties tab of your bucket. Scroll to Static website hosting and click Edit. Choose Enable. Set the Index document: If your file is named index.html, enter: index.html Save changes. ✅ Step 6: Add a Bucket Policy (If Access Denied) If you're getting an "Access Denied" error: Go to the Permissions tab. Scroll to Bucket Policy, click Edit. Paste this policy (replace YOUR-BUCKET-NAME): json Copy Edit { "Version": "2012-10-17", "Statement": [ { "Sid": "PublicReadGetObject", "Effect": "Allow", "Principal": "", "Action": "s3:GetObject", "Resource": "arn:aws:s3:::YOUR-BUCKET-NAME/" } ] } Click Save changes. ✅ Step 7: View Your Website!
✅ Step 1: Prepare Your Website Files
- First, I created a simple HTML file called myself.html containing my resume and personal information.
- It can include HTML, CSS, and JavaScript — no backend code is needed since it’s a static website.
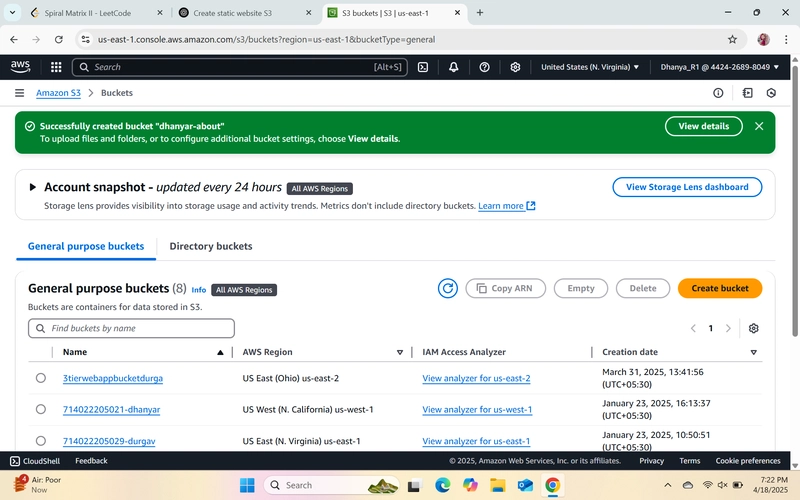
✅ Step 2: Create an S3 Bucket
- Log in to the AWS Console.
- Go to S3 under Services.
- Click Create bucket.
- Choose a globally unique name.
- Uncheck “Block all public access”.
- Enable ACLs and acknowledge the warning.
- Click Create bucket.
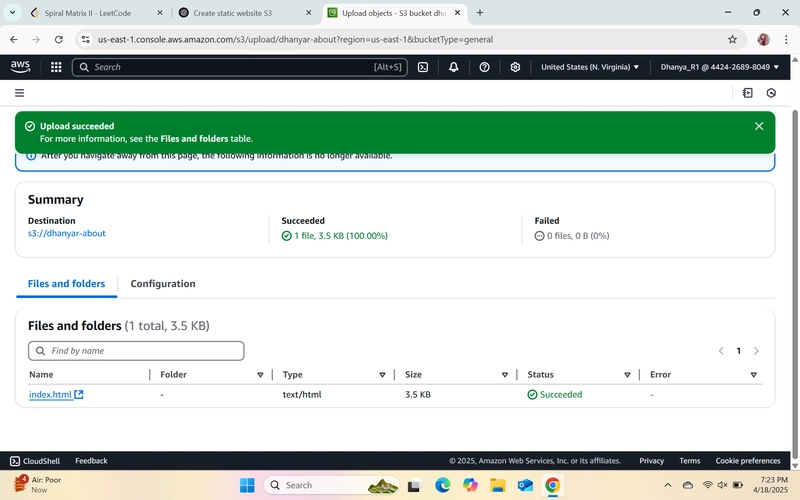
✅ Step 3: Upload Your HTML File
- Open your bucket.
- Click Upload → Add your index.html.
- Click Upload.
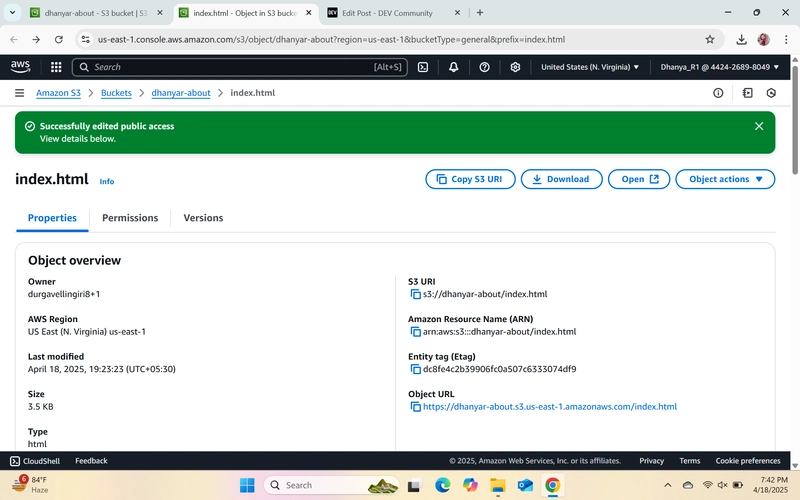
✅ Step 4: Set File Permissions
- Select the uploaded file.
- Click Actions > Make public.
- This step is important so your file is visible to the public through the website URL.
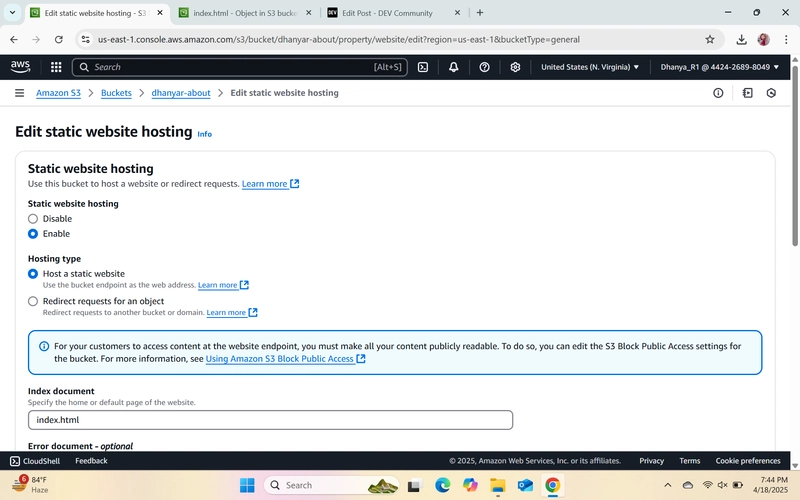
✅ Step 5: Enable Static Website Hosting
- Go to the Properties tab of your bucket.
- Scroll to Static website hosting and click Edit.
- Choose Enable.
- Set the Index document:
- If your file is named index.html, enter: index.html
- Save changes.
✅ Step 6: Add a Bucket Policy (If Access Denied)
- If you're getting an "Access Denied" error:
- Go to the Permissions tab.
- Scroll to Bucket Policy, click Edit.
- Paste this policy (replace YOUR-BUCKET-NAME):
- json
- Copy
- Edit
{
"Version": "2012-10-17",
"Statement": [
{
"Sid": "PublicReadGetObject",
"Effect": "Allow",
"Principal": "",
"Action": "s3:GetObject",
"Resource": "arn:aws:s3:::YOUR-BUCKET-NAME/"
}
]
}
- Click Save changes.
✅ Step 7: View Your Website!