Building My first React Web Application – A Developer's Journey
Step 1: Choosing the Right Tech Stack Before starting, I decided to use React for its component-based architecture and efficient rendering. Along with React, I used: ✅ Vite for a fast development setup ✅ Tailwind CSS for styling ✅ other libraries/frameworks like Redux, Step 2: Setting Up the Project I initialized my project using Vite: sh npm create vite@latest paste-app cd paste-app npm install npm run dev This gave me a blazing-fast dev server with hot reloading. Step 3: Creating the Core Components I structured my app into reusable components like: Navbar.jsx – Navigation bar Home.jsx – Main page content Past.x.jsx – Bottom section with links Viewpaste.jsx – for view paste notes and documents Step 4: Managing State with Hooks To handle app state, I used useState and useEffect: jsx const [data, setData] = useState([]); useEffect(() => { fetchData(); }, []); const fetchData = async () => { const response = await fetch("https://api.example.com/data"); const result = await response.json(); setData(result); }; This helped me fetch and display dynamic content. Step 5: Adding Routing with React Router I set up navigation using react-router-dom: sh npm install react-router-dom Then, I created routes in App.jsx: jsx import { BrowserRouter as Router, Route, Routes } from "react-router-dom"; import Home from "./Home"; import Navbar from "./Navbar"; function App() { return ( ); } export default App; This made my app a multi-page experience without reloading. Step 6: Styling the UI I used Tailwind CSS for quick styling: terminal npm install tailwindcss @tailwindcss/vite vite.config.ts import { defineConfig } from 'vite' import tailwindcss from '@tailwindcss/vite' export default defineConfig({ plugins: [ tailwindcss(), ], }) Import tailwind in CSS file @import "tailwindcss"; Then, npm run dev Then, added styles like this: jsx settitle(e.target.value)} /> { pasteId ? "update my paste" : "create my paste" } This kept my styling clean and maintainable. Step 7: Deploying the App Once I was happy with my app, I deployed it on Vercel: sh npm run build vercel deploy Now, my app is live and accessible online!
Step 1: Choosing the Right Tech Stack
Before starting, I decided to use React for its component-based architecture and efficient rendering. Along with React, I used:
✅ Vite for a fast development setup
✅ Tailwind CSS for styling
✅ other libraries/frameworks like Redux,
Step 2: Setting Up the Project
I initialized my project using Vite:
sh

npm create vite@latest paste-app
cd paste-app
npm install
npm run dev
This gave me a blazing-fast dev server with hot reloading.
Step 3: Creating the Core Components
I structured my app into reusable components like:
- Navbar.jsx – Navigation bar
- Home.jsx – Main page content
- Past.x.jsx – Bottom section with links
- Viewpaste.jsx – for view paste notes and documents
Step 4: Managing State with Hooks
To handle app state, I used useState and useEffect:
jsx
const [data, setData] = useState([]);

useEffect(() => {
  fetchData();
}, []);

const fetchData = async () => {
  const response = await fetch("https://api.example.com/data");
  const result = await response.json();
  setData(result);
};
This helped me fetch and display dynamic content.
Step 5: Adding Routing with React Router
I set up navigation using react-router-dom:
sh

npm install react-router-dom
Then, I created routes in App.jsx:
jsx
import { BrowserRouter as Router, Route, Routes } from "react-router-dom";
import Home from "./Home";
import Navbar from "./Navbar";
function App() {
return (
);
}
export default App;
This made my app a multi-page experience without reloading.
Step 6: Styling the UI
I used Tailwind CSS for quick styling:
terminal
npm install tailwindcss @tailwindcss/vite
vite.config.ts
import { defineConfig } from 'vite'
import tailwindcss from '@tailwindcss/vite'
export default defineConfig({
  plugins: [
    tailwindcss(),
  ],
})
Import tailwind in CSS file
@import "tailwindcss";
Then,
npm run dev
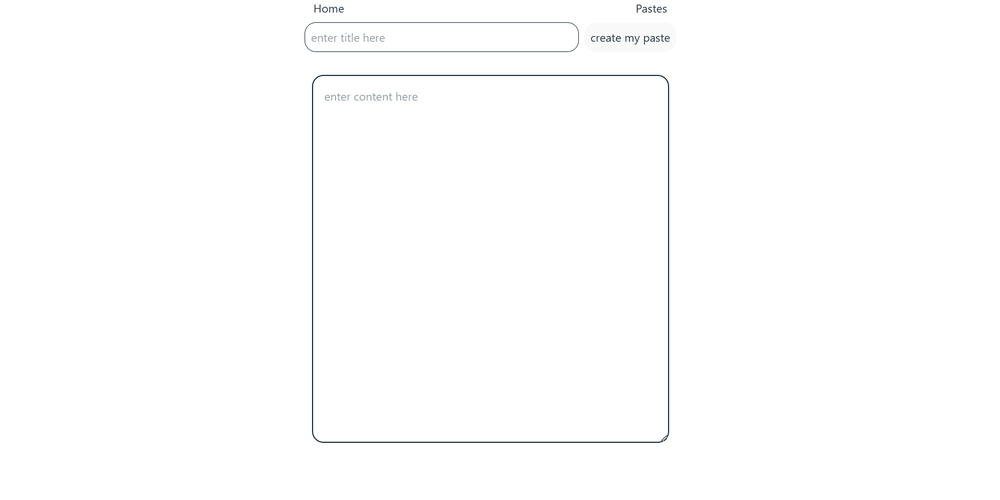
Then, added styles like this:
jsx
settitle(e.target.value)} />
This kept my styling clean and maintainable.
Step 7: Deploying the App
Once I was happy with my app, I deployed it on Vercel:
sh

npm run build
vercel deploy
Now, my app is live and accessible online!


![[The AI Show Episode 142]: ChatGPT’s New Image Generator, Studio Ghibli Craze and Backlash, Gemini 2.5, OpenAI Academy, 4o Updates, Vibe Marketing & xAI Acquires X](https://www.marketingaiinstitute.com/hubfs/ep%20142%20cover.png)




![[FREE EBOOKS] The Kubernetes Bible, The Ultimate Linux Shell Scripting Guide & Four More Best Selling Titles](https://www.javacodegeeks.com/wp-content/uploads/2012/12/jcg-logo.jpg)


![From drop-out to software architect with Jason Lengstorf [Podcast #167]](https://cdn.hashnode.com/res/hashnode/image/upload/v1743796461357/f3d19cd7-e6f5-4d7c-8bfc-eb974bc8da68.png?#)


.png?#)


.jpg?#)


 (1).webp?#)


_Christophe_Coat_Alamy.jpg?#)




![Rapidus in Talks With Apple as It Accelerates Toward 2nm Chip Production [Report]](https://www.iclarified.com/images/news/96937/96937/96937-640.jpg)


