


![[Webinar] AI Is Already Inside Your SaaS Stack — Learn How to Prevent the Next Silent Breach](https://blogger.googleusercontent.com/img/b/R29vZ2xl/AVvXsEiOWn65wd33dg2uO99NrtKbpYLfcepwOLidQDMls0HXKlA91k6HURluRA4WXgJRAZldEe1VReMQZyyYt1PgnoAn5JPpILsWlXIzmrBSs_TBoyPwO7hZrWouBg2-O3mdeoeSGY-l9_bsZB7vbpKjTSvG93zNytjxgTaMPqo9iq9Z5pGa05CJOs9uXpwHFT4/s1600/ai-cyber.jpg?#)


![[The AI Show Episode 144]: ChatGPT’s New Memory, Shopify CEO’s Leaked “AI First” Memo, Google Cloud Next Releases, o3 and o4-mini Coming Soon & Llama 4’s Rocky Launch](https://www.marketingaiinstitute.com/hubfs/ep%20144%20cover.png)


![Rogue Company Elite tier list of best characters [April 2025]](https://media.pocketgamer.com/artwork/na-33136-1657102075/rogue-company-ios-android-tier-cover.jpg?#)


_Andreas_Prott_Alamy.jpg?width=1280&auto=webp&quality=80&disable=upscale#)


![What’s new in Android’s April 2025 Google System Updates [U: 4/18]](https://i0.wp.com/9to5google.com/wp-content/uploads/sites/4/2025/01/google-play-services-3.jpg?resize=1200%2C628&quality=82&strip=all&ssl=1)


![Apple Watch Series 10 Back On Sale for $299! [Lowest Price Ever]](https://www.iclarified.com/images/news/96657/96657/96657-640.jpg)
![EU Postpones Apple App Store Fines Amid Tariff Negotiations [Report]](https://www.iclarified.com/images/news/97068/97068/97068-640.jpg)
![Apple Slips to Fifth in China's Smartphone Market with 9% Decline [Report]](https://www.iclarified.com/images/news/97065/97065/97065-640.jpg)


AZURE STORAGE SERVICES/CREATING A PRIVATE STORAGE ACCOUNT
STEP 1 Go to azure portal and create storage account -Give the resource group a name -Give the storage account a name -Select region -In primary service, select 'Azure blob storage' -In performance select 'standard' -Under redundancy ' untick the ticked box' Click on 'Review and create' Deployment is in progress Deployment is complete, click on 'Go to resource' Click on 'Data management on the left pane' If you want to effect any corrections, it can be done here STEP 2 Go to 'data storage' option, then click on 'container' -click on 'create' -give it a name -click on 'create' Click on the name private Click on 'upload' -browse for a file to upload -click on 'upload' Click on the uploaded image -copy the URL and paste on a browser You will get an error message, indicating that it is not accessible, because it was made to be private in the settings option If you want the content in your container to be public, you can change the private option to public. Still on overview page, click on 'generate SAS' To give the necessary permission; read set access permission time to 24 hours allow HTTPS protocol Click on 'Generate the SAS token and URL' copy the 'sas url blob' in a browser The file/image in the container is made public STEP 3 MOVING BLOBS FROM HOT TIER TO FULL TIER- STORAGE LIFE CYCLE MANAGEMENT Click on 'saprivate123 overview page Go to data management, life cycle management Click on 'add a rule' Give the rule a name 'movetocool' -leave other features at default -click on 'next' Specify the duration and what happens to it after the stipulated time The rule has been successfully added as shown below STEP 4 **CREATE A PUBLIC CONTAINER/OBJECT REPLICATION/CREATING BACK-UPS Go to data storage select container Go to container -give it a name 'backup' -click on 'create' The backup container is created Go to 'settings' -click on configuration Go to configuration -Enable 'allow blob anonymous access' -click on save button Go to 'container' tick the 'backup' box click on change access level The back up is not made public, that's why the pulic access is not granted To make it public, enable 'blob anonymous access' in the settings tap, then configuration in the left pane. This action is to make the blob public. This means everyone can access the blob but not the container
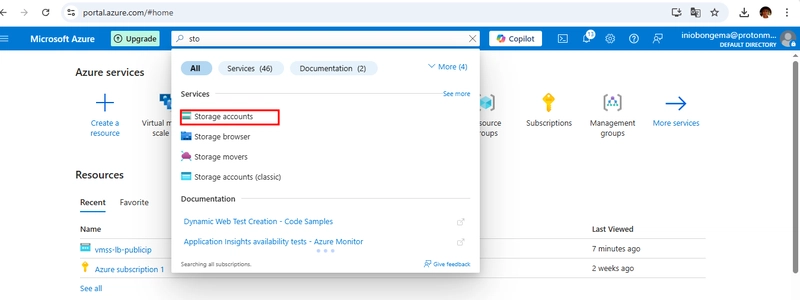
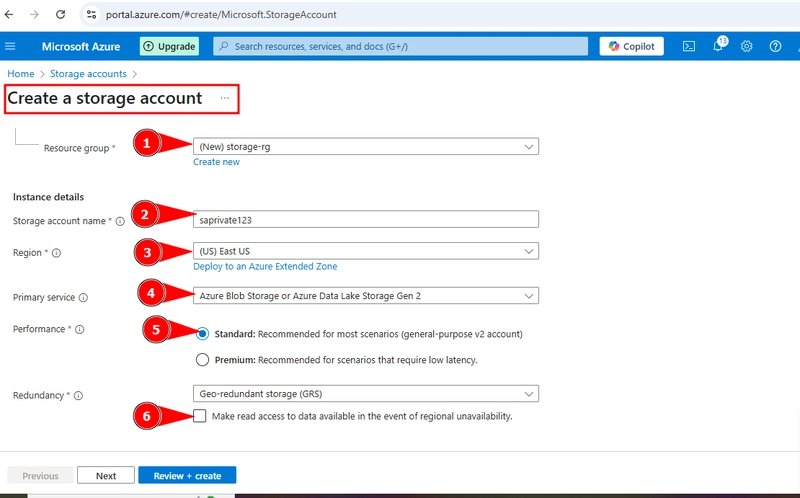
STEP 1
Go to azure portal and create storage account
-Give the resource group a name
-Give the storage account a name
-Select region
-In primary service, select 'Azure blob storage'
-In performance select 'standard'
-Under redundancy ' untick the ticked box'
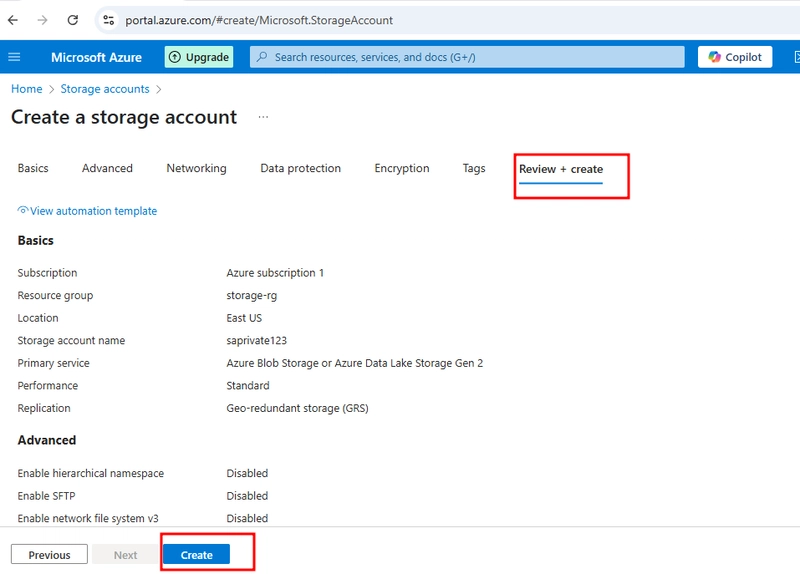
Click on 'Review and create'
Deployment is in progress
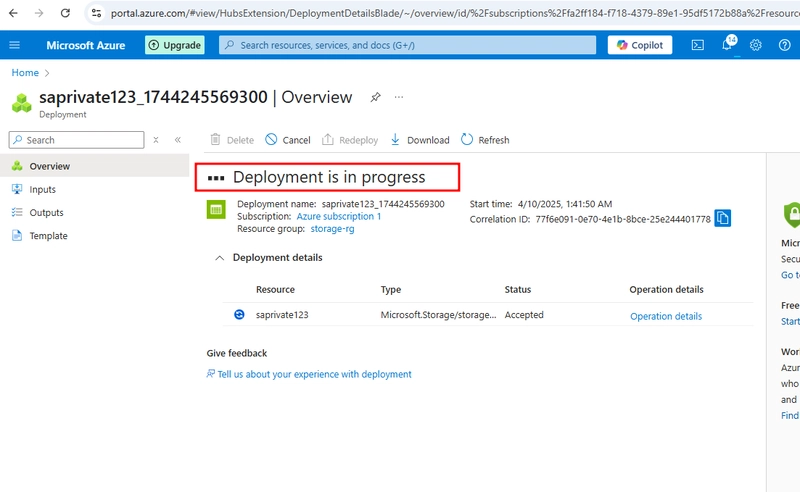
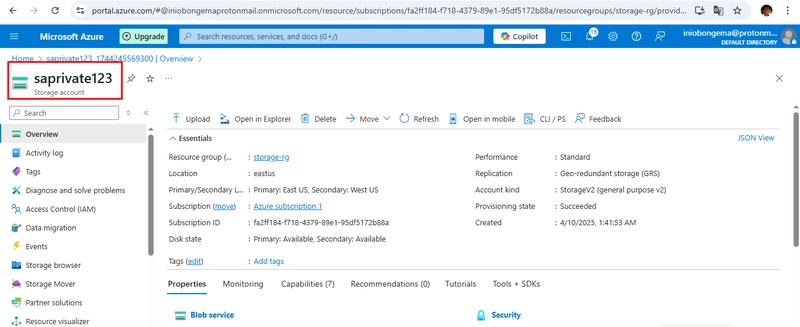
Deployment is complete, click on 'Go to resource'
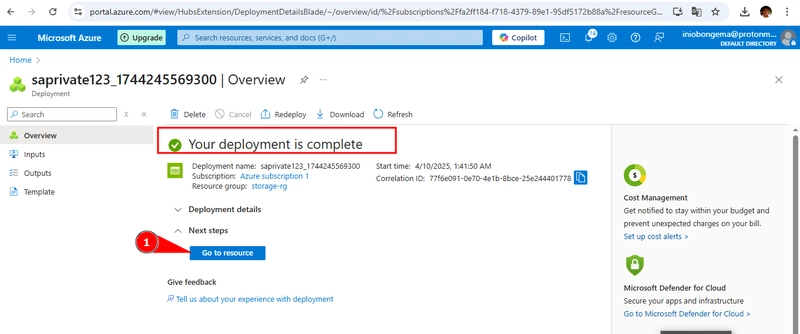
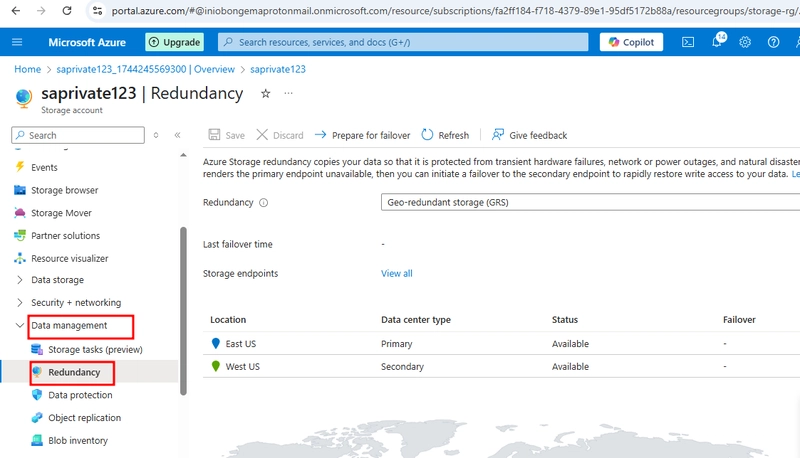
Click on 'Data management on the left pane'
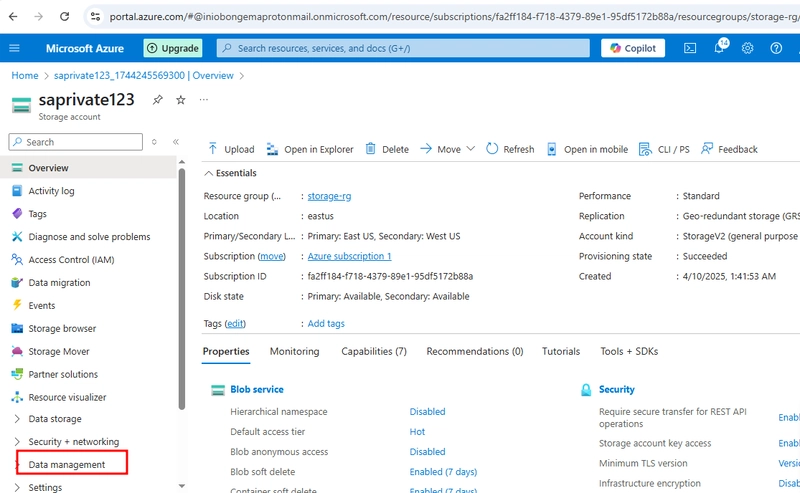
If you want to effect any corrections, it can be done here
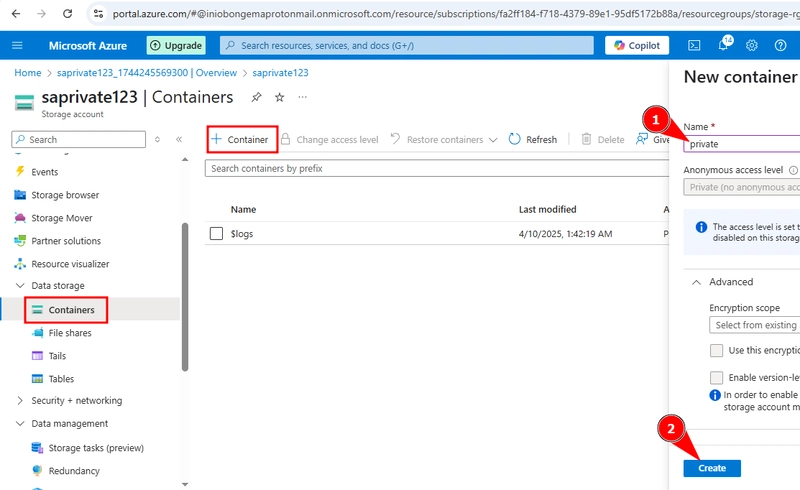
STEP 2
Go to 'data storage' option, then click on 'container'
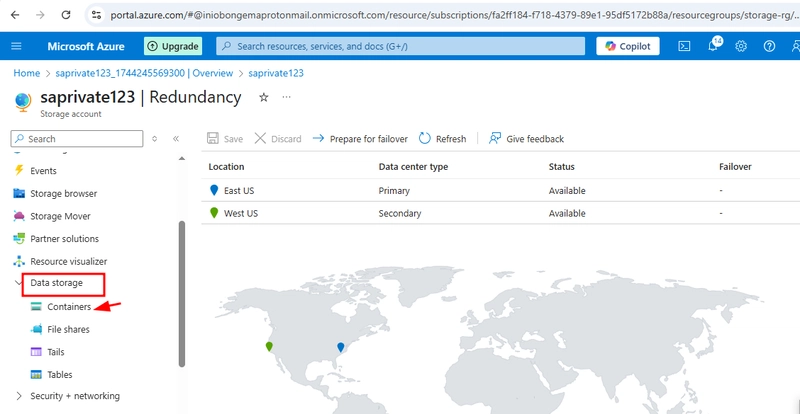
-click on 'create'
-give it a name
-click on 'create'
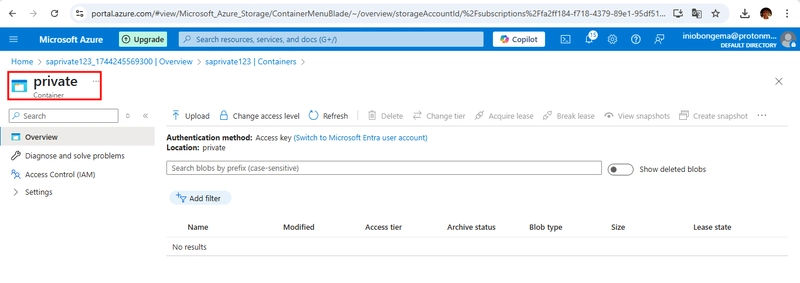
Click on the name private
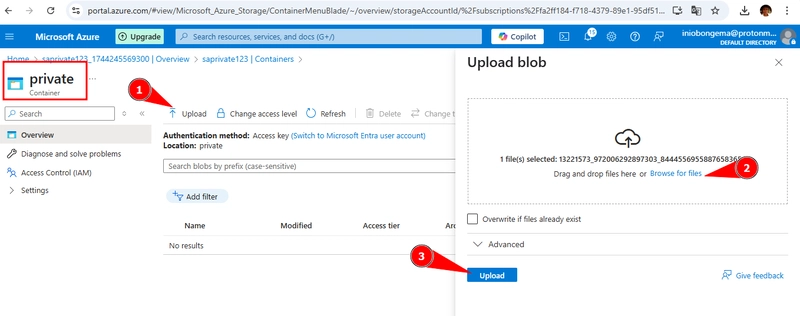
Click on 'upload'
-browse for a file to upload
-click on 'upload'
Click on the uploaded image
-copy the URL and paste on a browser
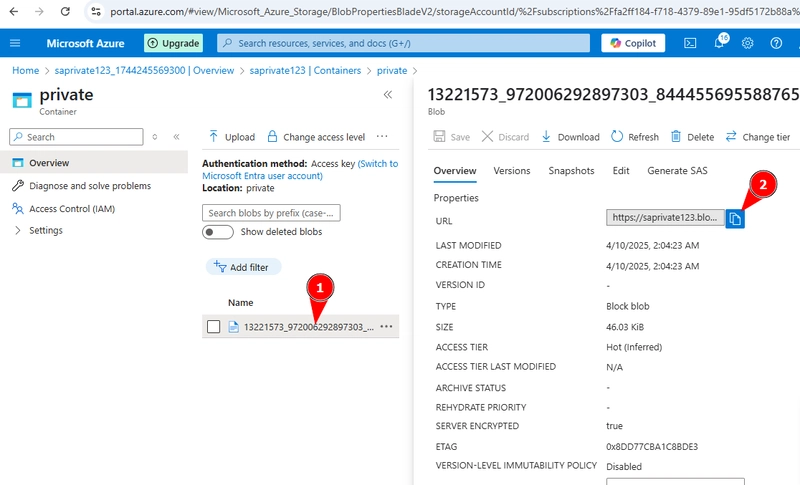
You will get an error message, indicating that it is not accessible, because it was made to be private in the settings option

If you want the content in your container to be public, you can change the private option to public.
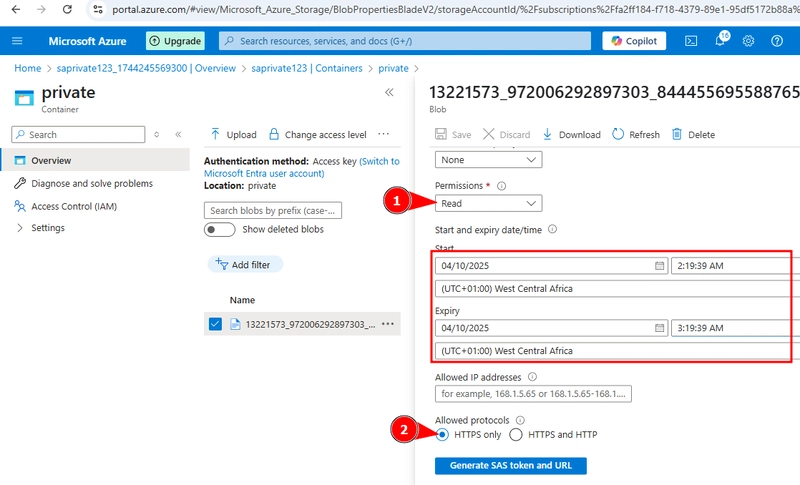
Still on overview page, click on 'generate SAS'

To give the necessary permission;
- read
- set access permission time to 24 hours
- allow HTTPS protocol
Click on 'Generate the SAS token and URL'
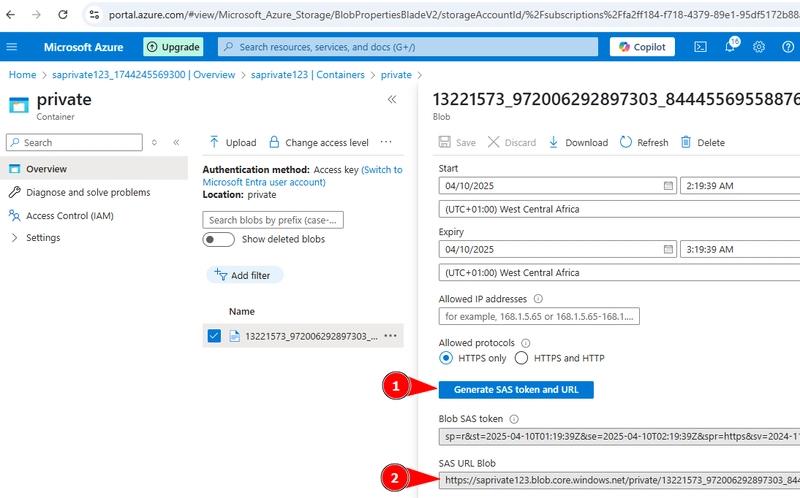
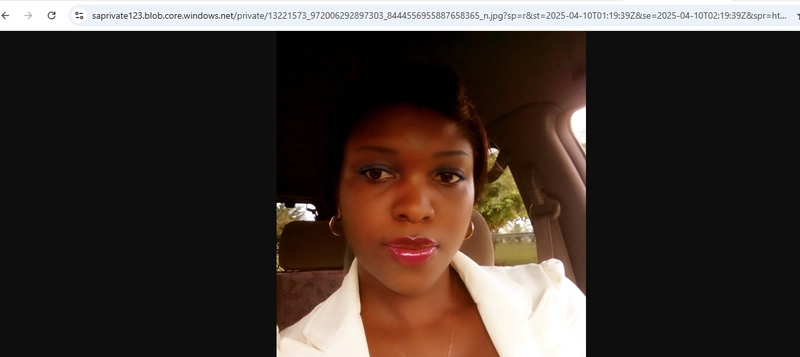
copy the 'sas url blob' in a browser
The file/image in the container is made public
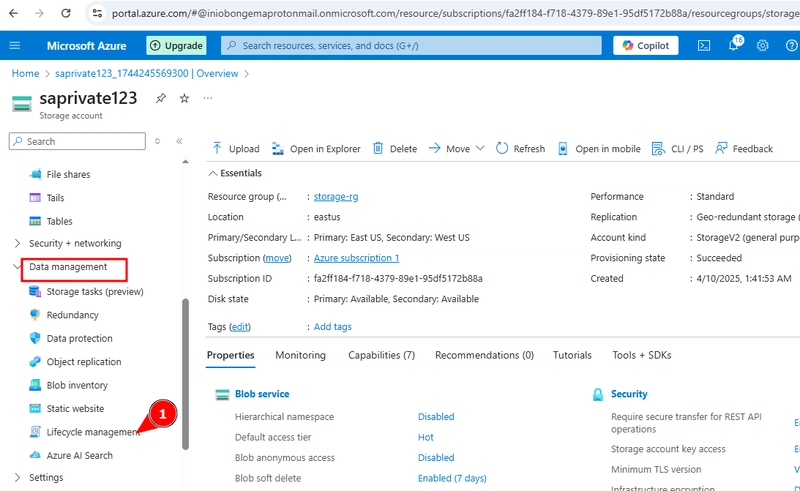
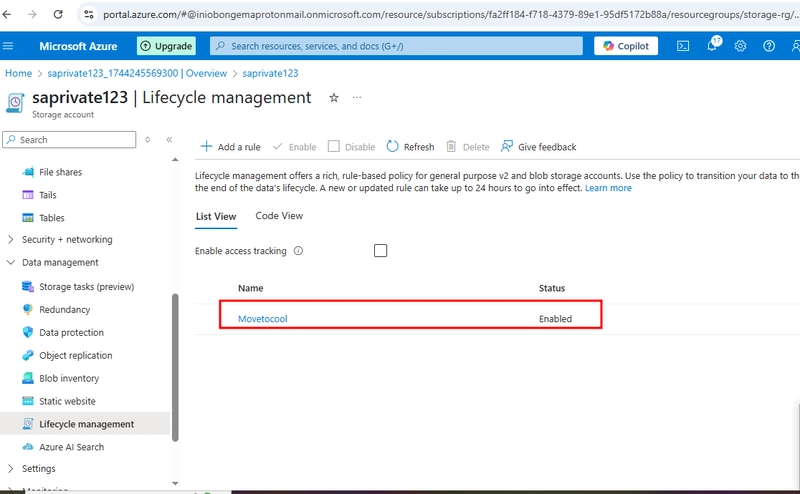
STEP 3
MOVING BLOBS FROM HOT TIER TO FULL TIER- STORAGE LIFE CYCLE MANAGEMENT
Click on 'saprivate123 overview page
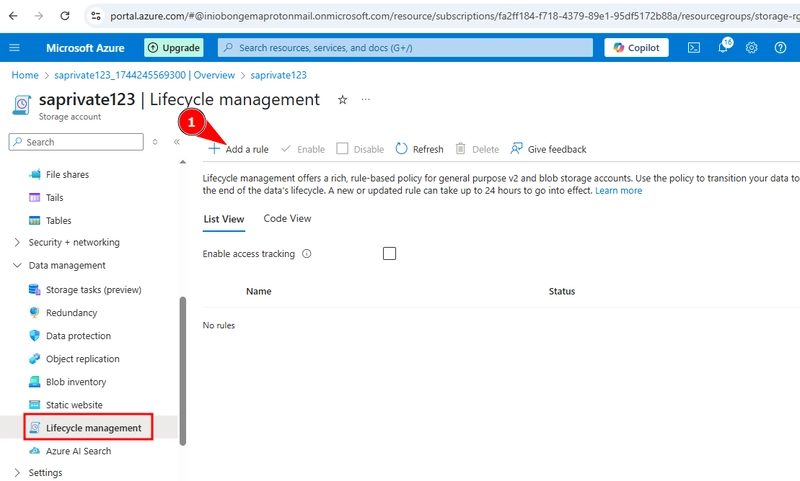
Go to data management, life cycle management
Click on 'add a rule'
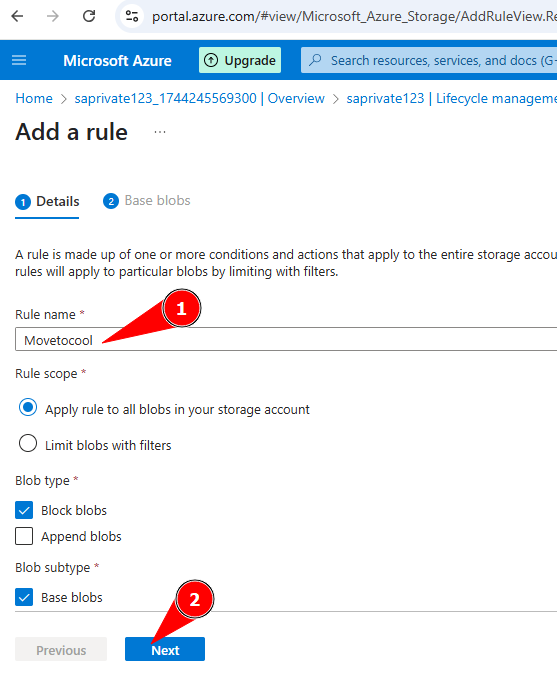
Give the rule a name 'movetocool'
-leave other features at default
-click on 'next'
Specify the duration and what happens to it after the stipulated time
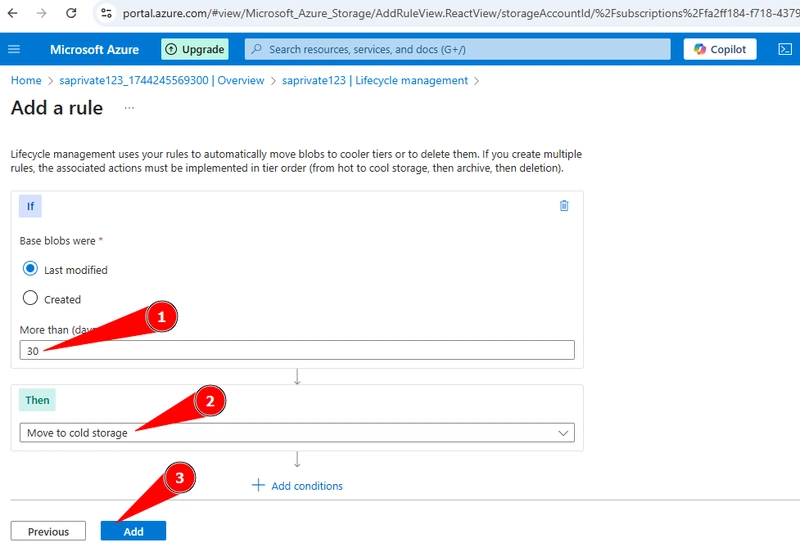
The rule has been successfully added as shown below
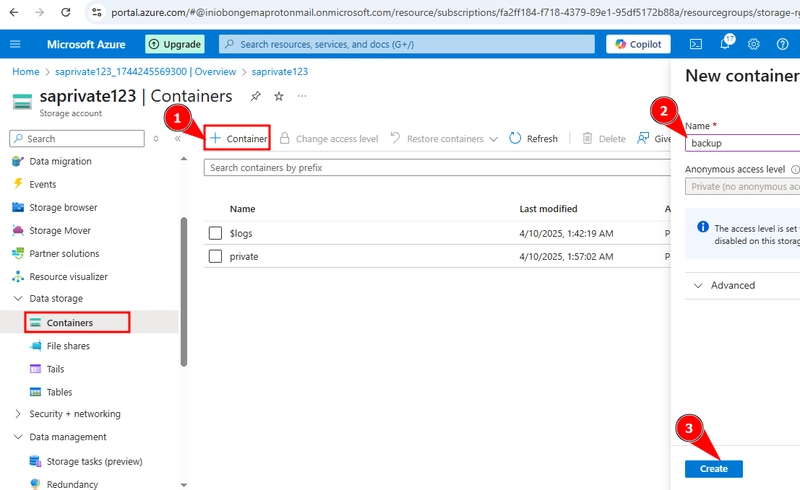
STEP 4
**CREATE A PUBLIC CONTAINER/OBJECT REPLICATION/CREATING BACK-UPS
Go to data storage
- select container

Go to container
-give it a name 'backup'
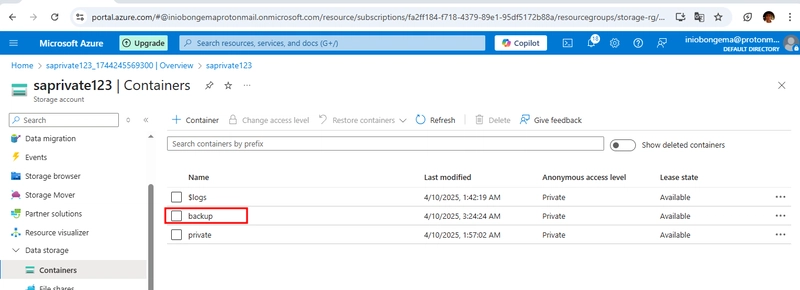
-click on 'create'
The backup container is created
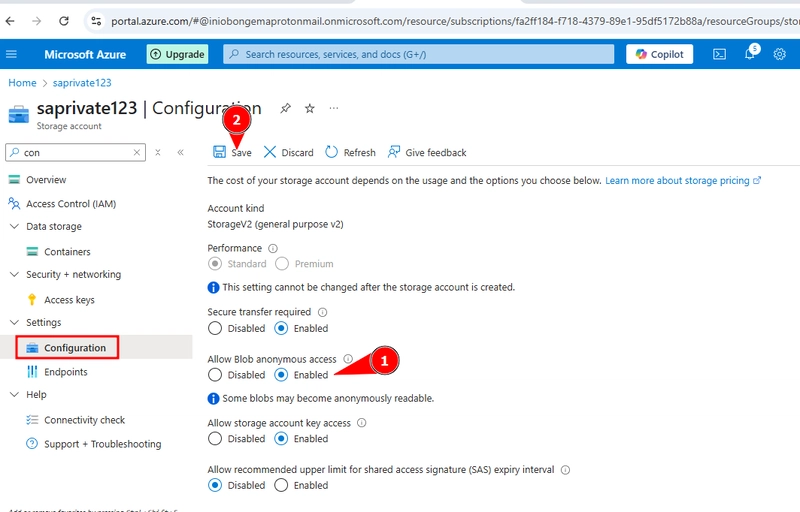
Go to 'settings'
-click on configuration

Go to configuration
-Enable 'allow blob anonymous access'
-click on save button
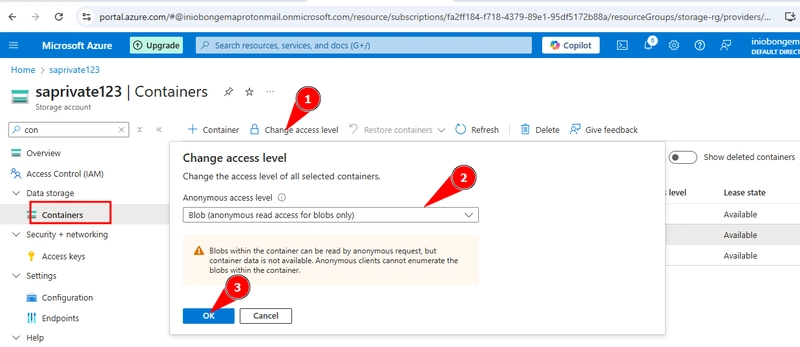
Go to 'container'
- tick the 'backup' box
- click on change access level
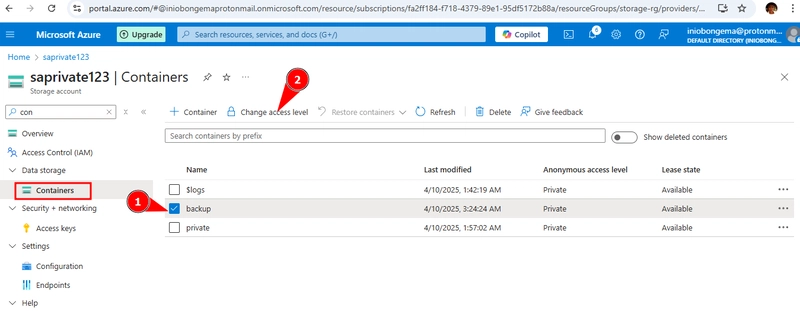
The back up is not made public, that's why the pulic access is not granted
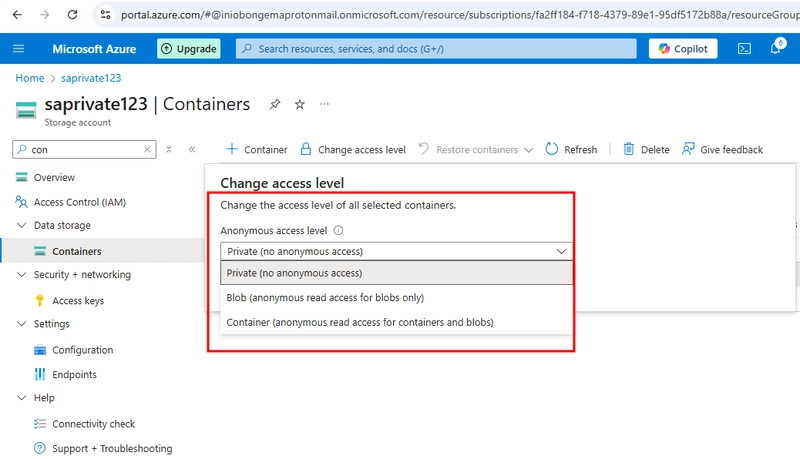
To make it public, enable 'blob anonymous access' in the settings tap, then configuration in the left pane. This action is to make the blob public. This means everyone can access the blob but not the container