![[The AI Show Episode 142]: ChatGPT’s New Image Generator, Studio Ghibli Craze and Backlash, Gemini 2.5, OpenAI Academy, 4o Updates, Vibe Marketing & xAI Acquires X](https://www.marketingaiinstitute.com/hubfs/ep%20142%20cover.png)


![From drop-out to software architect with Jason Lengstorf [Podcast #167]](https://cdn.hashnode.com/res/hashnode/image/upload/v1743796461357/f3d19cd7-e6f5-4d7c-8bfc-eb974bc8da68.png?#)


.png?#)


_Christophe_Coat_Alamy.jpg?#)


.webp?#)


![Apple Considers Delaying Smart Home Hub Until 2026 [Gurman]](https://www.iclarified.com/images/news/96946/96946/96946-640.jpg)
![iPhone 17 Pro Won't Feature Two-Toned Back [Gurman]](https://www.iclarified.com/images/news/96944/96944/96944-640.jpg)
![Tariffs Threaten Apple's $999 iPhone Price Point in the U.S. [Gurman]](https://www.iclarified.com/images/news/96943/96943/96943-640.jpg)


Implementing Formique in Vue.js: A Comprehensive Guide
Formique is a powerful and flexible form-building library that simplifies the process of creating well styled (themed) dynamic and interactive forms in web applications. With Formique, you can easily define form schemas, handle form validation, and manage form submissions without having to fiddle with html and css. In this guide, we'll walk you through the steps to integrate Formique into a Vue.js project. What is Formique? Formique is a lightweight, framework-agnostic library designed to streamline the creation of forms in web applications. It provides a declarative way to define form structures, supports dynamic form fields, and includes built-in validation and theming capabilities. Whether you're building simple contact forms or complex multi-step forms, Formique makes the process intuitive and efficient. Key Formique Features Declarative Syntax: Define forms using a simple and intuitive schema. Wide Range of Inputs: Supports text, email, number, password, date, time, file uploads, and more. Dynamic Form Generation: Generate forms dynamically based on your schema. Accessibility Compliance: Ensures all form elements meet WCAG and WAI-ARIA standards. Mobile Responsiveness: Forms are mobile-friendly out of the box. JavaScript-Driven Themes: Apply themes dynamically for a customizable UI. Nested Conditional Logic: Show or hide fields based on user input. Dynamic Dropdowns: Create dropdowns with options that change dynamically. Framework Agnostic: Works with Svelte, React, Vue, Angular, and Vanilla JS. Step 1: Install a Vue.js Project To get started, create a new Vue.js project using the Vue CLI. If you don't have the Vue CLI installed, you can install it globally by running: npm install -g @vue/cli Then, create a new Vue project: npm create vue@latest myapp Follow the prompts to set up your project. Once the project is created, navigate to the project directory: cd myapp Note: For the latest instructions, refer to the official Vue.js installation guide. Step 2: Include Formique CSS To ensure that your Formique forms are styled correctly, include the Formique CSS file in your project. Add the following CDN link inside the tag of your index.html file: This will apply Formique's default styles to your forms. Step 3: Install Formique Next, install Formique in your Vue project using npm: npm install formique This will add Formique to your project's dependencies. Step 4: Create a Form Component Now, let's create a Vue component for your form. Inside the src/components directory, create a new file called RegForm.vue. This component will define the form schema, parameters, and settings. Template Section In the section, define the structure of your form: Registration Form The div with the ID formique is where Formique will render the form. You can customize this ID if needed. Script Section In the section, import Formique and define the form schema, parameters, and settings: import { ref, onMounted } from 'vue'; import Formique from 'formique'; export default { setup() { // Define the form schema const formSchema = ref([ ['text', 'name', 'Name', { required: true }, {}], ['text', 'surname', 'Surname', { required: true }], ['email', 'email', 'Email', { required: true }, {}], ['singleSelect', 'title', 'Title', { required: true }, { dependents: ['status'] }, [ { value: 'mr', label: 'Mr' }, { value: 'ms', label: 'Ms' }, { value: 'mrs', label: 'Mrs' }, { value: 'dr', label: 'Dr' }, { value: 'prof', label: 'Prof' } ]], ['singleSelect', 'status', 'Status', { required: true }, { dependsOn: 'title', condition: (value) => value === 'prof' }, [ { value: 'full professor', label: 'Full Professor' }, { value: 'associate professor', label: 'Associate Professor' } ]], ['submit', 'submit', 'Submit', {}, { style: 'width: 100%;' }] ]); // Define form parameters const formParams = ref({ method: 'post', id: 'myForm', class: 'form', style: 'width: 100%; font-size: 14px;' }); // Define form settings const formSettings = ref({ requiredFieldIndicator: true, framework: 'vue', placeholders: true, theme: 'dark-blue', submitOnPage: true }); // Initialize Formique when the component is mounted onMounted(() => { new Formique(formSchema.value, formParams.value, formSettings.value); }); return {}; } }; Explanation: Form Schema: The formSchema array defines the fields in your form. Each field is represented as an array with properties like type, name, label, validation rules, and options. Form Parameters: The formParams object defines attributes for the form element, such as method, id, and class. Form Settings: The formSet
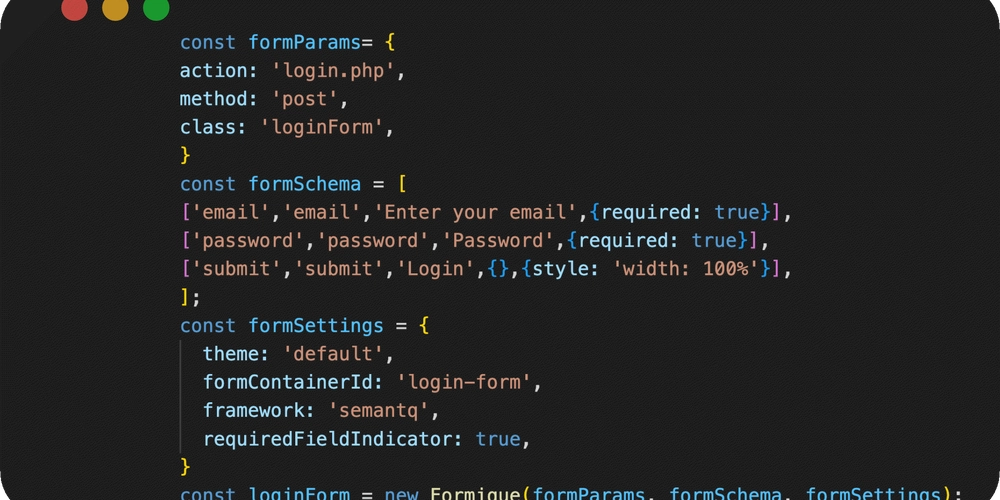
Formique is a powerful and flexible form-building library that simplifies the process of creating well styled (themed) dynamic and interactive forms in web applications. With Formique, you can easily define form schemas, handle form validation, and manage form submissions without having to fiddle with html and css. In this guide, we'll walk you through the steps to integrate Formique into a Vue.js project.
What is Formique?
Formique is a lightweight, framework-agnostic library designed to streamline the creation of forms in web applications. It provides a declarative way to define form structures, supports dynamic form fields, and includes built-in validation and theming capabilities. Whether you're building simple contact forms or complex multi-step forms, Formique makes the process intuitive and efficient.
Key Formique Features
- Declarative Syntax: Define forms using a simple and intuitive schema.
- Wide Range of Inputs: Supports text, email, number, password, date, time, file uploads, and more.
- Dynamic Form Generation: Generate forms dynamically based on your schema.
- Accessibility Compliance: Ensures all form elements meet WCAG and WAI-ARIA standards.
- Mobile Responsiveness: Forms are mobile-friendly out of the box.
- JavaScript-Driven Themes: Apply themes dynamically for a customizable UI.
- Nested Conditional Logic: Show or hide fields based on user input.
- Dynamic Dropdowns: Create dropdowns with options that change dynamically.
- Framework Agnostic: Works with Svelte, React, Vue, Angular, and Vanilla JS.
Step 1: Install a Vue.js Project
To get started, create a new Vue.js project using the Vue CLI. If you don't have the Vue CLI installed, you can install it globally by running:
npm install -g @vue/cli
Then, create a new Vue project:
npm create vue@latest myapp
Follow the prompts to set up your project. Once the project is created, navigate to the project directory:
cd myapp
Note: For the latest instructions, refer to the official Vue.js installation guide.
Step 2: Include Formique CSS
To ensure that your Formique forms are styled correctly, include the Formique CSS file in your project. Add the following CDN link inside the tag of your index.html file:
rel="stylesheet" href="https://cdn.jsdelivr.net/npm/formique-css@1.0.6/formique.min.css" formique-style>
This will apply Formique's default styles to your forms.
Step 3: Install Formique
Next, install Formique in your Vue project using npm:
npm install formique
This will add Formique to your project's dependencies.
Step 4: Create a Form Component
Now, let's create a Vue component for your form. Inside the src/components directory, create a new file called RegForm.vue. This component will define the form schema, parameters, and settings.
Template Section
In the section, define the structure of your form:
    Registration Form
     id="formique">
The div with the ID formique is where Formique will render the form. You can customize this ID if needed.
Script Section
In the