


![[The AI Show Episode 142]: ChatGPT’s New Image Generator, Studio Ghibli Craze and Backlash, Gemini 2.5, OpenAI Academy, 4o Updates, Vibe Marketing & xAI Acquires X](https://www.marketingaiinstitute.com/hubfs/ep%20142%20cover.png)


![From drop-out to software architect with Jason Lengstorf [Podcast #167]](https://cdn.hashnode.com/res/hashnode/image/upload/v1743796461357/f3d19cd7-e6f5-4d7c-8bfc-eb974bc8da68.png?#)


.png?#)


_Christophe_Coat_Alamy.jpg?#)
 (1).webp?#)


![iPhone 17 Pro Won't Feature Two-Toned Back [Gurman]](https://www.iclarified.com/images/news/96944/96944/96944-640.jpg)
![Tariffs Threaten Apple's $999 iPhone Price Point in the U.S. [Gurman]](https://www.iclarified.com/images/news/96943/96943/96943-640.jpg)


How to Dismiss the Keyboard in SwiftUI: Two Simple Approaches
⌨️ As iOS developers, we often face the challenge of managing keyboard interactions in our apps. One common task is dismissing the keyboard when users are done with text input. In this article, I'll share two simple but effective approaches to keyboard dismissal in SwiftUI (without using UIKit at all :) that I've implemented in my recent project PillsMemo. Method 1: Adding a Toolbar with a Done Button The first approach is straightforward: add a toolbar with a "Done" button that appears above the keyboard. This is particularly useful for keyboard types that don't include a return key, such as the numeric keypad. struct DrugEditorView: View { enum Field: Hashable { case title case quantity case notes } @Bindable var drug: Drug @FocusState private var fieldIsFocused: Field? var body: some View { Form { Section(header: Text("Notes")) { TextEditor(text: $drug.notes) .focused($fieldIsFocused, equals: .notes) .frame(minHeight: 70) } } .toolbar { ToolbarItemGroup(placement: .keyboard) { Spacer() Button("Done") { fieldIsFocused = nil } } } } } This code adds a toolbar above the keyboard with a "Done" button aligned to the right. When tapped, it sets fieldIsFocused to nil, which dismisses the keyboard. Key Points About This Method: The .keyboard placement ensures the toolbar appears directly above the keyboard The Spacer() pushes the "Done" button to the right side Using a @FocusState property with an enum allows precise control over which field has focus (only available in iOS 15 and above) Setting the focus state to nil dismisses the keyboard Method 2: Dismissing When Tapping Outside The second approach creates an invisible, tappable layer that dismisses the keyboard when users tap outside input fields. This solution uses a ZStack with Color.clear and contentShape: @FocusState private var fieldIsFocused: Field? var body: some View { ZStack { Form { Section(header: Text("Notes")) { TextEditor(text: $drug.notes) .focused($fieldIsFocused, equals: .notes) } // ... other form elements } if fieldIsFocused != nil { Color.clear .contentShape(Rectangle()) .onTapGesture { fieldIsFocused = nil } } } } How This Works: We wrap our form in a ZStack to create layering We conditionally add an invisible layer (Color.clear) only when the keyboard is active The contentShape(Rectangle()) ensures the invisible layer captures tap gestures When tapped, it sets fieldIsFocused to nil, dismissing the keyboard
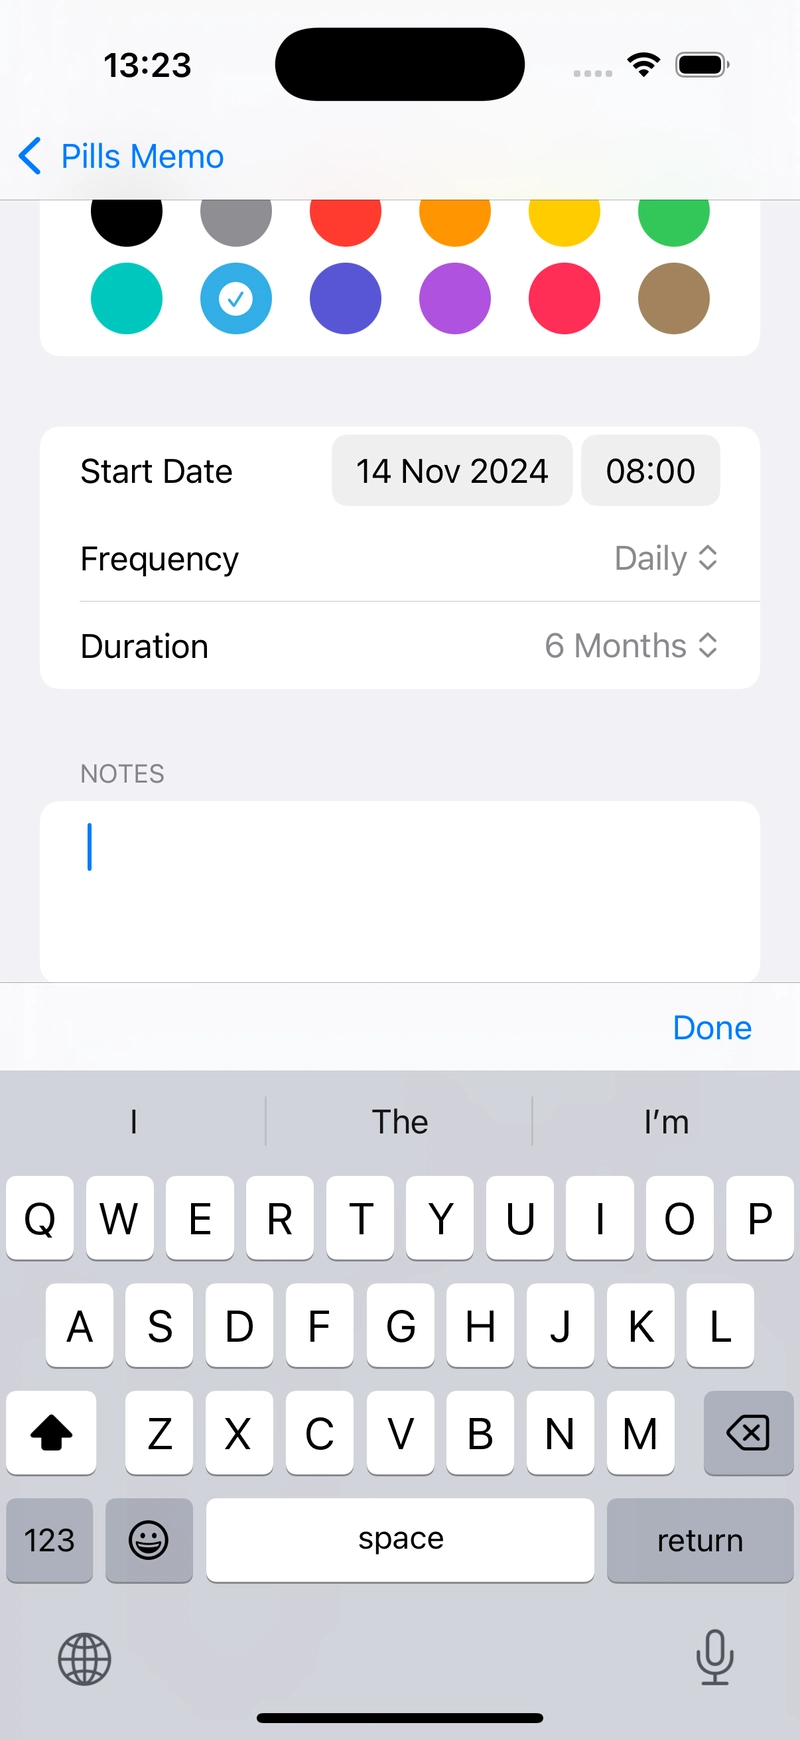
⌨️ As iOS developers, we often face the challenge of managing keyboard interactions in our apps. One common task is dismissing the keyboard when users are done with text input.
In this article, I'll share two simple but effective approaches to keyboard dismissal in SwiftUI (without using UIKit at all :) that I've implemented in my recent project PillsMemo.
Method 1: Adding a Toolbar with a Done Button
The first approach is straightforward: add a toolbar with a "Done" button that appears above the keyboard. This is particularly useful for keyboard types that don't include a return key, such as the numeric keypad.
struct DrugEditorView: View {

    enum Field: Hashable {
        case title
        case quantity
        case notes
    }

    @Bindable var drug: Drug
    @FocusState private var fieldIsFocused: Field?

    var body: some View {
        Form {
            Section(header: Text("Notes")) {
                    TextEditor(text: $drug.notes)
                        .focused($fieldIsFocused, equals: .notes)
                    .frame(minHeight: 70)
            }
        }
        .toolbar {
            ToolbarItemGroup(placement: .keyboard) {
                Spacer()
                Button("Done") {
                    fieldIsFocused = nil
                }
            }
        }
    }
}
This code adds a toolbar above the keyboard with a "Done" button aligned to the right. When tapped, it sets fieldIsFocused to nil, which dismisses the keyboard.
Key Points About This Method:
- The
.keyboardplacement ensures the toolbar appears directly above the keyboard - The
Spacer()pushes the "Done" button to the right side - Using a
@FocusStateproperty with an enum allows precise control over which field has focus (only available in iOS 15 and above) - Setting the focus state to
nildismisses the keyboard
Method 2: Dismissing When Tapping Outside
The second approach creates an invisible, tappable layer that dismisses the keyboard when users tap outside input fields. This solution uses a ZStack with Color.clear and contentShape:
@FocusState private var fieldIsFocused: Field?
var body: some View {
    ZStack {
        Form {
            Section(header: Text("Notes")) {
                TextEditor(text: $drug.notes)
                    .focused($fieldIsFocused, equals: .notes)
            }
            // ... other form elements
        }

        if fieldIsFocused != nil {
            Color.clear
                .contentShape(Rectangle())
                .onTapGesture {
                    fieldIsFocused = nil
                }
        }
    }
}
How This Works:
- We wrap our form in a
ZStackto create layering - We conditionally add an invisible layer (Color.clear) only when the keyboard is active
- The
contentShape(Rectangle())ensures the invisible layer captures tap gestures - When tapped, it sets
fieldIsFocusedto nil, dismissing the keyboard

![Clojure Is Awesome!!! [PART 15]](https://media2.dev.to/dynamic/image/width%3D1000,height%3D500,fit%3Dcover,gravity%3Dauto,format%3Dauto/https:%2F%2Fdev-to-uploads.s3.amazonaws.com%2Fuploads%2Farticles%2Fu918srfvtpbh2fyf0as8.jpg)
