


![[The AI Show Episode 144]: ChatGPT’s New Memory, Shopify CEO’s Leaked “AI First” Memo, Google Cloud Next Releases, o3 and o4-mini Coming Soon & Llama 4’s Rocky Launch](https://www.marketingaiinstitute.com/hubfs/ep%20144%20cover.png)


![Rogue Company Elite tier list of best characters [April 2025]](https://media.pocketgamer.com/artwork/na-33136-1657102075/rogue-company-ios-android-tier-cover.jpg?#)


.webp?#)


![Here’s the first live demo of Android XR on Google’s prototype smart glasses [Video]](https://i0.wp.com/9to5google.com/wp-content/uploads/sites/4/2025/04/google-android-xr-ted-glasses-demo-3.png?resize=1200%2C628&quality=82&strip=all&ssl=1)


![New Beats USB-C Charging Cables Now Available on Amazon [Video]](https://www.iclarified.com/images/news/97060/97060/97060-640.jpg)

![Apple M4 13-inch iPad Pro On Sale for $200 Off [Deal]](https://www.iclarified.com/images/news/97056/97056/97056-640.jpg)


Essential Software for Hardware Hackers: Your First IDE & Tools
Intro: Okay, I Have the Hardware... What Software Do I Need? In the last installment, we covered the essential hardware bits for getting started with electronics. You might be looking at your pile of components and wondering, "Great, but how do I tell this stuff what to do?" That's where software comes in. Good news: compared to tracking down sensors, resistors, wires, and tools, the software side is often more straightforward. Let's break down the necessary software items. Chapter 1: Focusing on the "Brain" - The Calculation Step Remember our basic project flow: Input -> Calculation -> Output. The software you write lives squarely in the Calculation phase. It's the code running on your microcontroller (like an Arduino or Raspberry Pi Pico) that processes inputs and determines outputs. To write, manage, and get this code onto your hardware, you need one primary category of tool: a Development Tool or Environment. Chapter 2: Crucial Point: Match the Tool to the Hardware! This is key: There is no single universal software tool. The right tool depends entirely on the microcontroller board you're programming. Here are common pairings for beginner-friendly boards: Arduino (Uno, Nano, Mega, etc.): The go-to is the Arduino IDE. Raspberry Pi (running Raspberry Pi OS): Often involves the Terminal (command line) combined with a Text Editor like nano, vim, or a more featured editor like VS Code with appropriate extensions. Remote access via SSH is common. Raspberry Pi Pico (MicroPython): The Thonny IDE is highly recommended and often pre-installed in Raspberry Pi OS. ESP32 / ESP8266: Can often be programmed using the Arduino IDE (with board support installed), PlatformIO (an extension for VS Code), or MicroPython tools like Thonny or esptool.py. Always check the documentation for your specific board to see the recommended development environment(s). Chapter 3: Deconstructing the "IDE" Many of these tools are IDEs (Integrated Development Environments). What does that mean? It's software that bundles several essential development functions: Code Editor: A text editor optimized for code, often with syntax highlighting, auto-completion, and error checking to help you write cleaner code faster. Compiler / Interpreter: Compiler (e.g., for Arduino C++): Translates your human-readable source code into low-level machine code (binary 0s and 1s) that the microcontroller's CPU can directly execute. This step is necessary because CPUs don't understand C++ or Python directly. Interpreter (e.g., for MicroPython): Reads your code line by line and executes it directly (often via an interpreter running on the microcontroller itself). Compilation might happen behind the scenes or just-in-time. Build/Upload Tools: Functionality to trigger the compile process and then transfer the resulting binary file (or script) to the microcontroller's memory, usually over a USB connection. Debugger: Tools to help you find and fix errors ("bugs") in your code. This might include: Printing output/messages (like Serial.println() in Arduino or print() in Python). Setting breakpoints to pause execution. Inspecting variable values. Chapter 4: Common Development Workflows Arduino IDE: Write C++-like code -> Click "Verify" (Compiles) -> Click "Upload" (Transfers binary via USB) -> Use Serial Monitor for Serial.print() debugging. Thonny (for Pico/MicroPython): Write Python code -> Click "Run" (Transfers script via USB and runs it using the MicroPython interpreter on the Pico) -> Use the built-in Shell/REPL for interaction and print() debugging. Raspberry Pi (Terminal + Editor): Connect via SSH (or use desktop) -> Open Terminal -> Use nano my_script.py to edit -> Save -> Run with python3 my_script.py -> Use print() statements for debugging output visible in the terminal. Chapter 5: Summary: Keep It Simple! The main takeaway for software is positive: You primarily need one main Development Tool/Environment. The specific choice depends heavily on your microcontroller hardware. Unlike hardware, you don't need a large variety of different software tools to start; an IDE often bundles the essentials (Editor, Compiler/Interpreter, Uploader, Debugger). Identify the right software companion for your chosen board, install it on your PC, and you're ready to start coding your electronics projects! Happy Coding!
Intro: Okay, I Have the Hardware... What Software Do I Need?
In the last installment, we covered the essential hardware bits for getting started with electronics. You might be looking at your pile of components and wondering, "Great, but how do I tell this stuff what to do?" That's where software comes in.
Good news: compared to tracking down sensors, resistors, wires, and tools, the software side is often more straightforward. Let's break down the necessary software items.
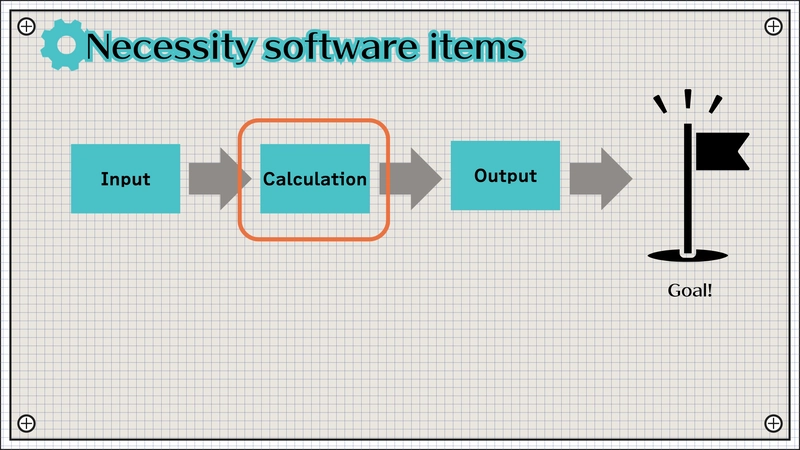
Chapter 1: Focusing on the "Brain" - The Calculation Step

Remember our basic project flow: Input -> Calculation -> Output. The software you write lives squarely in the Calculation phase. It's the code running on your microcontroller (like an Arduino or Raspberry Pi Pico) that processes inputs and determines outputs.
To write, manage, and get this code onto your hardware, you need one primary category of tool: a Development Tool or Environment.
Chapter 2: Crucial Point: Match the Tool to the Hardware!
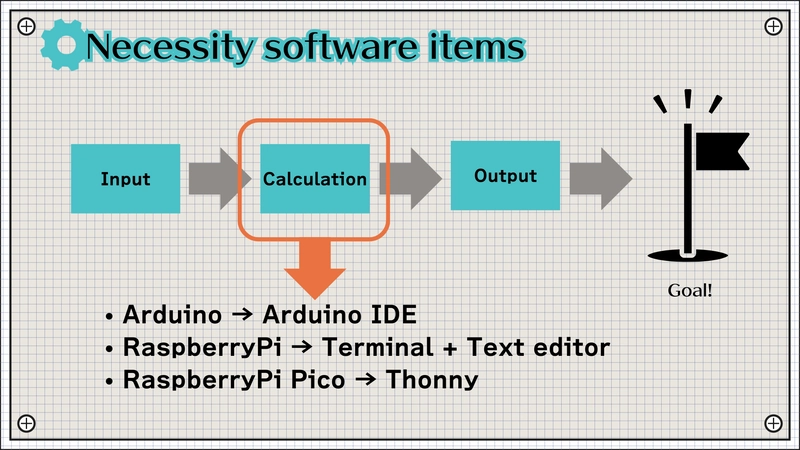
This is key: There is no single universal software tool. The right tool depends entirely on the microcontroller board you're programming.
Here are common pairings for beginner-friendly boards:
- Arduino (Uno, Nano, Mega, etc.): The go-to is the
Arduino IDE. - Raspberry Pi (running Raspberry Pi OS): Often involves the Terminal (command line) combined with a Text Editor like
nano,vim, or a more featured editor likeVS Codewith appropriate extensions. Remote access viaSSHis common. - Raspberry Pi Pico (MicroPython): The
Thonny IDEis highly recommended and often pre-installed in Raspberry Pi OS. - ESP32 / ESP8266: Can often be programmed using the Arduino IDE (with board support installed), PlatformIO (an extension for VS Code), or MicroPython tools like Thonny or
esptool.py.
Always check the documentation for your specific board to see the recommended development environment(s).
Chapter 3: Deconstructing the "IDE"
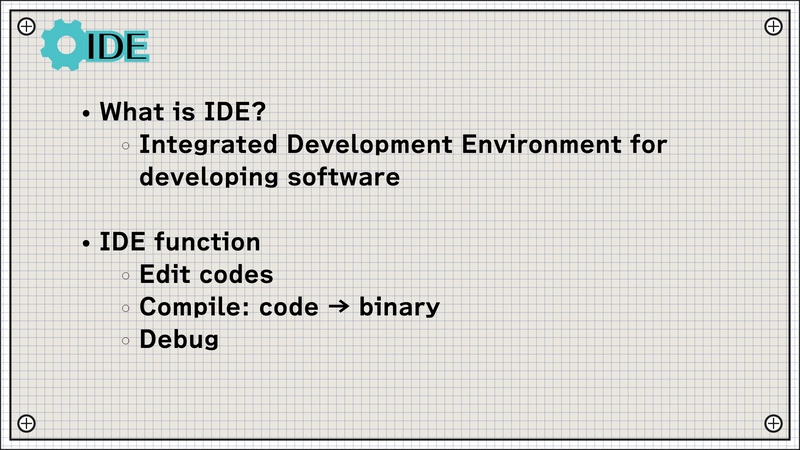
Many of these tools are IDEs (Integrated Development Environments). What does that mean? It's software that bundles several essential development functions:
- Code Editor: A text editor optimized for code, often with syntax highlighting, auto-completion, and error checking to help you write cleaner code faster.
- Compiler / Interpreter:
- Compiler (e.g., for Arduino C++): Translates your human-readable source code into low-level machine code (binary 0s and 1s) that the microcontroller's CPU can directly execute. This step is necessary because CPUs don't understand C++ or Python directly.
- Interpreter (e.g., for MicroPython): Reads your code line by line and executes it directly (often via an interpreter running on the microcontroller itself). Compilation might happen behind the scenes or just-in-time.
- Build/Upload Tools: Functionality to trigger the compile process and then transfer the resulting binary file (or script) to the microcontroller's memory, usually over a USB connection.
- Debugger: Tools to help you find and fix errors ("bugs") in your code. This might include:
- Printing output/messages (like
Serial.println()in Arduino orprint()in Python). - Setting breakpoints to pause execution.
- Inspecting variable values.
- Printing output/messages (like
Chapter 4: Common Development Workflows
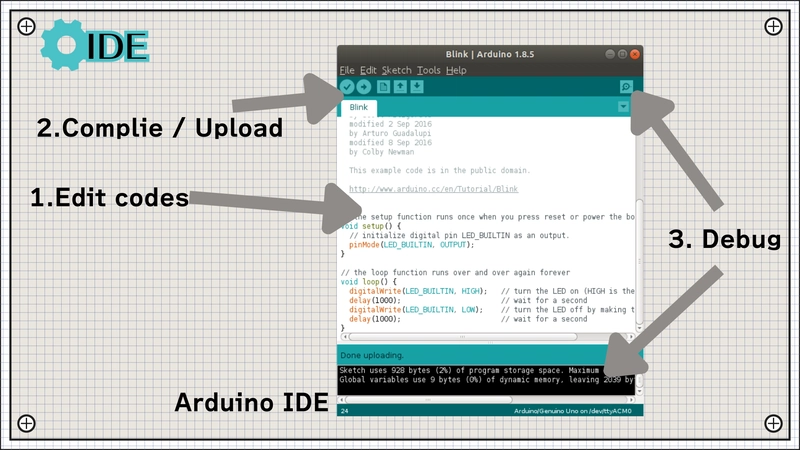

- Arduino IDE: Write C++-like code -> Click "Verify" (Compiles) -> Click "Upload" (Transfers binary via USB) -> Use Serial Monitor for
Serial.print()debugging. - Thonny (for Pico/MicroPython): Write Python code -> Click "Run" (Transfers script via USB and runs it using the MicroPython interpreter on the Pico) -> Use the built-in Shell/REPL for interaction and
print()debugging. - Raspberry Pi (Terminal + Editor): Connect via SSH (or use desktop) -> Open Terminal -> Use
nano my_script.pyto edit -> Save -> Run withpython3 my_script.py-> Useprint()statements for debugging output visible in the terminal.
Chapter 5: Summary: Keep It Simple!
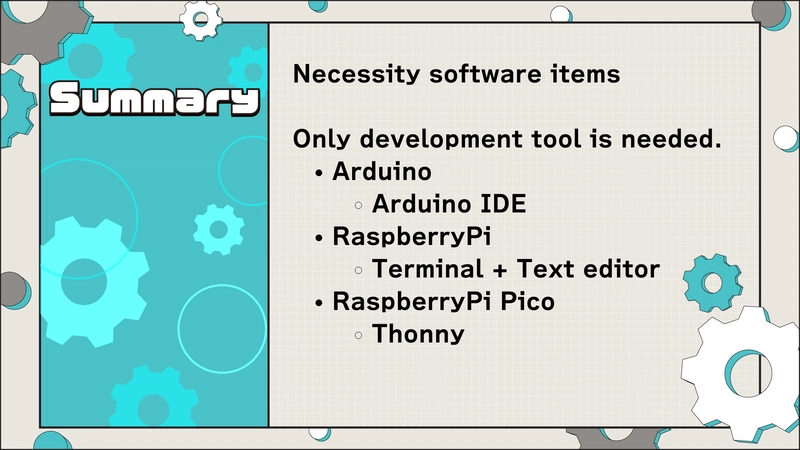
The main takeaway for software is positive:
- You primarily need one main Development Tool/Environment.
- The specific choice depends heavily on your microcontroller hardware.
- Unlike hardware, you don't need a large variety of different software tools to start; an IDE often bundles the essentials (Editor, Compiler/Interpreter, Uploader, Debugger).
Identify the right software companion for your chosen board, install it on your PC, and you're ready to start coding your electronics projects!
Happy Coding!

