![[The AI Show Episode 142]: ChatGPT’s New Image Generator, Studio Ghibli Craze and Backlash, Gemini 2.5, OpenAI Academy, 4o Updates, Vibe Marketing & xAI Acquires X](https://www.marketingaiinstitute.com/hubfs/ep%20142%20cover.png)


![From drop-out to software architect with Jason Lengstorf [Podcast #167]](https://cdn.hashnode.com/res/hashnode/image/upload/v1743796461357/f3d19cd7-e6f5-4d7c-8bfc-eb974bc8da68.png?#)


.png?#)


_Christophe_Coat_Alamy.jpg?#)
 (1).webp?#)


![Apple Considers Delaying Smart Home Hub Until 2026 [Gurman]](https://www.iclarified.com/images/news/96946/96946/96946-640.jpg)
![iPhone 17 Pro Won't Feature Two-Toned Back [Gurman]](https://www.iclarified.com/images/news/96944/96944/96944-640.jpg)
![Tariffs Threaten Apple's $999 iPhone Price Point in the U.S. [Gurman]](https://www.iclarified.com/images/news/96943/96943/96943-640.jpg)


Convert Your Images to Ghibli Style in a Fully Private and Local Environment
The magical charm of Studio Ghibli’s art style has captivated fans for decades, making it a dream for many to transform their own photos into this hand-painted aesthetic. While some AI-powered tools offer Ghibli-style conversions, they often come with restrictions, either locked behind paywalls or requiring processing that compromises privacy. Many people are also raising concerns about privacy and data theft associated with sending personal and sensitive pictures to some AI company's server. But what if you could convert your pictures to stunning Ghibli-style images entirely on your own device, with full control over the process? Thanks to EasyControl, an exciting open-source model, you can now achieve exactly that, privately, locally, and for free without any limits! In this guide, we'll walk you through a step-by-step process to set up and run this powerful AI model on your own system. By the end, you’ll be able to generate breathtaking Ghibli-inspired portraits without relying on external services, all while keeping your data private and your creativity limitless. Prerequisites The minimum system requirements for running this model are: GPU: RTX A6000 Storage: 100GB (preferable) VRAM: 16GB Anaconda installed Step-by-step process to install and run EasyControl locally For the purpose of this tutorial, we’ll use a GPU-powered Virtual Machine by NodeShift since it provides high compute Virtual Machines at a very affordable cost on a scale that meets GDPR, SOC2, and ISO27001 requirements. Also, it offers an intuitive and user-friendly interface, making it easier for beginners to get started with Cloud deployments. However, feel free to use any cloud provider of your choice and follow the same steps for the rest of the tutorial. Step 1: Setting up a NodeShift Account Visit app.nodeshift.com and create an account by filling in basic details, or continue signing up with your Google/GitHub account. If you already have an account, login straight to your dashboard. Step 2: Create a GPU Node After accessing your account, you should see a dashboard (see image), now: 1) Navigate to the menu on the left side. 2) Click on the GPU Nodes option. 3) Click on Start to start creating your very first GPU node. These GPU nodes are GPU-powered virtual machines by NodeShift. These nodes are highly customizable and let you control different environmental configurations for GPUs ranging from H100s to A100s, CPUs, RAM, and storage, according to your needs. Step 3: Selecting configuration for GPU (model, region, storage) 1) For this tutorial, we’ll be using 1x RTX A6000 GPU, however, you can choose any GPU as per the prerequisites. 2) Similarly, we’ll opt for 200GB storage by sliding the bar. You can also select the region where you want your GPU to reside from the available ones. Step 4: Choose GPU Configuration and Authentication method 1) After selecting your required configuration options, you'll see the available GPU nodes in your region and according to (or very close to) your configuration. In our case, we'll choose a 1x RTX A6000 48GB GPU node with 64vCPUs/63GB RAM/200GB SSD. 2) Next, you'll need to select an authentication method. Two methods are available: Password and SSH Key. We recommend using SSH keys, as they are a more secure option. To create one, head over to our official documentation. Step 5: Choose an Image The final step is to choose an image for the VM, which in our case is Nvidia Cuda, where we’ll deploy and run the inference of our model. That's it! You are now ready to deploy the node. Finalize the configuration summary, and if it looks good, click Create to deploy the node. Step 6: Connect to active Compute Node using SSH 1) As soon as you create the node, it will be deployed in a few seconds or a minute. Once deployed, you will see a status Running in green, meaning that our Compute node is ready to use! 2) Once your GPU shows this status, navigate to the three dots on the right, click on Connect with SSH, and copy the SSH details that appear. As you copy the details, follow the below steps to connect to the running GPU VM via SSH: 1) Open your terminal, paste the SSH command, and run it. 2) In some cases, your terminal may take your consent before connecting. Enter ‘yes’. 3) A prompt will request a password. Type the SSH password, and you should be connected. Output: Next, If you want to check the GPU details, run the following command in the terminal: !nvidia-smi Step 7: Set Up Project Environment 1) Ensure you've have Anaconda installed and create virtual environment with conda. conda create -n ghibli python=3.11 -y && conda activate ghibli Output: 2) Clone the official repository of EasyControl and move inside the project directory. git clone https://github.com/Xiaojiu-z/EasyControl.git && cd EasyControl Output: 3) Instal

The magical charm of Studio Ghibli’s art style has captivated fans for decades, making it a dream for many to transform their own photos into this hand-painted aesthetic. While some AI-powered tools offer Ghibli-style conversions, they often come with restrictions, either locked behind paywalls or requiring processing that compromises privacy. Many people are also raising concerns about privacy and data theft associated with sending personal and sensitive pictures to some AI company's server. But what if you could convert your pictures to stunning Ghibli-style images entirely on your own device, with full control over the process? Thanks to EasyControl, an exciting open-source model, you can now achieve exactly that, privately, locally, and for free without any limits!
In this guide, we'll walk you through a step-by-step process to set up and run this powerful AI model on your own system. By the end, you’ll be able to generate breathtaking Ghibli-inspired portraits without relying on external services, all while keeping your data private and your creativity limitless.
Prerequisites
The minimum system requirements for running this model are:
GPU: RTX A6000
Storage: 100GB (preferable)
VRAM: 16GB
Step-by-step process to install and run EasyControl locally
For the purpose of this tutorial, we’ll use a GPU-powered Virtual Machine by NodeShift since it provides high compute Virtual Machines at a very affordable cost on a scale that meets GDPR, SOC2, and ISO27001 requirements. Also, it offers an intuitive and user-friendly interface, making it easier for beginners to get started with Cloud deployments. However, feel free to use any cloud provider of your choice and follow the same steps for the rest of the tutorial.
Step 1: Setting up a NodeShift Account
Visit app.nodeshift.com and create an account by filling in basic details, or continue signing up with your Google/GitHub account.
If you already have an account, login straight to your dashboard.
Step 2: Create a GPU Node
After accessing your account, you should see a dashboard (see image), now:
1) Navigate to the menu on the left side.
2) Click on the GPU Nodes option.
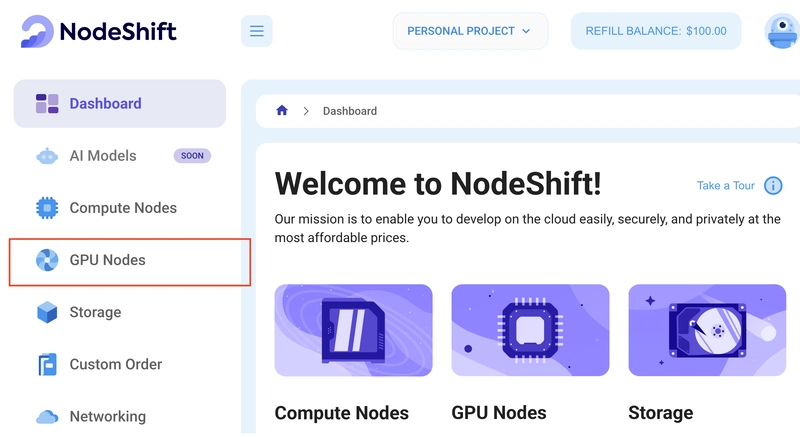
3) Click on Start to start creating your very first GPU node.

These GPU nodes are GPU-powered virtual machines by NodeShift. These nodes are highly customizable and let you control different environmental configurations for GPUs ranging from H100s to A100s, CPUs, RAM, and storage, according to your needs.
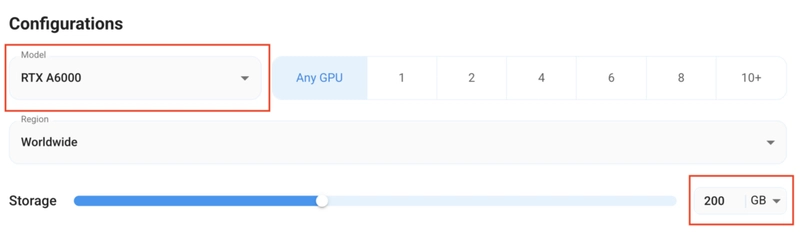
Step 3: Selecting configuration for GPU (model, region, storage)
1) For this tutorial, we’ll be using 1x RTX A6000 GPU, however, you can choose any GPU as per the prerequisites.
2) Similarly, we’ll opt for 200GB storage by sliding the bar. You can also select the region where you want your GPU to reside from the available ones.
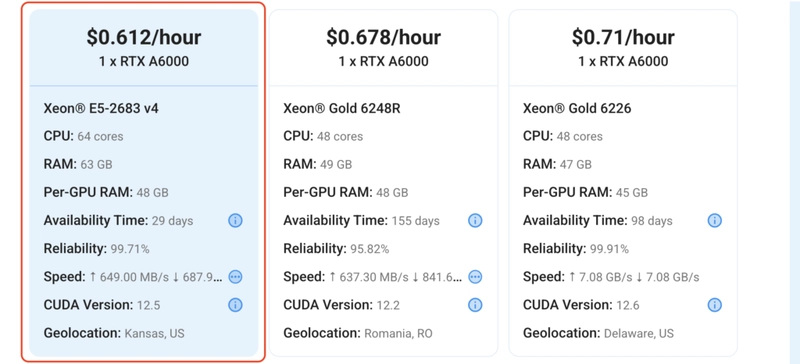
Step 4: Choose GPU Configuration and Authentication method
1) After selecting your required configuration options, you'll see the available GPU nodes in your region and according to (or very close to) your configuration. In our case, we'll choose a 1x RTX A6000 48GB GPU node with 64vCPUs/63GB RAM/200GB SSD.
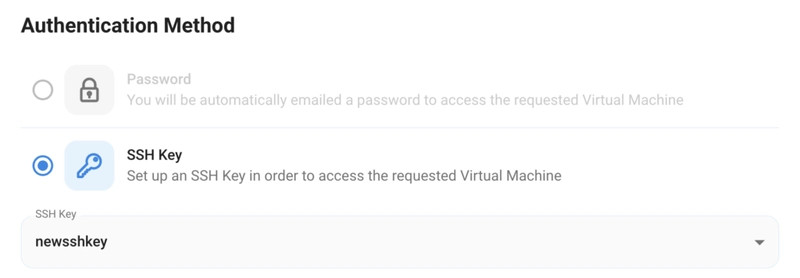
2) Next, you'll need to select an authentication method. Two methods are available: Password and SSH Key. We recommend using SSH keys, as they are a more secure option. To create one, head over to our official documentation.
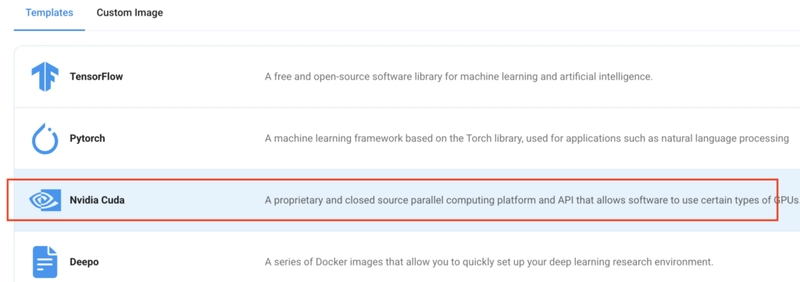
Step 5: Choose an Image
The final step is to choose an image for the VM, which in our case is Nvidia Cuda, where we’ll deploy and run the inference of our model.
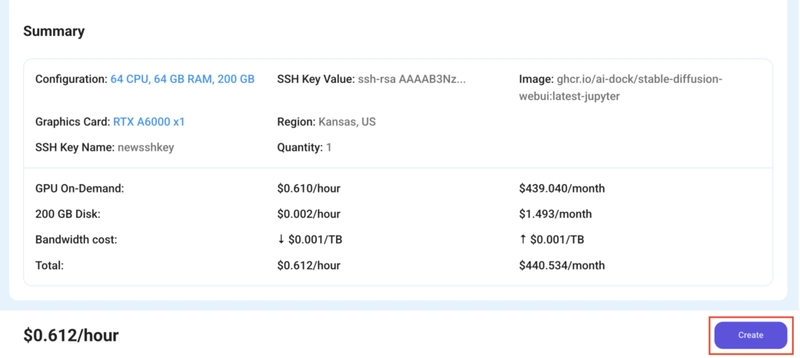
That's it! You are now ready to deploy the node. Finalize the configuration summary, and if it looks good, click Create to deploy the node.

Step 6: Connect to active Compute Node using SSH
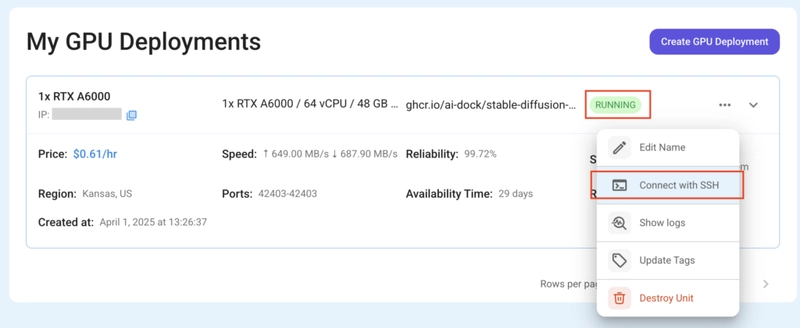
1) As soon as you create the node, it will be deployed in a few seconds or a minute. Once deployed, you will see a status Running in green, meaning that our Compute node is ready to use!
2) Once your GPU shows this status, navigate to the three dots on the right, click on Connect with SSH, and copy the SSH details that appear.
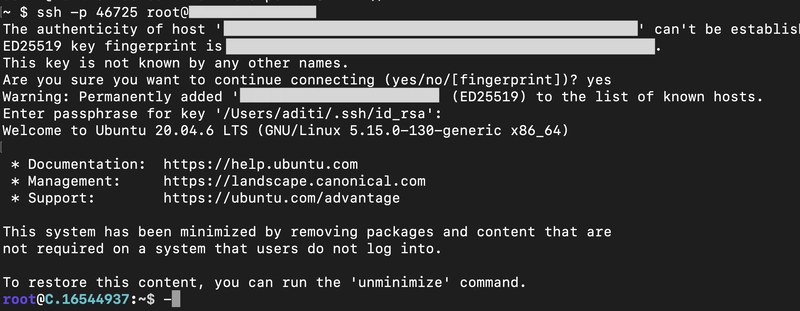
As you copy the details, follow the below steps to connect to the running GPU VM via SSH:
1) Open your terminal, paste the SSH command, and run it.
2) In some cases, your terminal may take your consent before connecting. Enter ‘yes’.
3) A prompt will request a password. Type the SSH password, and you should be connected.
Output:
Next, If you want to check the GPU details, run the following command in the terminal:
!nvidia-smi
Step 7: Set Up Project Environment
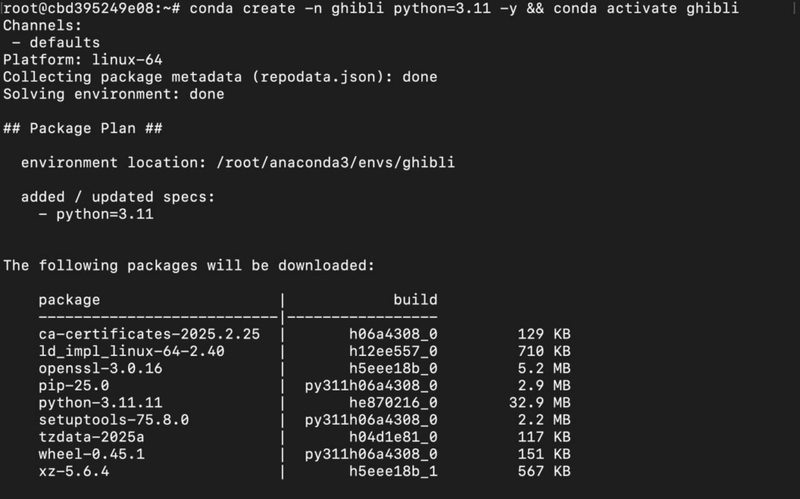
1) Ensure you've have Anaconda installed and create virtual environment with conda.
conda create -n ghibli python=3.11 -y && conda activate ghibli
Output:
2) Clone the official repository of EasyControl and move inside the project directory.
git clone https://github.com/Xiaojiu-z/EasyControl.git && cd EasyControl
Output:

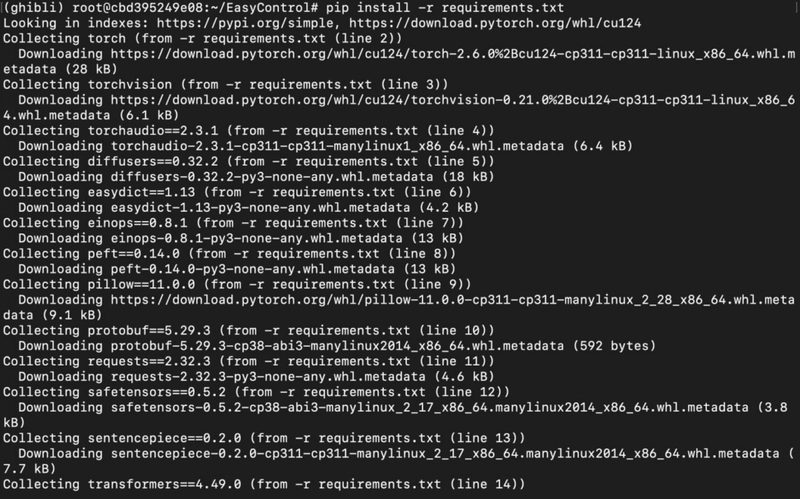
3) Install project dependencies.
pip install -r requirements.txt
Output:
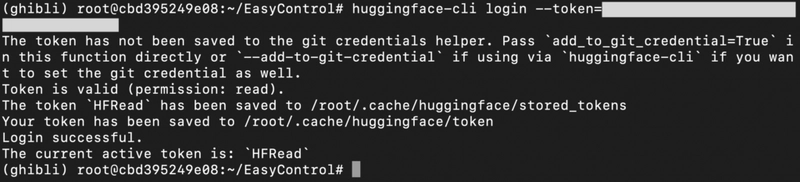
4) Login to huggingface-cli with HF READ token.
(replace
huggingface-cli login --token=
Output:
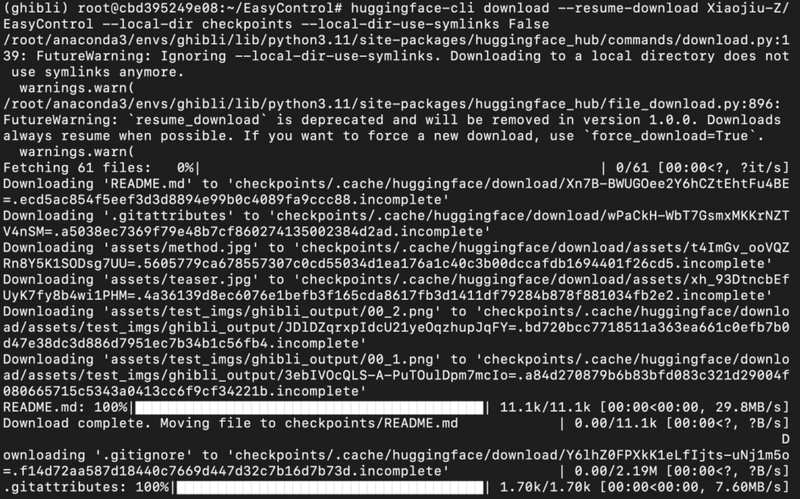
Step 8: Download model files
Next, we'll download the model from HuggingFace using the command below:
huggingface-cli download --resume-download Xiaojiu-Z/EasyControl --local-dir checkpoints --local-dir-use-symlinks False
Output:
2) Open the project in VSCode Editor.
For this, if you're using a remote server (e.g. NodeShift GPU), you'll first need to connect your local VS Code editor to your remote server via SSH with the following steps:
a) Install the “Remote-SSH” Extension by Microsoft on VS Code.
b) Type “Remote-SSH: Connect to Host” on the Command Palette.
c) Enter the host details, such as username and SSH password, and you should be connected.
3) Once inside the project, replace the code in app.py with the below code snippet.
import spaces
import os
import json
import time
import torch
from PIL import Image
from tqdm import tqdm
import gradio as gr

from safetensors.torch import save_file
from src.pipeline import FluxPipeline
from src.transformer_flux import FluxTransformer2DModel
from src.lora_helper import set_single_lora, set_multi_lora, unset_lora

# Initialize the image processor
base_path = "black-forest-labs/FLUX.1-dev"
lora_base_path = "./checkpoints/models"

pipe = FluxPipeline.from_pretrained(base_path, torch_dtype=torch.bfloat16)
transformer = FluxTransformer2DModel.from_pretrained(base_path, subfolder="transformer", torch_dtype=torch.bfloat16)
pipe.transformer = transformer
pipe.to("cuda")

def clear_cache(transformer):
    for name, attn_processor in transformer.attn_processors.items():
        attn_processor.bank_kv.clear()

# Define the Gradio interface
@spaces.GPU()
def single_condition_generate_image(prompt, spatial_img, height, width, seed, control_type):
    # Set the control type
    if control_type == "Ghibli":
        lora_path = os.path.join(lora_base_path, "Ghibli.safetensors")
    set_single_lora(pipe.transformer, lora_path, lora_weights=[1], cond_size=512)

    # Process the image
    spatial_imgs = [spatial_img] if spatial_img else []
    image = pipe(
        prompt,
        height=int(height),
        width=int(width),
        guidance_scale=3.5,
        num_inference_steps=25,
        max_sequence_length=512,
        generator=torch.Generator("cpu").manual_seed(seed),
        subject_images=[],
        spatial_images=spatial_imgs,
        cond_size=512,
    ).images[0]
    clear_cache(pipe.transformer)
    return image

# Define the Gradio interface components
control_types = ["Ghibli"]

# Create the Gradio Blocks interface
with gr.Blocks() as demo:
    gr.Markdown("# Ghibli Studio Control Image Generation with EasyControl")
    gr.Markdown("The model is trained on **only 100 real Asian faces** paired with **GPT-4o-generated Ghibli-style counterparts**, and it preserves facial features while applying the iconic anime aesthetic.")
    gr.Markdown("Generate images using EasyControl with Ghibli control LoRAs.(Due to hardware constraints, only low-resolution images can be generated. For high-resolution (1024+), please set up your own environment.)")

    gr.Markdown("**[Attention!!]**:The recommended prompts for using Ghibli Control LoRA should include the trigger words: `Ghibli Studio style, Charming hand-drawn anime-style illustration`")
    gr.Markdown("