


![[The AI Show Episode 147]: OpenAI Abandons For-Profit Plan, AI College Cheating Epidemic, Apple Says AI Will Replace Search Engines & HubSpot’s AI-First Scorecard](https://www.marketingaiinstitute.com/hubfs/ep%20147%20cover.png)


.jpeg?width=1920&height=1920&fit=bounds&quality=70&format=jpg&auto=webp#)


-xl.jpg)


![Apple Working on Brain-Controlled iPhone With Synchron [Report]](https://www.iclarified.com/images/news/97312/97312/97312-640.jpg)


How to Program Ultrasonic Sensors for Automatic Gates (Fence Applications Included)
Modern residential and commercial security systems increasingly depend on automation, and one of the key components enabling this transformation is the ultrasonic sensor. These devices are both cost-effective and highly reliable in automatic gate systems. In this article, we will explore how to program ultrasonic sensors for automatic gates, with a focus on real-world fencing applications. An ultrasonic sensor measures distance by sending out a sound wave at a frequency higher than humans can hear. The sensor then listens for the echo of that wave bouncing back from an object. Based on the time it takes for the echo to return, the sensor calculates the distance to the object. This mechanism makes it perfect for detecting the presence of people, vehicles, or obstacles—ideal for gates that need to open or close automatically. One of the most commonly used ultrasonic sensors in DIY and professional projects is the HC-SR04. Below are several code examples in different environments to help you get started. Arduino (C++) Example #include const int trigPin = 9; const int echoPin = 10; const int servoPin = 6; Servo gateServo; void setup() { pinMode(trigPin, OUTPUT); pinMode(echoPin, INPUT); gateServo.attach(servoPin); Serial.begin(9600); } void loop() { long duration; int distance; // Trigger pulse digitalWrite(trigPin, LOW); delayMicroseconds(2); digitalWrite(trigPin, HIGH); delayMicroseconds(10); digitalWrite(trigPin, LOW); // Echo time duration = pulseIn(echoPin, HIGH); distance = duration * 0.034 / 2; Serial.print("Distance: "); Serial.println(distance); if (distance { const proximity = new Proximity({ controller: "HCSR04", pin: 7 }); const relay = new Relay(8); proximity.on("data", () => { console.log("Proximity: " + proximity.cm + " cm"); if (proximity.cm relay.off()); } }); }); Below we embed the specified phrases naturally within the discussion of fencing implementations: In urban environments, combining Automatic Gates Chicago IL with ultrasonic sensors offers a seamless entry experience for vehicles. By installing sensors alongside chain link fence in Chicago, you get unobstructed wave propagation through the mesh, ensuring reliable gate actuation. For residential settings that prefer the clean look of a Vinyl Fence Chicago IL, mount sensors on gate posts with a clear line of sight. Traditional barriers can be enhanced by mounting sensors on or near Wood fence Installation Chicago IL posts, ensuring privacy and reliable automation. Best Practices and Tips Mount at the Right Height: Ensure sensors have a clear detection path. Avoid Reflective Surfaces: Glass or shiny metal may cause false readings. Weatherproofing: Use enclosures to protect electronics. Prototype & Test: Validate sensor placement before permanent installation. Integration: Pair with cameras, RFID, or smartphone apps for enhanced security. Conclusion Programming ultrasonic sensors for automatic gate systems brings together practical electronics and real-world utility. By embedding automation into fencing solutions—chain link, vinyl, or wood—you create a secure, user-friendly entrance system. These code examples across multiple platforms should help you implement and expand your project with confidence.

Modern residential and commercial security systems increasingly depend on automation, and one of the key components enabling this transformation is the ultrasonic sensor. These devices are both cost-effective and highly reliable in automatic gate systems. In this article, we will explore how to program ultrasonic sensors for automatic gates, with a focus on real-world fencing applications.
An ultrasonic sensor measures distance by sending out a sound wave at a frequency higher than humans can hear. The sensor then listens for the echo of that wave bouncing back from an object. Based on the time it takes for the echo to return, the sensor calculates the distance to the object. This mechanism makes it perfect for detecting the presence of people, vehicles, or obstacles—ideal for gates that need to open or close automatically.
One of the most commonly used ultrasonic sensors in DIY and professional projects is the HC-SR04. Below are several code examples in different environments to help you get started.
Arduino (C++) Example
#include Raspberry Pi (Python) Example
import RPi.GPIO as GPIO
import time

TRIG = 23
ECHO = 24
RELAY = 18

GPIO.setmode(GPIO.BCM)
GPIO.setup(TRIG, GPIO.OUT)
GPIO.setup(ECHO, GPIO.IN)
GPIO.setup(RELAY, GPIO.OUT)

def measure_distance():
    GPIO.output(TRIG, False)
    time.sleep(0.5)

    GPIO.output(TRIG, True)
    time.sleep(0.00001)
    GPIO.output(TRIG, False)

    while GPIO.input(ECHO) == 0:
        pulse_start = time.time()

    while GPIO.input(ECHO) == 1:
        pulse_end = time.time()

    pulse_duration = pulse_end - pulse_start
    distance = pulse_duration * 17150  # cm
    return round(distance, 2)

try:
    while True:
        dist = measure_distance()
        print(f"Distance: {dist} cm")
        if dist < 50:
            GPIO.output(RELAY, GPIO.HIGH)
            time.sleep(5)
            GPIO.output(RELAY, GPIO.LOW)
        time.sleep(1)
except KeyboardInterrupt:
    GPIO.cleanup()
ESP8266 (MicroPython) Example
from machine import Pin, time_pulse_us
import time

trig = Pin(5, Pin.OUT)
echo = Pin(4, Pin.IN)
relay = Pin(0, Pin.OUT)

while True:
    trig.value(0)
    time.sleep_us(2)
    trig.value(1)
    time.sleep_us(10)
    trig.value(0)

    duration = time_pulse_us(echo, 1)
    distance = (duration / 2) / 29.1  # cm
    print('Distance:', distance)

    if distance < 50:
        relay.on()
        time.sleep(5)
        relay.off()

    time.sleep(1)
Node.js (Johnny-Five) Example
const { Board, Proximity, Relay } = require("johnny-five");
const board = new Board();

board.on("ready", () => {
  const proximity = new Proximity({ controller: "HCSR04", pin: 7 });
  const relay = new Relay(8);

  proximity.on("data", () => {
    console.log("Proximity: " + proximity.cm + " cm");
    if (proximity.cm < 50) {
      relay.on();
      board.wait(5000, () => relay.off());
    }
  });
});
Below we embed the specified phrases naturally within the discussion of fencing implementations:
In urban environments, combining Automatic Gates Chicago IL with ultrasonic sensors offers a seamless entry experience for vehicles.
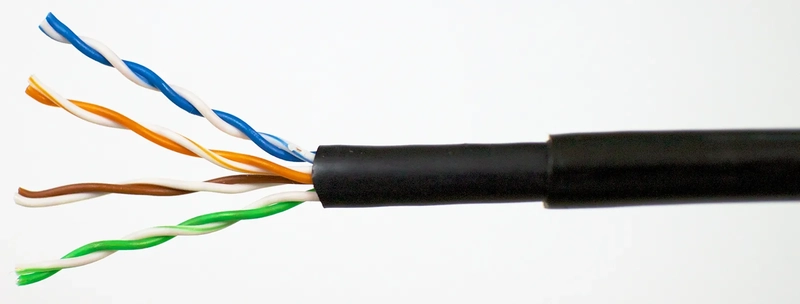
By installing sensors alongside chain link fence in Chicago, you get unobstructed wave propagation through the mesh, ensuring reliable gate actuation.
For residential settings that prefer the clean look of a Vinyl Fence Chicago IL, mount sensors on gate posts with a clear line of sight.
Traditional barriers can be enhanced by mounting sensors on or near Wood fence Installation Chicago IL posts, ensuring privacy and reliable automation.
Best Practices and Tips
- Mount at the Right Height: Ensure sensors have a clear detection path.
- Avoid Reflective Surfaces: Glass or shiny metal may cause false readings.
- Weatherproofing: Use enclosures to protect electronics.
- Prototype & Test: Validate sensor placement before permanent installation.
- Integration: Pair with cameras, RFID, or smartphone apps for enhanced security.
Conclusion
Programming ultrasonic sensors for automatic gate systems brings together practical electronics and real-world utility. By embedding automation into fencing solutions—chain link, vinyl, or wood—you create a secure, user-friendly entrance system. These code examples across multiple platforms should help you implement and expand your project with confidence.